I was worried about Pinnacles National Park. This National Park (one of the smallest and least visited National Parks), immediately followed Yosemite National Park (one of the largest and most popular) in our itinerary. I expected it to pale in comparison and serve more as a check-the-box National Park than one that stood on its own two feet.
I was pleasantly surprised though! Even with poor visibility in some of the most iconic sections, we had an amazing time hiking some of this park’s most iconic trails.

That said, the trails at Pinnacles National Park are no (literal) walk in the park. We thought long and hard about we could safely do with our 4-year-old. One of Pinnacles’ most iconic routes, the Steep & Narrow portion of the High Peaks Trail, really pushed that limit for us. Ultimately, we decided to go for it.
Since we spent so much time researching this specific section with kids and found very few helpful trip reports, I decided to write our own. If you’re thinking about hiking at Pinnacles with a child, here’s one example of what it was like for a 4 (and 3/4) year old.
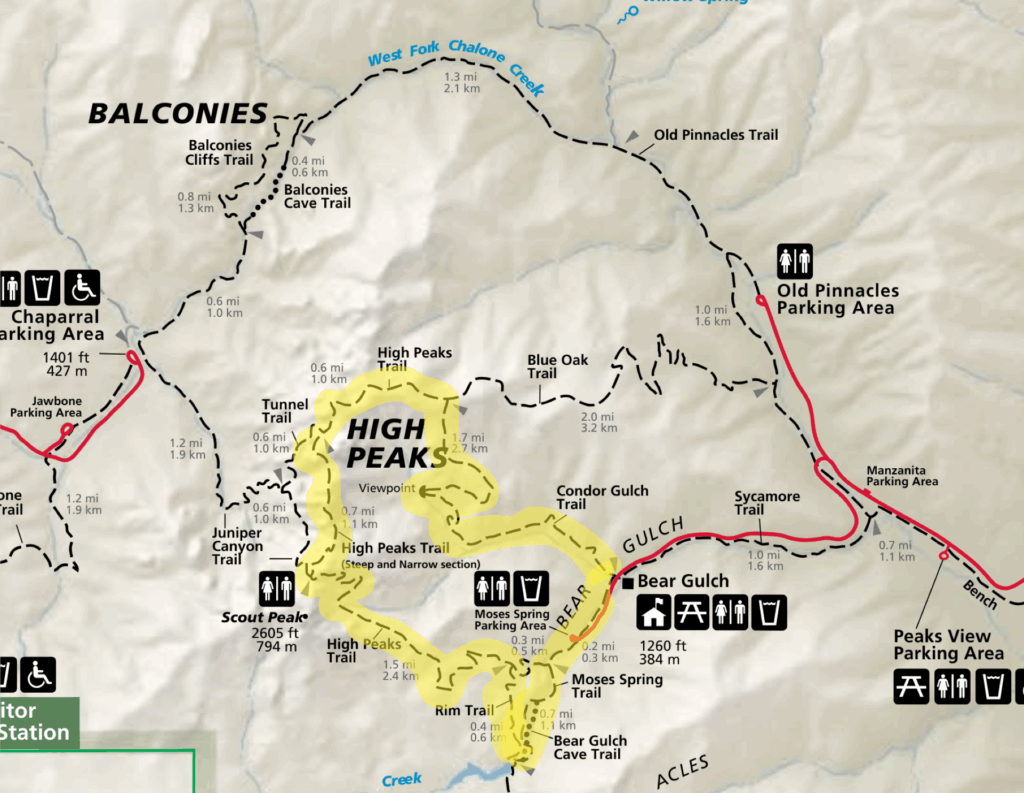
In this post, we’ll recap our experience on High Peaks Trail with a young kid. Specifically, our route was Condor Gulch Trail to High Peaks Trail, with a detour to Bear Gulch Caves and back on Moses Spring Trail. We’ll explain what each of trails were like, how we tackled the hardest parts, and how the hike went each step of the way.
A Brief Intro to Pinnacles National Park
What makes Pinnacles National Park unique is its volcanic landscape that formed over 23 million years ago. The result is a maze of rocky spires, winding caves and deep gorges. The park is known for its challenging and rewarding hiking trails, but also for the wildlife that call it come. Most notably, the park is famously home to many California Condors and infamously home to the Pacific rattlesnake.
I mentioned that Pinnacles is one of the smallest and least popular National Parks, but it is also one of the newest. It was officially established in 2013 as the 59th National Park in the US. (As of publication, there are now 63 National Parks.)
Pinnacles National Park is located about 200 miles south of San Francisco. The park itself is pretty isolated. There is camping inside the park, but no hotels. The nearest town, which is generally considered the most practical home base for the park, is Hollister. (We personally stayed at the Holiday Inn Express and it was delightful.)
Most people spend one to two full days at Pinnacles National Park.
About this Itinerary
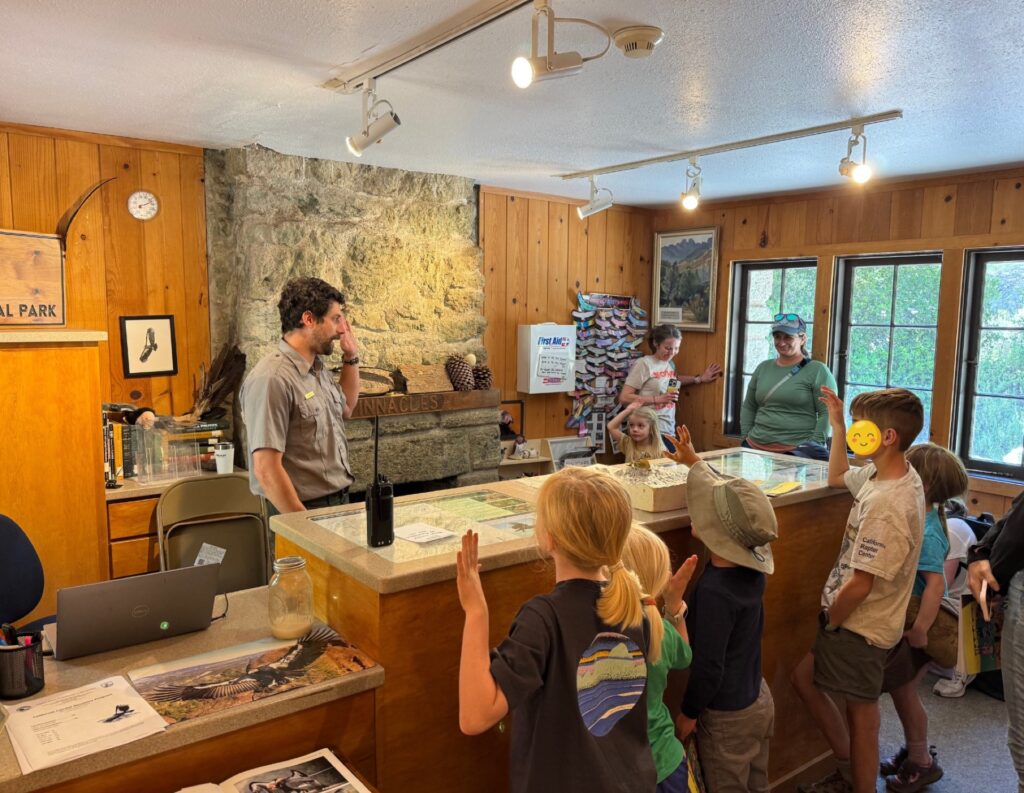
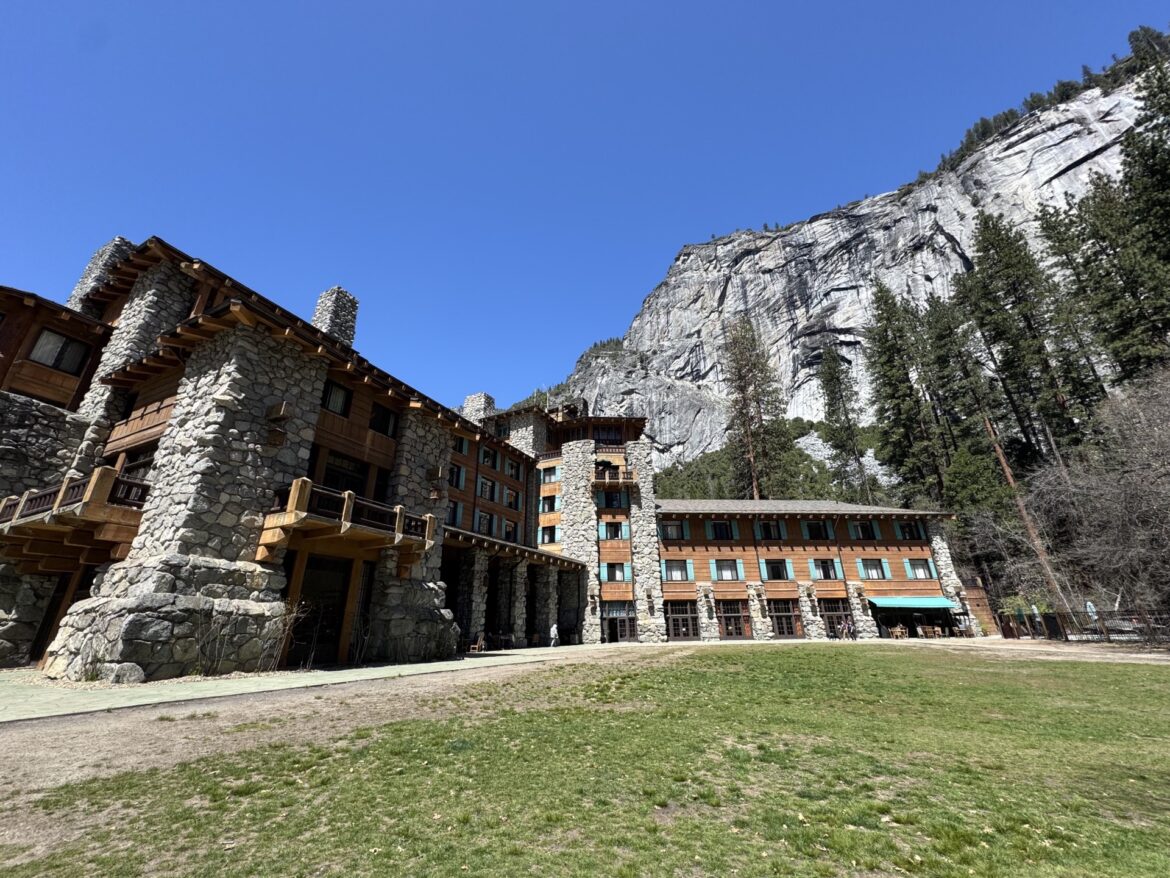
Our trip to Pinnacles National Park was part of a Spring Break trip that started at Yosemite National Park and ended at Disneyland. We had about 1.5 days at Pinnacles, which included an afternoon arrival which we spent at the Nature Center earning a Junior Ranger badge and one full day of hiking.
Read more! We did lots of hiking in Yosemite, too! You can read about all the trails we hiked in our 2-day Yosemite Itinerary.
It’s worth noting that we great hiking weather. We visited Pinnacles National Park in April. Even that early in the season, our arrival day was pretty hot (high 70s) and sunny. Fortunately, we caught a cold front the next day that gifted us a cloudy and cool day (50s-60s) for our full day of hiking. This park gets very hot in the summer time, and I’m not sure we would have even attempted this hike if heat was at all a factor.
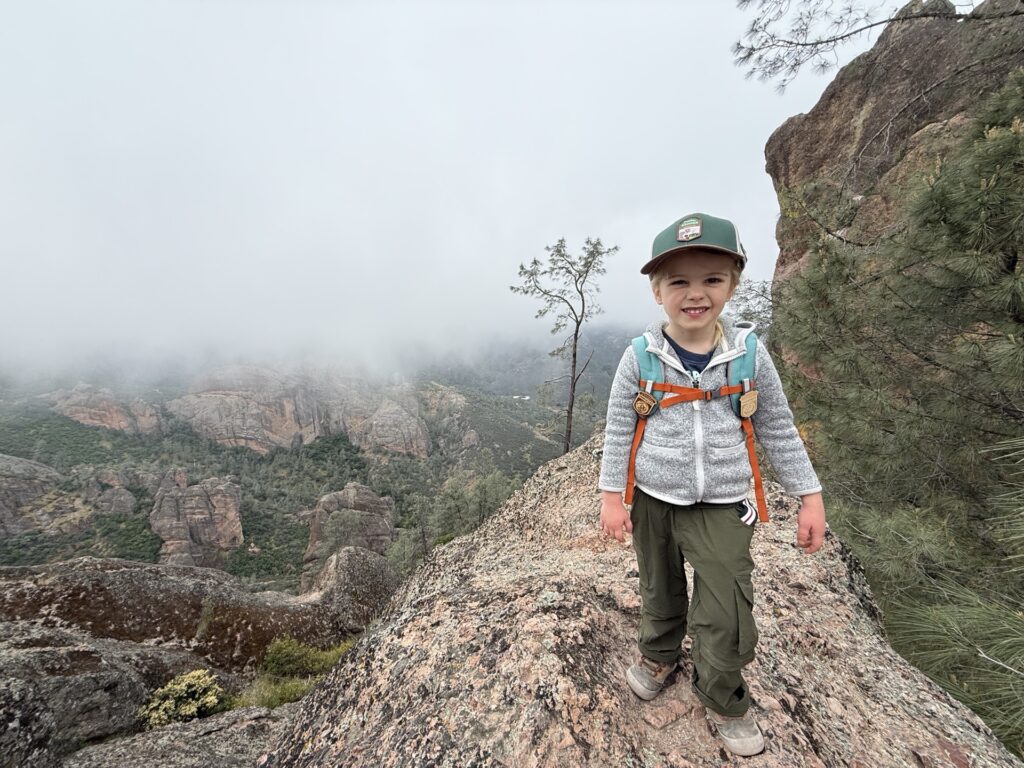
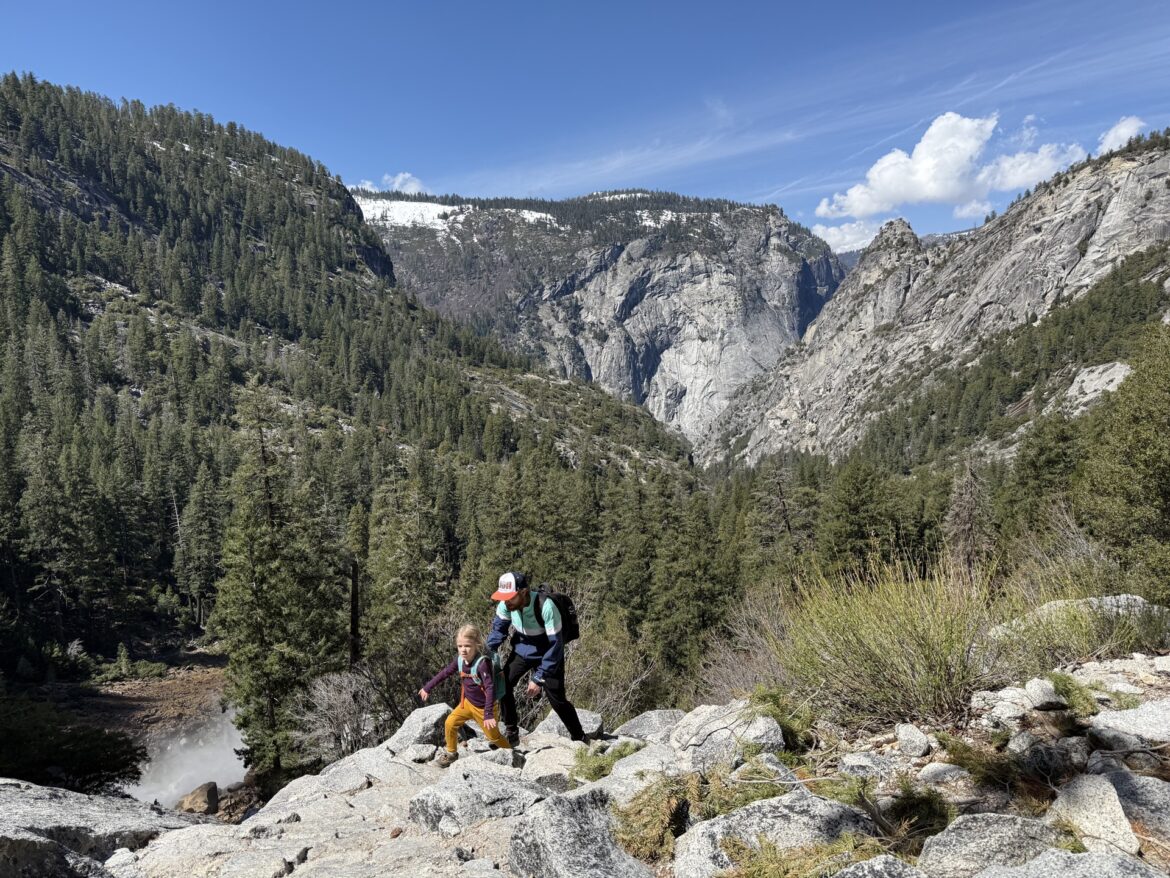
I also want to introduce our child. Zoe was 4 years and 8 months old during our trip, but they are a fairly seasoned hiker at this point. Just a few days prior, they hiked 9 miles to the top of Nevada Fall and back at Yosemite. Over the past year, we have also completed notable hikes at Zion National Park (The Watchman, Emerald Pools and a portion of The Narrows) and Acadia National Park (Pemetic Mountain, Gorham Mountain and 11 miles of carriage trails.) We also live car-free in NYC and spend a lot of time at theme parks, so we are used to walking a lot.
I say that solely for context and transparency. This post not intended to be a recommendation or guidance. We are simply sharing our child’s experience, but it’s not our place to say what a person of any age can or should do. You should always consider your child’s ability, your personal safety barometer and objective research prior to going out on the trails. This is simply our experience.
Without any further ado, let’s hit the trails.
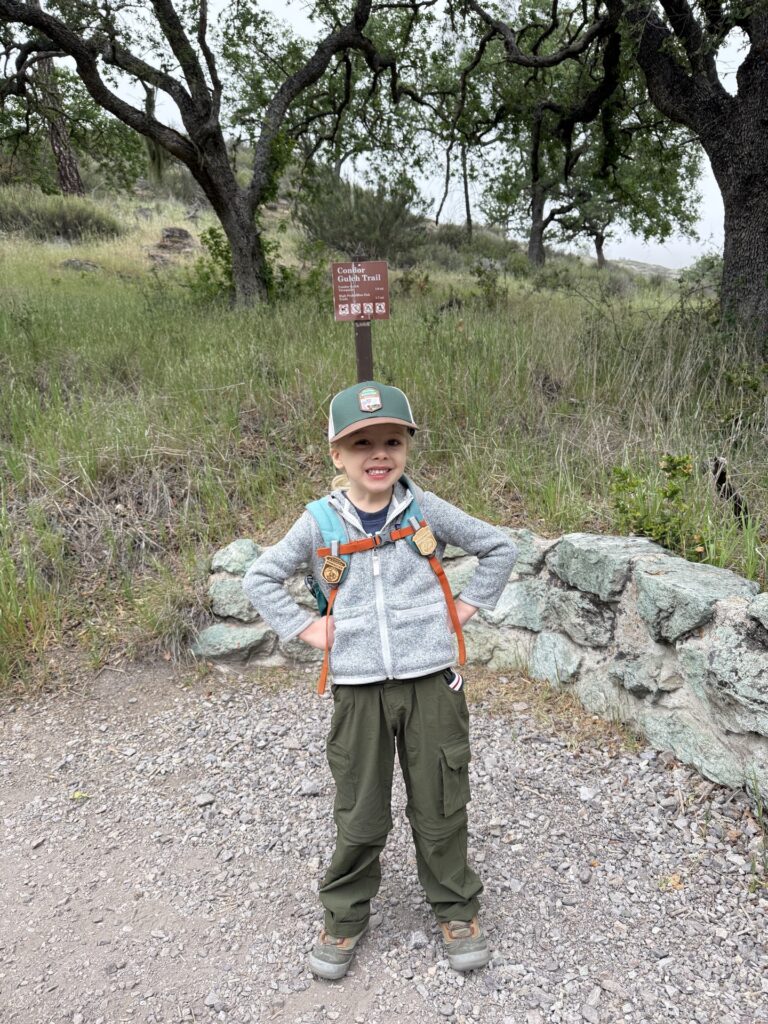
Condor Gulch Trail
Our day began at the Bear Gulch Nature Center. The nature center actually was not open on our hiking day. I’m not sure if this was regular seasonal hours or a result of National Park staffing cuts which recently went into effect. (The Rangers hinted at the later.) The parking lot for the nature center though, is also the parking area for the Condor Gulch Trail.
By 8 AM, we were off on the trail.
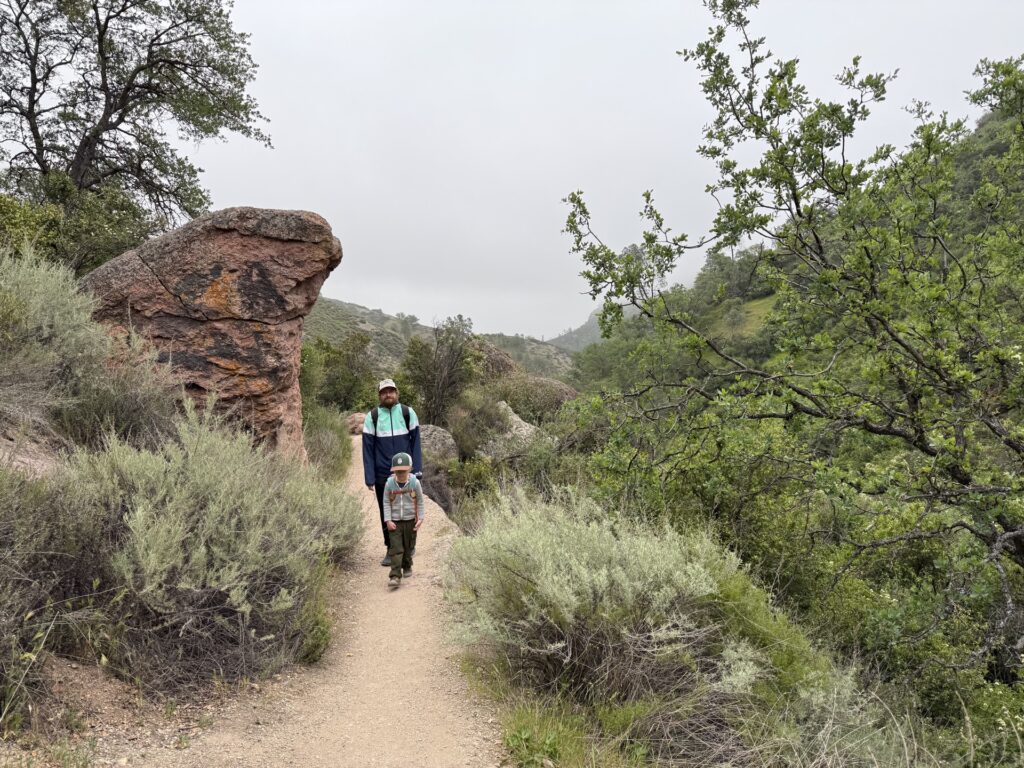
The Condor Gulch Trail is approximately 1.7 miles with about 1600 feet of elevation gain. It’s a rocky dirt trail that ascends over a series of switchbacks and (relatively) gradual inclines. The National Park Service calls this trail moderate to strenuous. (We’d call it moderate.)
Our hike started out a bit rocky – literally. About 3 minutes into the hike, Zoe tripped on a rock and busted their shin on another rock. I’m sure it hurt and there were plenty of tears, but they got up and chose to keep going. That was probably the worst of our day, so I guess it’s good we got that out of our system quickly.
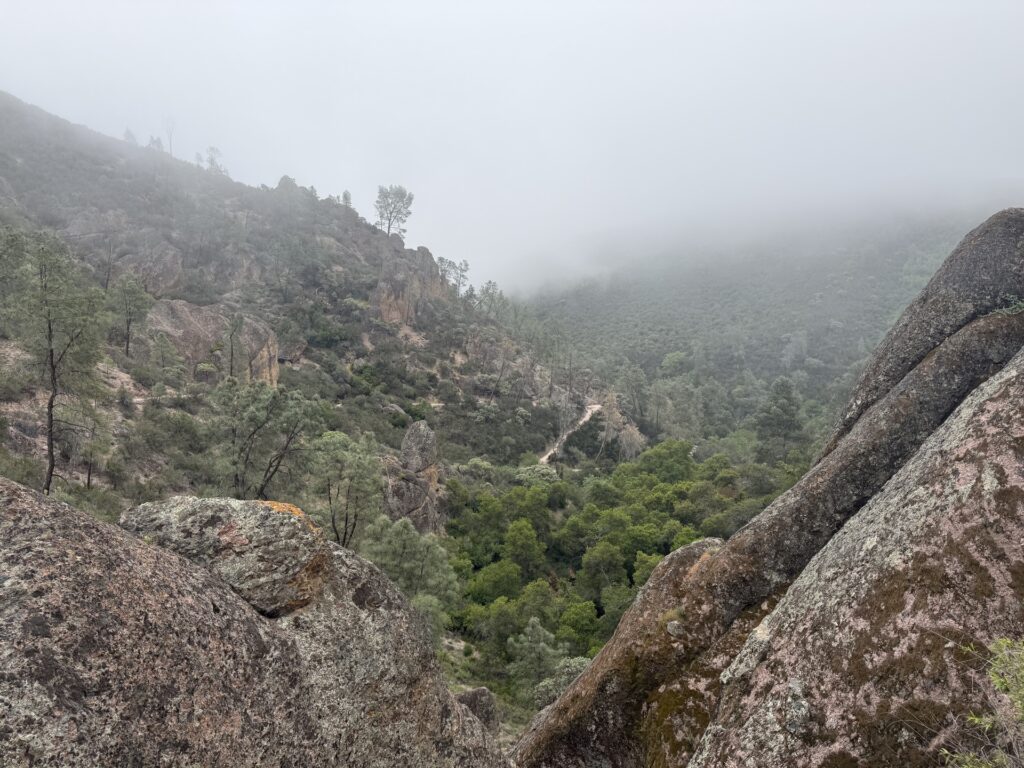
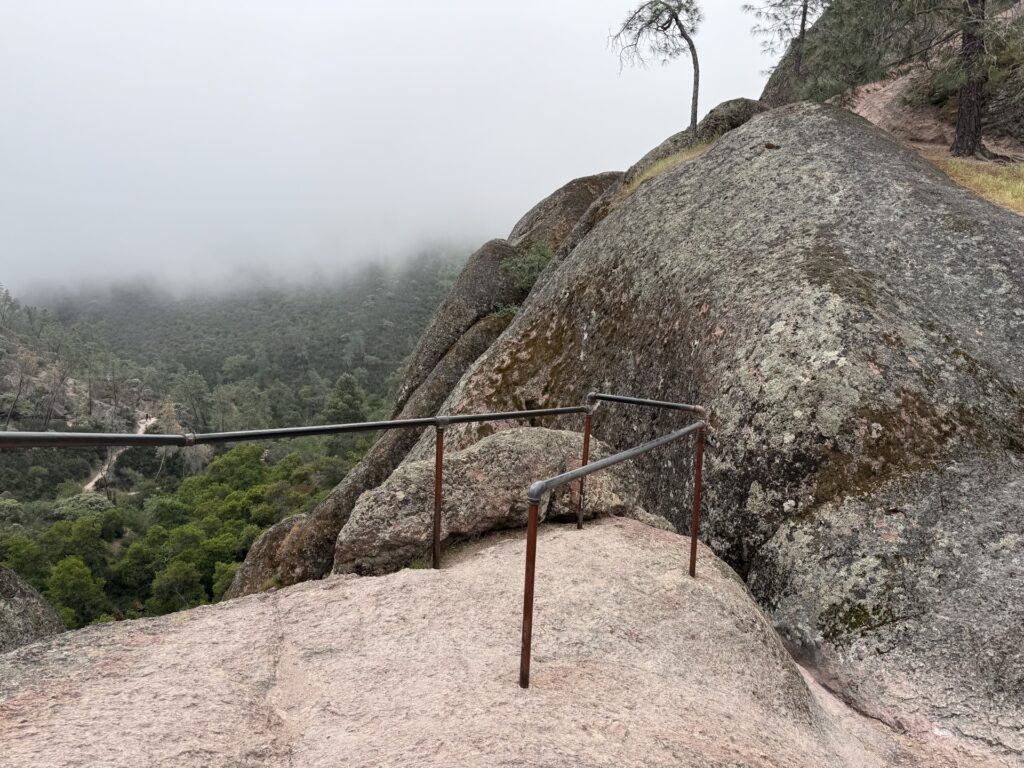
It was about 1 mile to the main viewpoint on this trail. This viewpoint is famous for its sweeping views of volcanic landscape and is usually great Condor spotting. We mostly just saw fog.
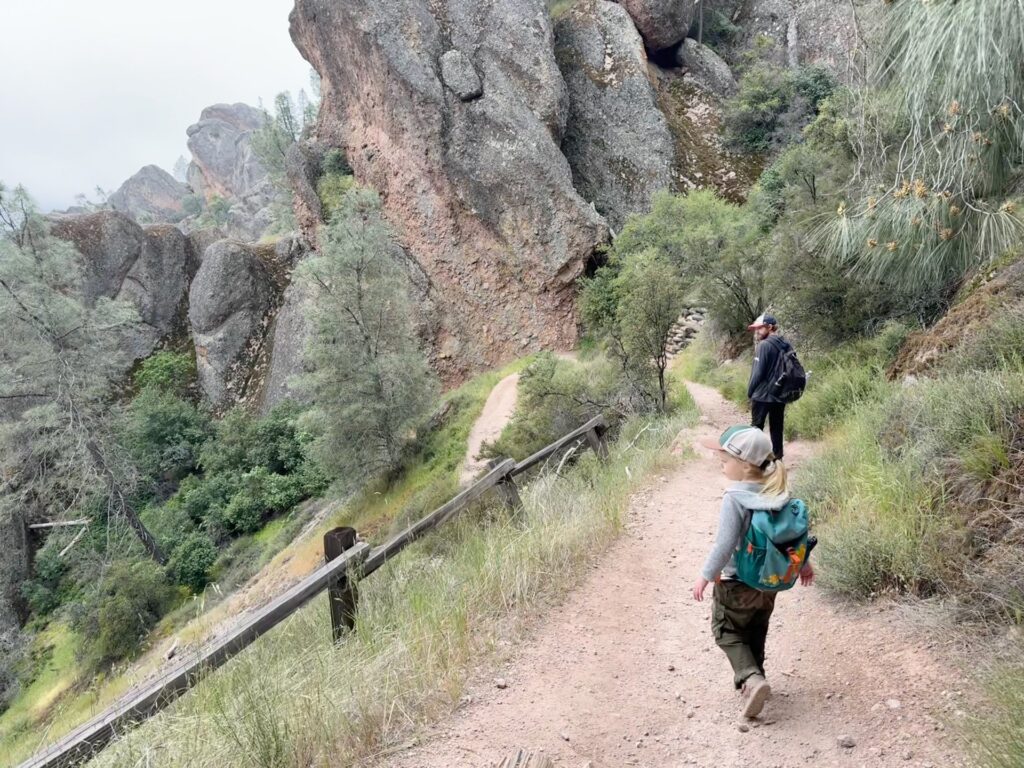
The viewpoint had the first of several railings we’d encounter through our day. We were glad they were they, but they were by no means child-proof.
To get the the main viewing area, you first had to climb up a short and narrow stretch of boulder just off the main trail. This part wasn’t that difficult and didn’t have much of a drop off. The main viewpoint was on a rock ledge, which was relatively flat but near a steep drop-off. There were a few rails, which served more so as handrails and not a significant barrier.
We had a snack on a boulder just beyond the viewpoint and then continued on our way. No more than 10 minutes after we left the viewpoint, we were completely in the clouds.
There was another 3/4 mile of trail from the viewpoint to the end of Condor Gulch Trail. The rocky trail continued to climb up a slight incline. As we made our way through the clouds, I had a feeling this is where the views were starting to get good. We still couldn’t see much, though.
Soon enough, we saw a trail sign that indicated we’d reached the end of Condor Gulch Trail. From this intersection, High Peaks Trail was to the left and Blue Oak Trial was to the right. After a short snack break, we turned left.
Morale Check: Condor Gulch Trail
Overall, this segment was pretty relaxed. The incline was within our comfort level, the trail wasn’t very exposed, and there were very few crowds.
Admittedly, Zoe was a little whiny during this section. I think it was a combination of being tired from Yosemite and the general lack of scenery due to the clouds. I don’t think it’s because this particular leg was that difficult.
Personally, I found this leg to be more exhausting on a mental note. The Park Ranger had just warned us the day before about rattle snakes. They are pretty common at Pinnacles, and even though bites are extremely rare, I was worried. We were some of the first people out on the trail that day, so there was a good chance they may still be near the trail.
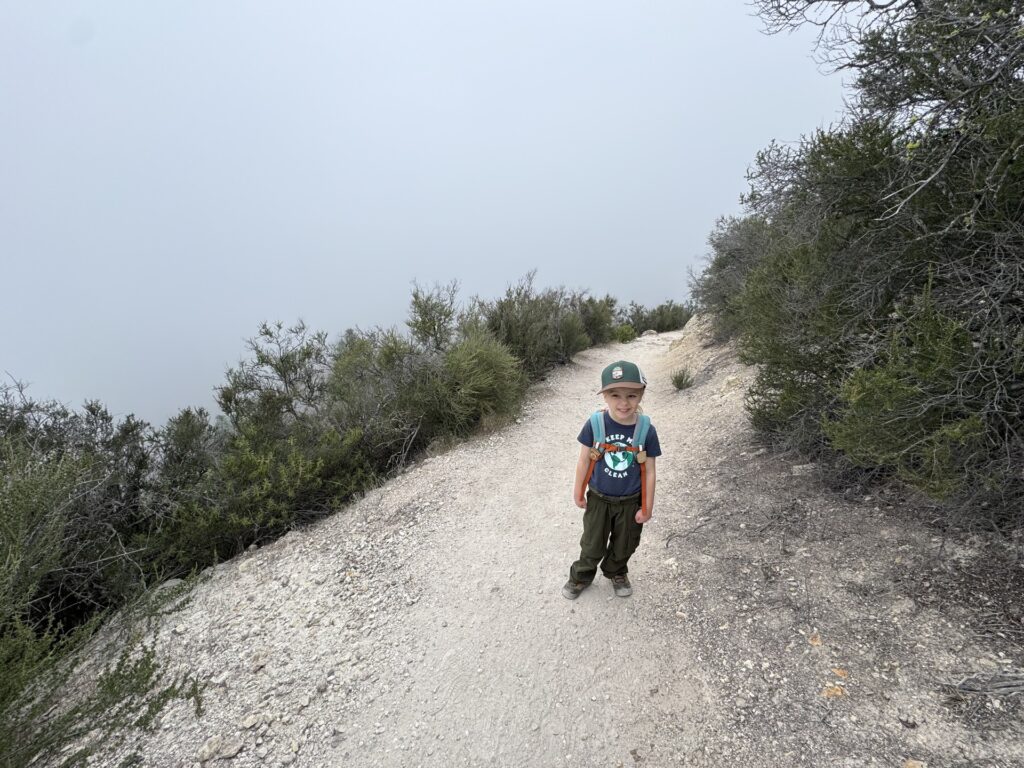
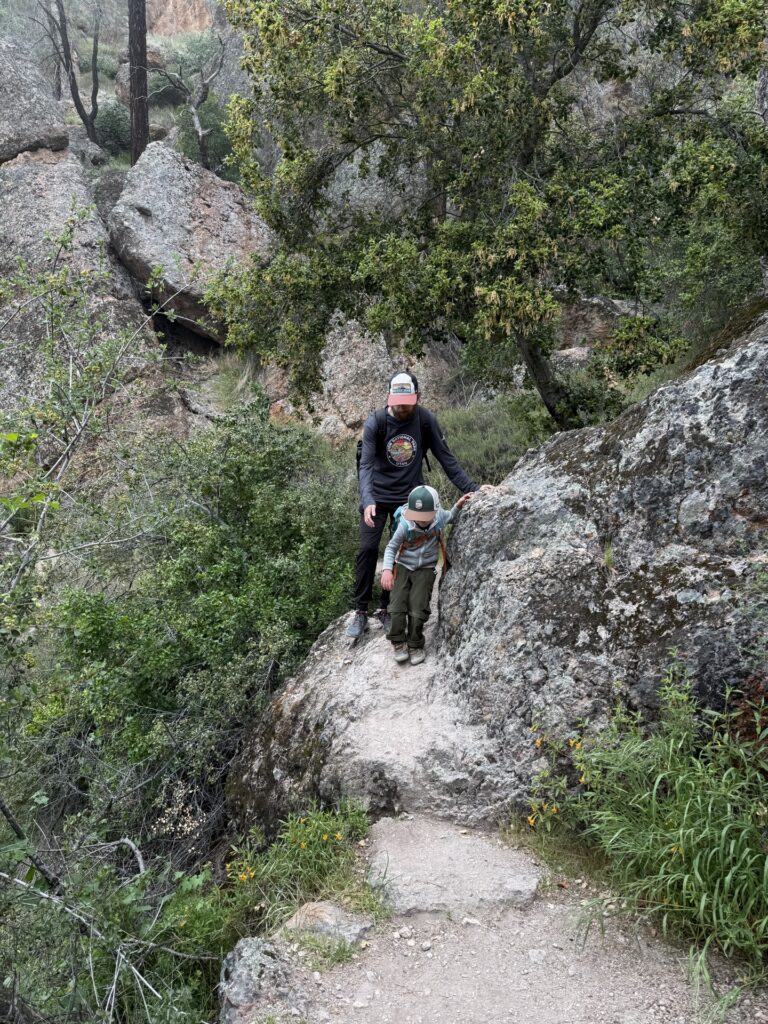
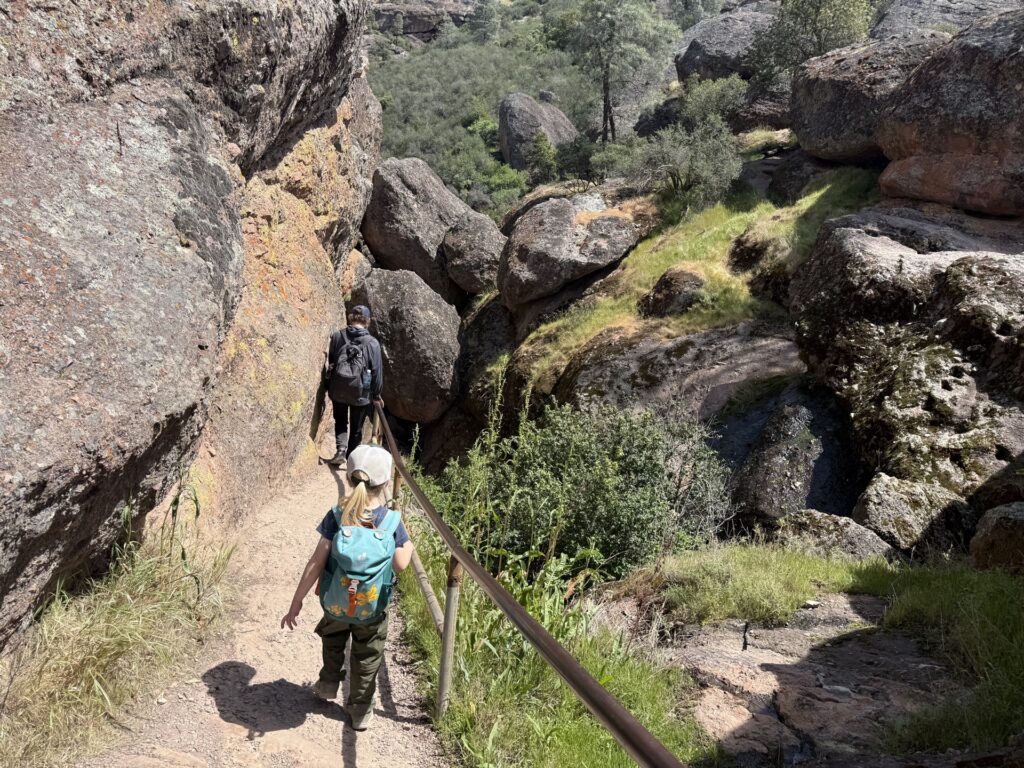
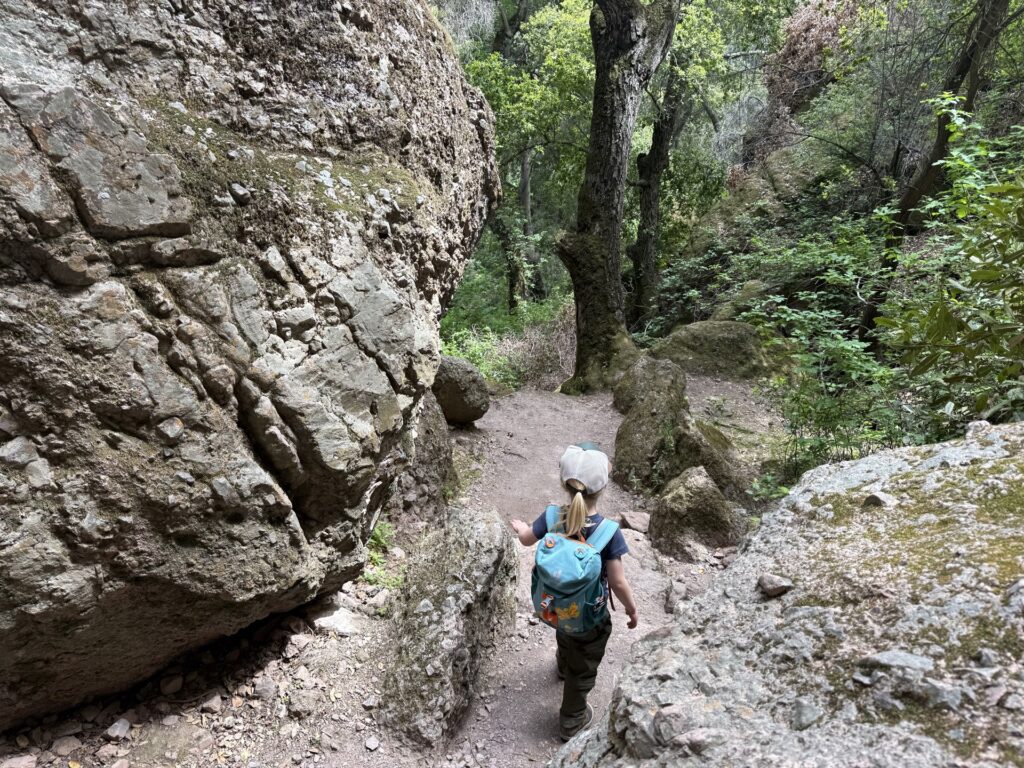
As a precaution, we kept Zoe in the middle (who you’ll see is wearing long pants), and we alternated taking the lead. The leader was in charge of scanning for rattlers near the trail and behind rocks. We never saw any, but the exercise was still exhausting.
High Peaks Trail Pt 1
Just after we turned onto High Peaks Trail, we were passed by a couple hikers. One of them asked how old our child was and we said 4. She was a bit shocked and mentioned that she had just sent their 8 year old down with another family member because getting to the viewpoint was too much. So yeah, this is not for everyone.
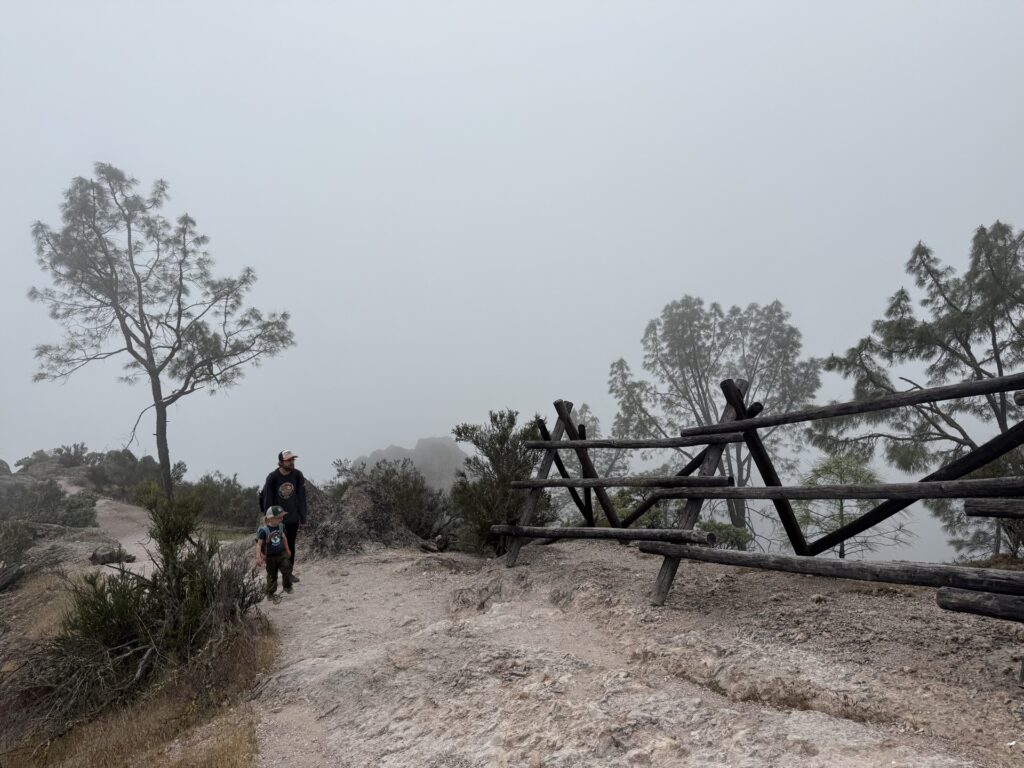
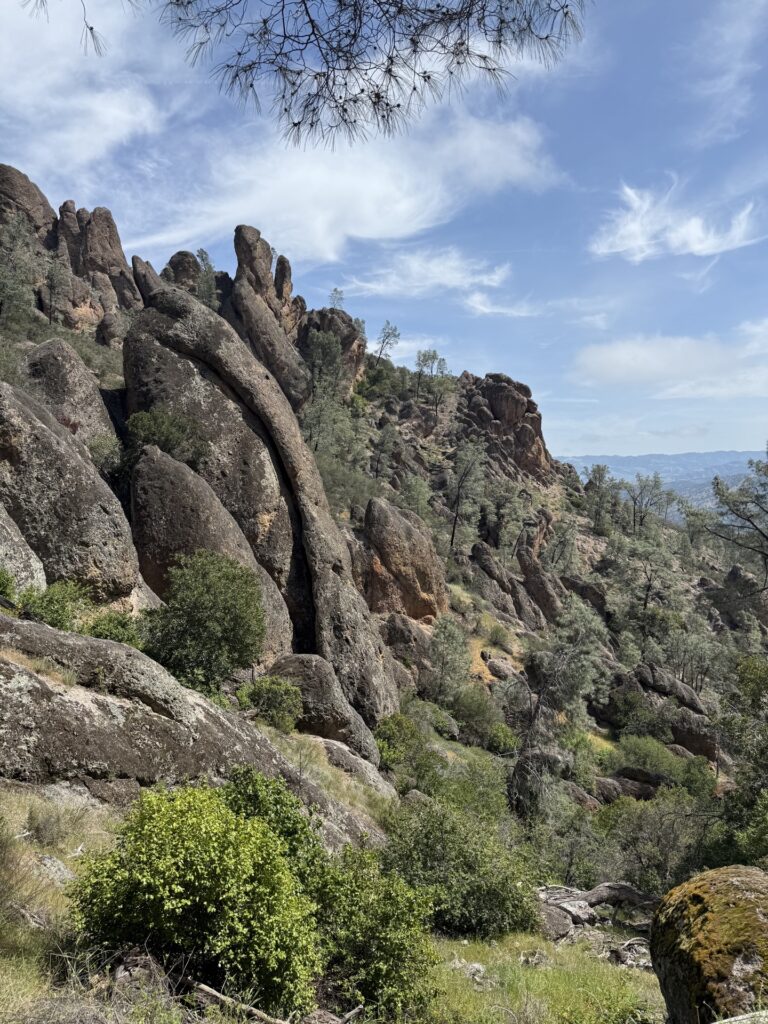
The first section of the High Peaks Trail was delightful, even though most of our views were still obstructed by the low-hanging crowds. I am sure that with clear skies, this area is stunning! While we didn’t have the traditionally epic views, the fog gave it a gloomy, mysterious vibe that I was kind of into.
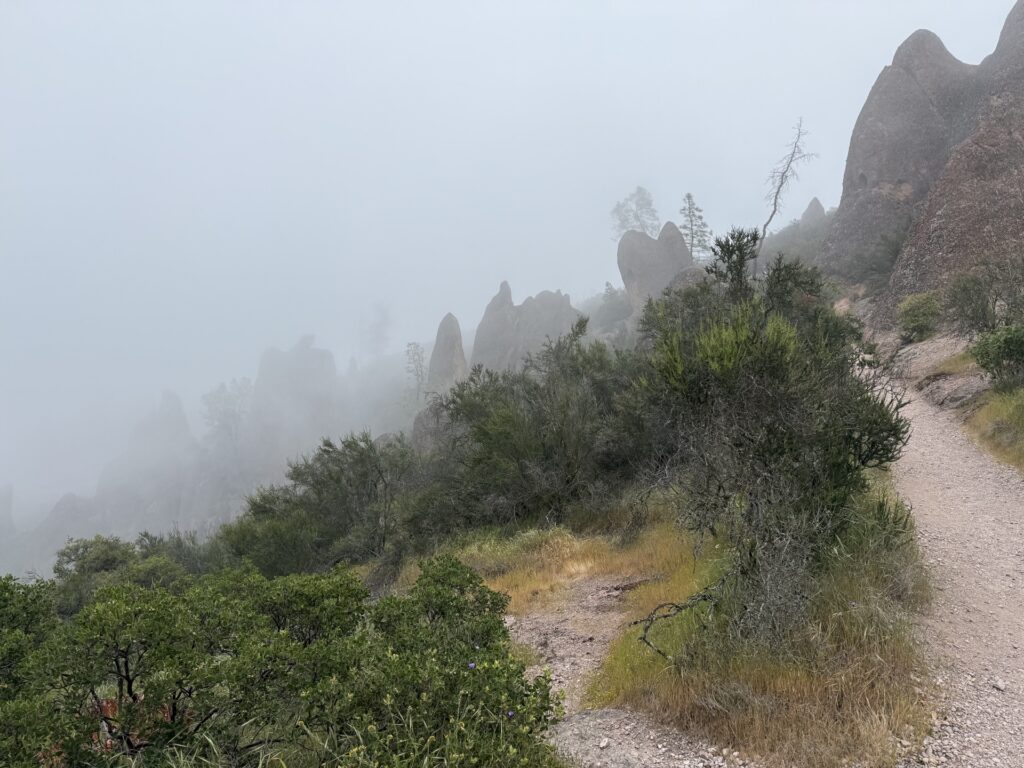

This was a mostly flat section of trail that wound through the volcanic spires. After the constant incline of Condor Gulch Trail, it was nice to be rewarded with both views (as limited as they were) and flat terrain. Zoe had a lot of fun in this section imaging what it was like when/if dinosaurs lived here.
That easy part didn’t last forever though.
High Peaks Trail Pt 2 — Steep & Narrow Section
After .6 miles on the High Peaks Trail, there is a fork. You can stay on the High Peaks Trail for what they call the Steep & Narrow Section, or you can split off and take a detour. This specific stretch of trail was always the part of this hike that we were were worried about.
After hiking so much in Yosemite, we didn’t want to push our little one too far. We cared a lot less about hiking this specific trail and more about maintaining their interest in hiking (and of course safety.) After we agreed that we thought the route was safe, we let them decide if they wanted to try it or not. Unsurprisingly, they chose the steep and narrow portion. Why? “Because it sounded cool.”
If you’re reading this post, there’s a good chance this is the specific section you want to know about. Is the Steep & Narrow section of the High Peaks Trail safe and possible for kids? What are the hard parts? What are the scary parts? So in this section, I’ve included as many pictures as possible to show you exactly what it was like.
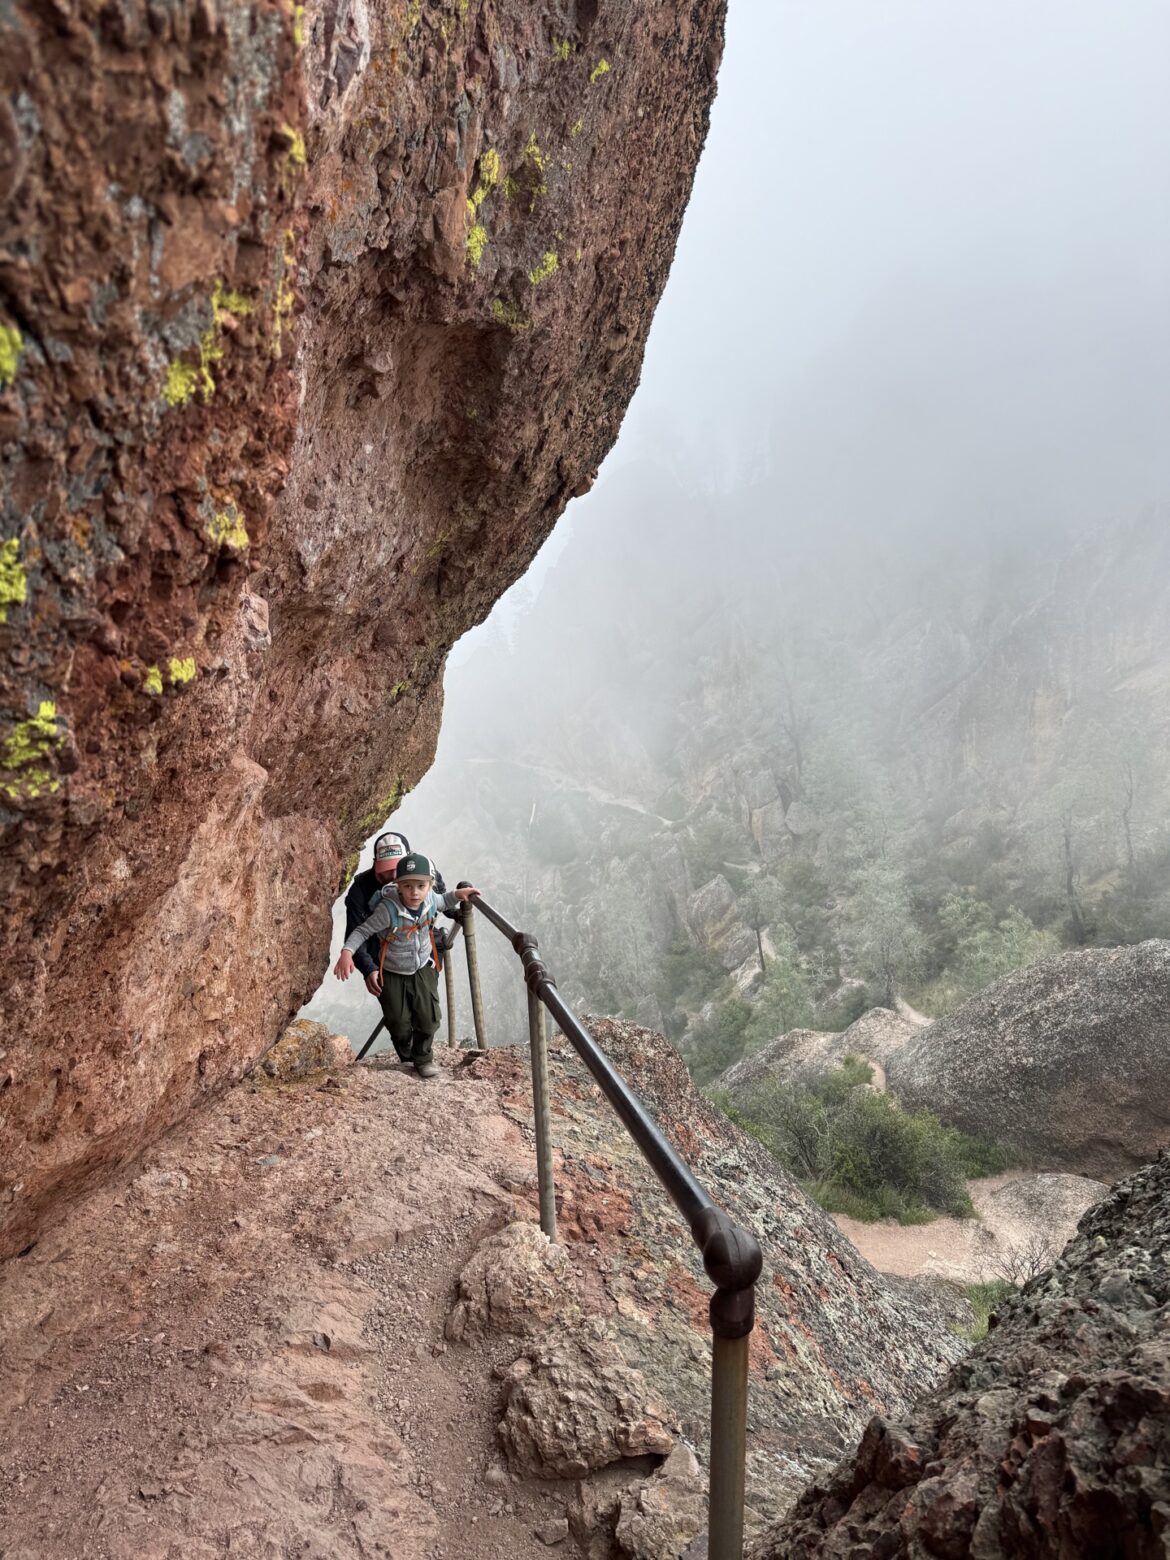
Overall, we found this stretch of trail to be stressful and mentally tough, but not too technically challenging. A lot of the climbing was along the inside of the rock formations and not on the exposed side of the cliffs. Here are some specific examples from this leg.
A Detailed Look at the Steep & Narrow Section
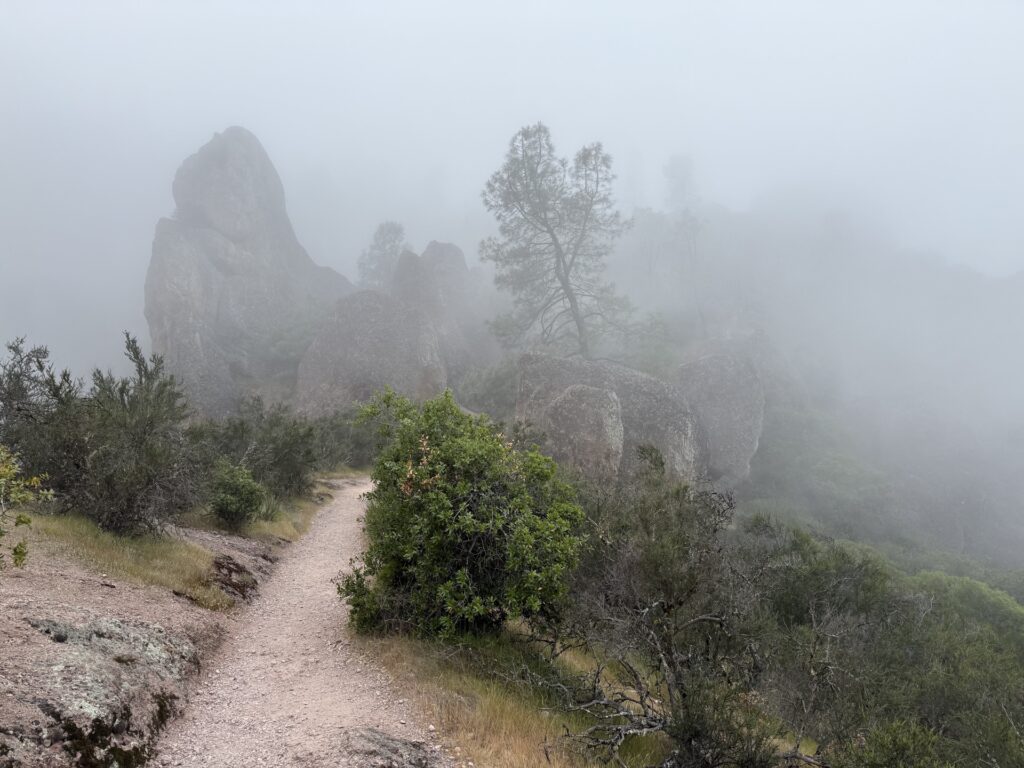
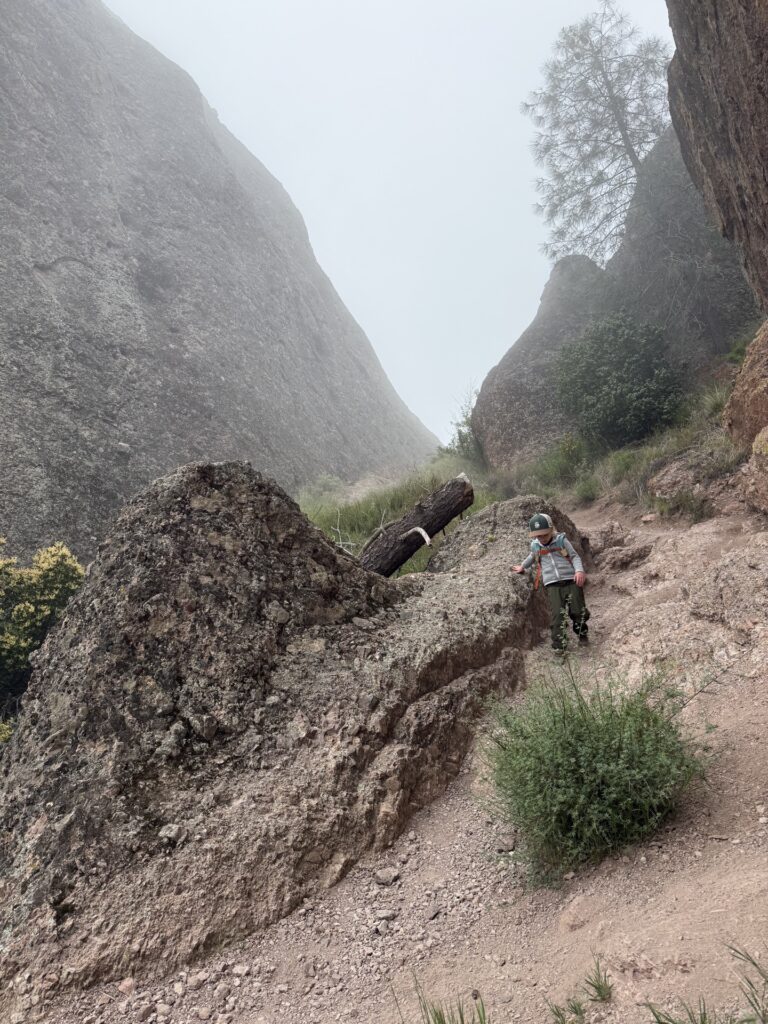
The trail started out like this. Pretty flat still, but increasingly narrow and portions started to be more exposed on one side. We wound through a lot of the pinnacles and rocky spires. It was still really foggy, so this part felt really ominous and cool.
There were a few tight sections around boulders with no railing, like this photo on the left. Other portions were flat trail like the photo on the right.
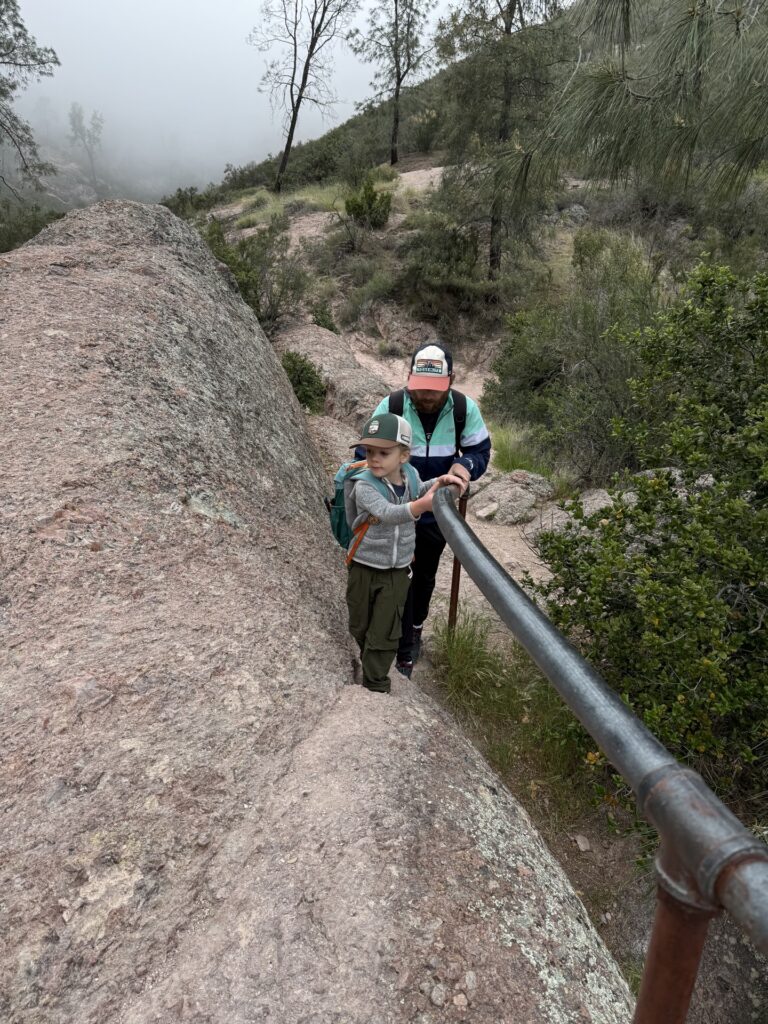
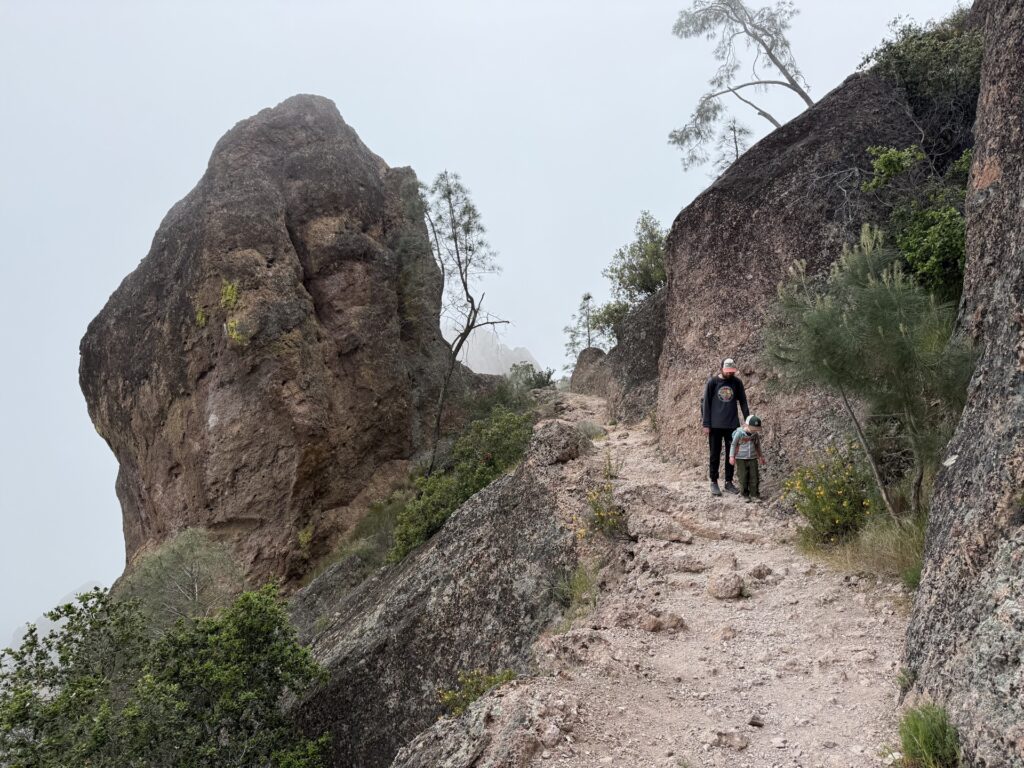
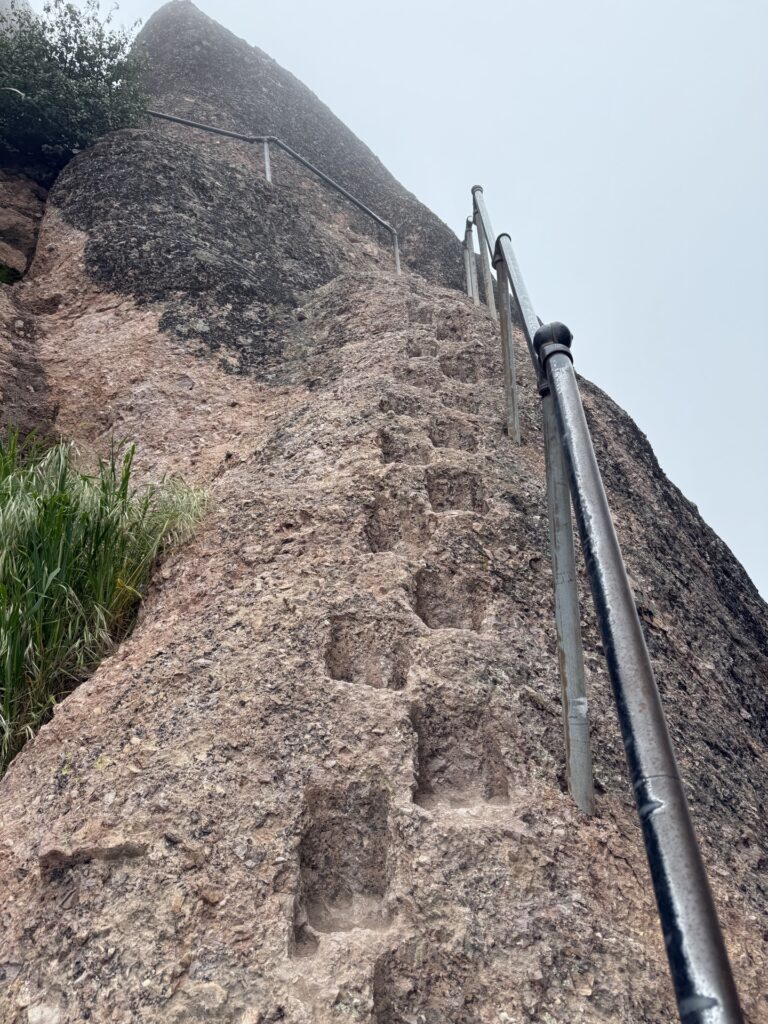
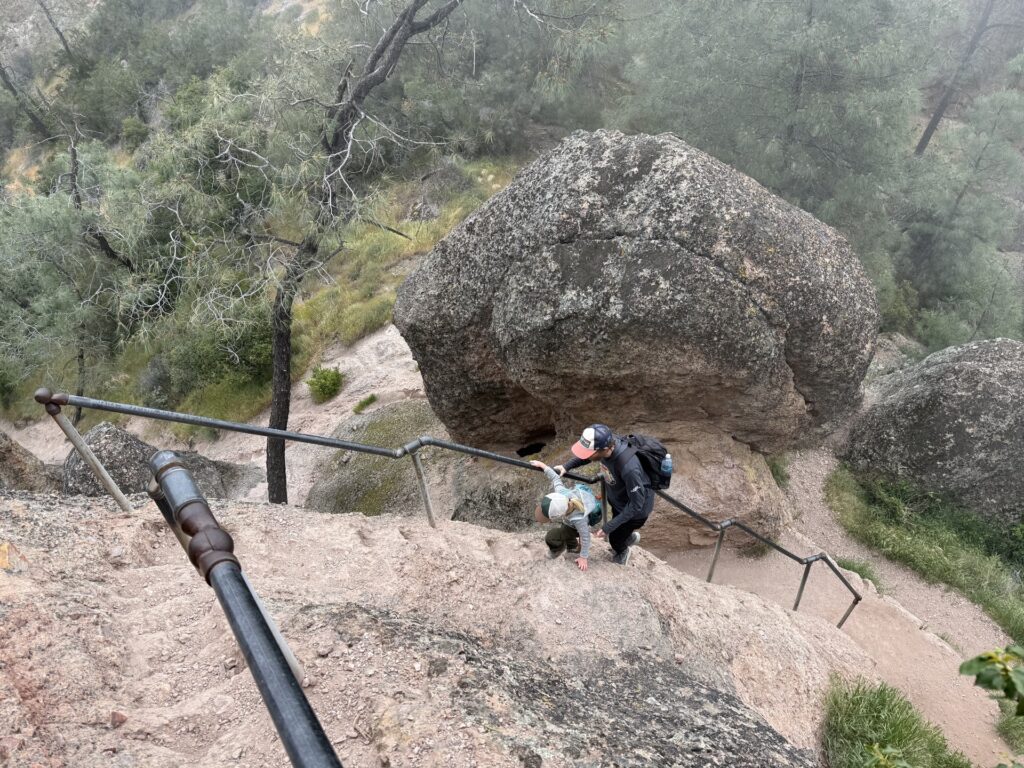
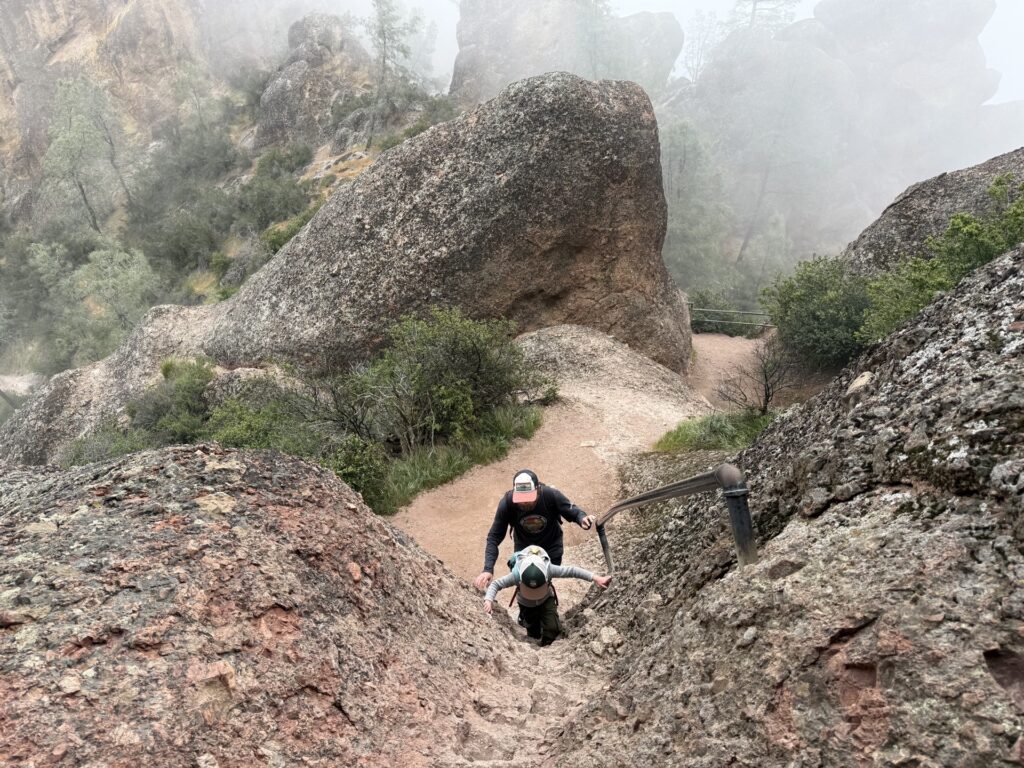
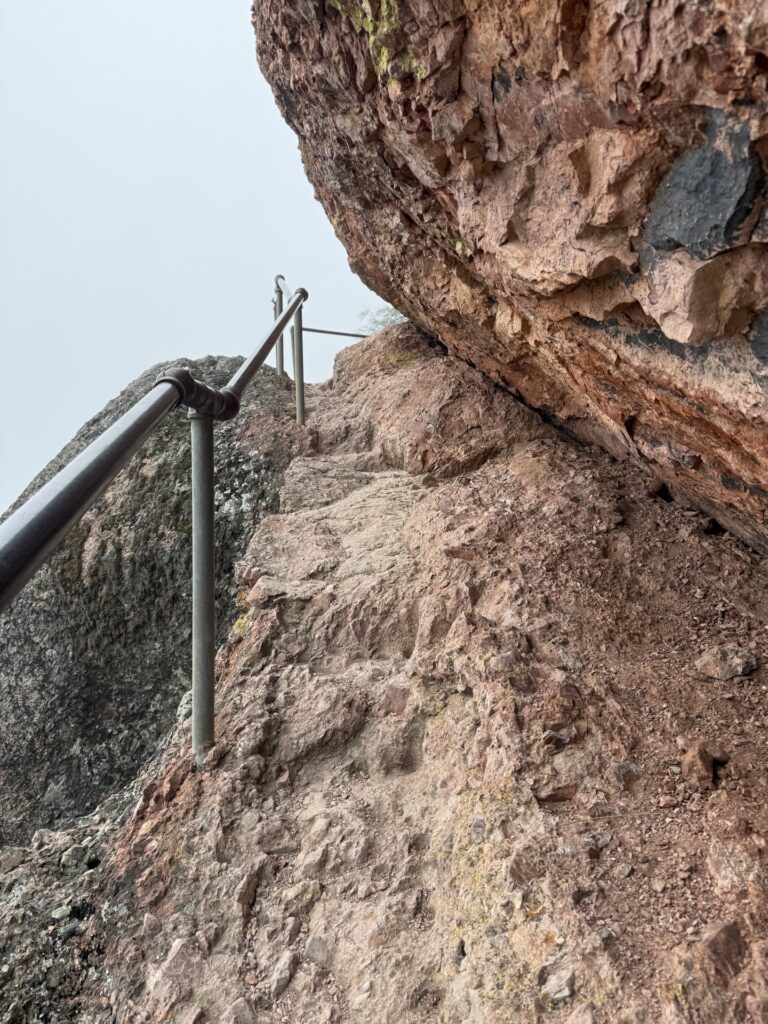
Next, we started the climbing section. When they say steep, they mean it. Here’s an example of some of the climbing sections. As you can see, there are foot holds and a hand rail. It’s like climbing a ladder or very steep steps. The hand rail is useful for a adults, but not so much for a 4-year-old. This section we took very seriously, with one adult in front and one in back.
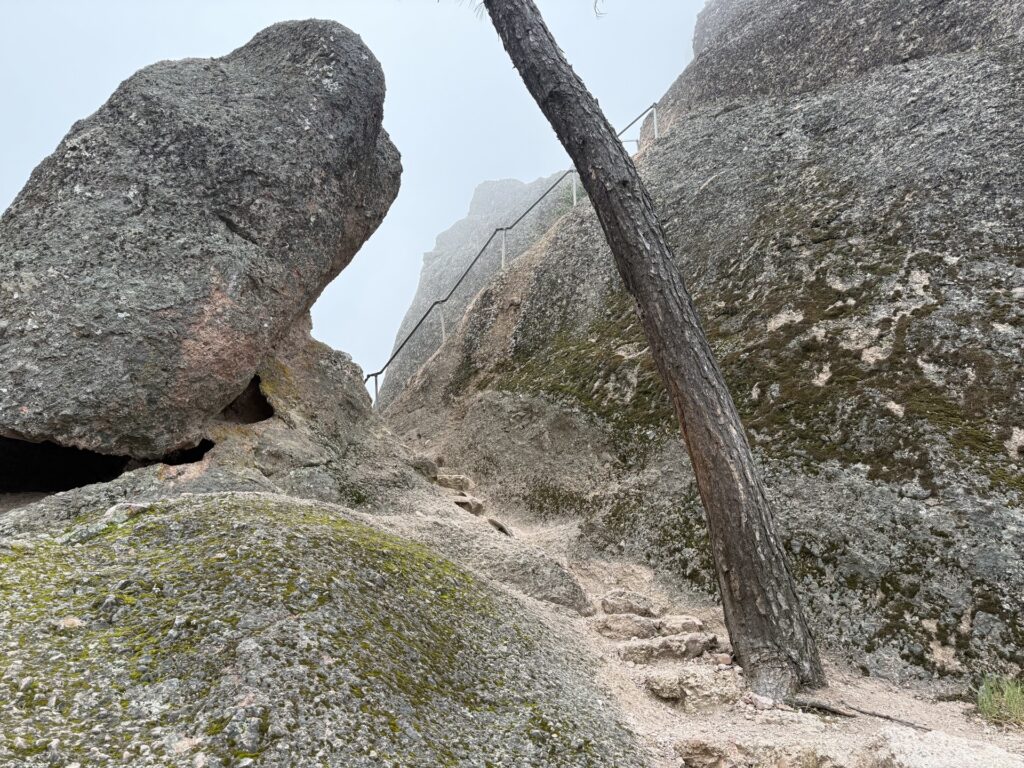
Here is some more views of similar climbs. There were several climbs like this. As you can see in the pictures, they were usually along relatively safe portions of the rock face. The drop off was steep, but not terrifyingly high.
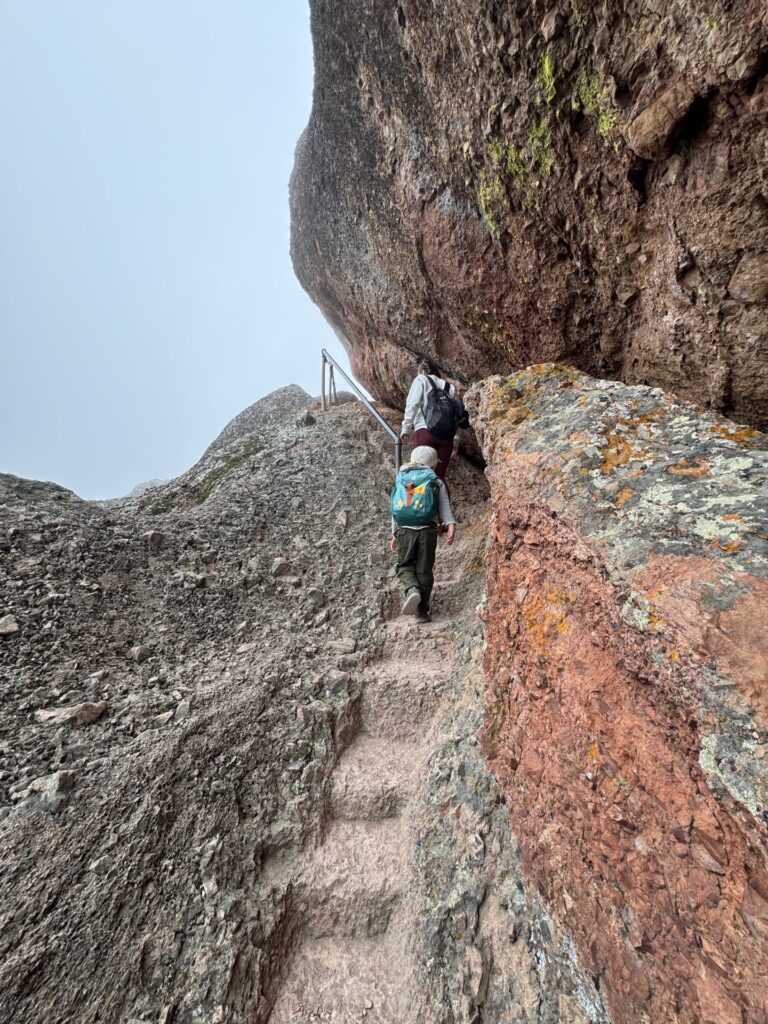
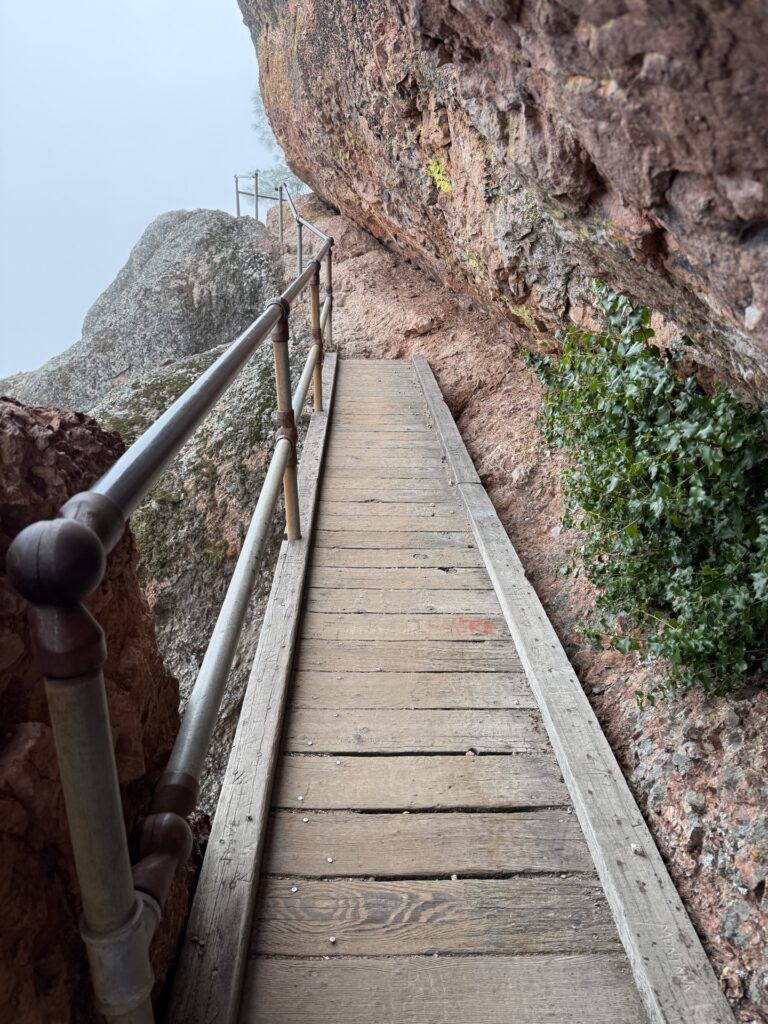
After a few steep sections like this, we found more of the narrow sections. The narrow sections had rails for holding, but not for catching. We were very careful and slow here, as the cliffside was more exposed.
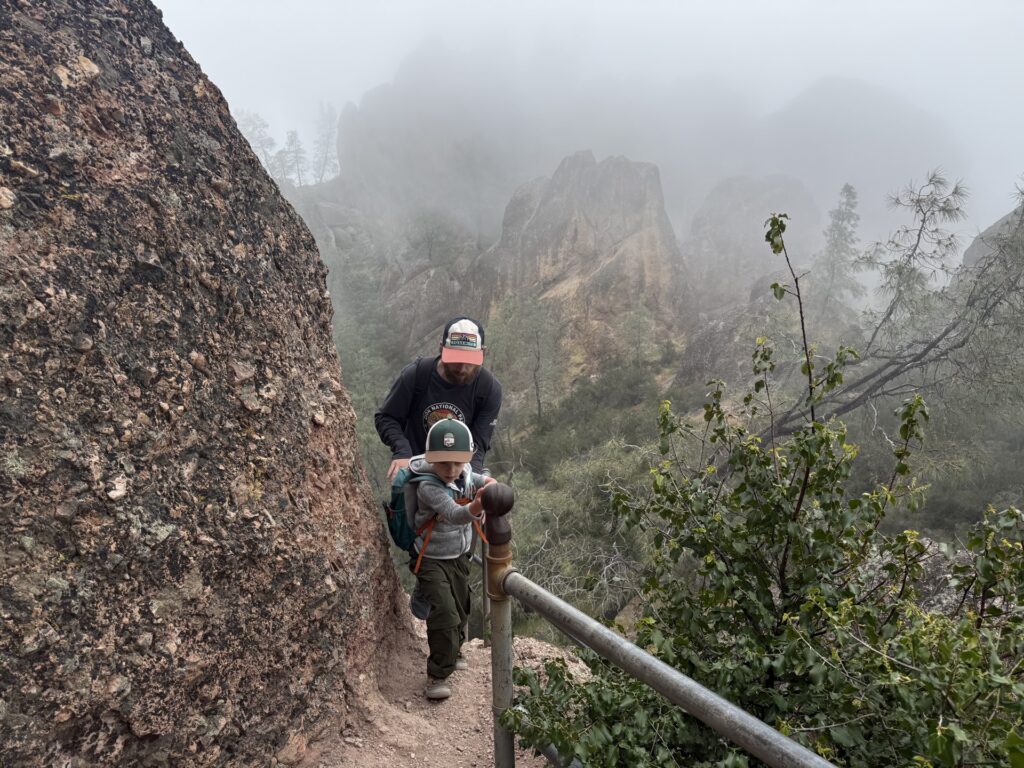
Here’s another cool section where the trail just wrapped around the rock formations. Again, narrow and decently exposed, but for a very short section and with handrails.
The final big climb was down to an overlook. The best I can recall (and my photos seem to confirm), this was the last difficult section. This overlook is known to be a great place to the spot the condors. Despite the low clouds, we actually got really lucky and saw several condors very close up around here.
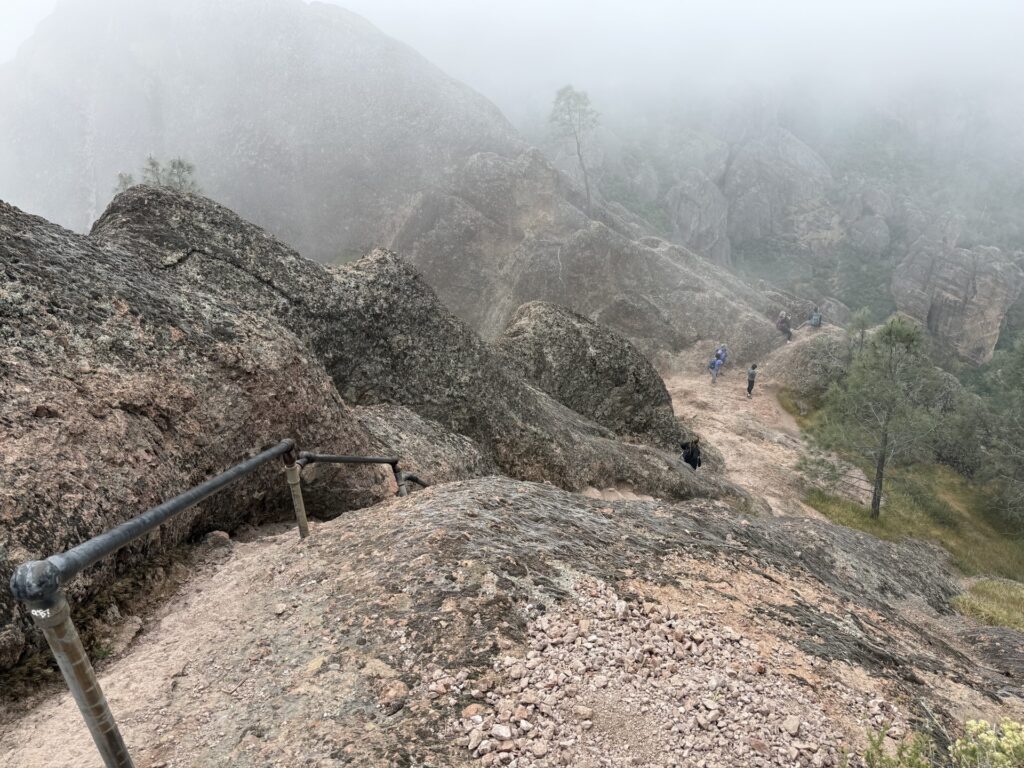
This entire section is about .7 miles and took us approximately 1 hour, which included a decent break at the overlook.
In hindsight, I’m happy we tried this section. It was challenging, and there were definitely risks involved. However, we took it slow and we were very cautious. The technical components were within our child’s ability and they handled it responsibly. Honestly, we all loved it!
That said, when our trail joined back up with the detour trail, we very happily sat for a nice, long snack break.
High Peaks Trail Pt 3
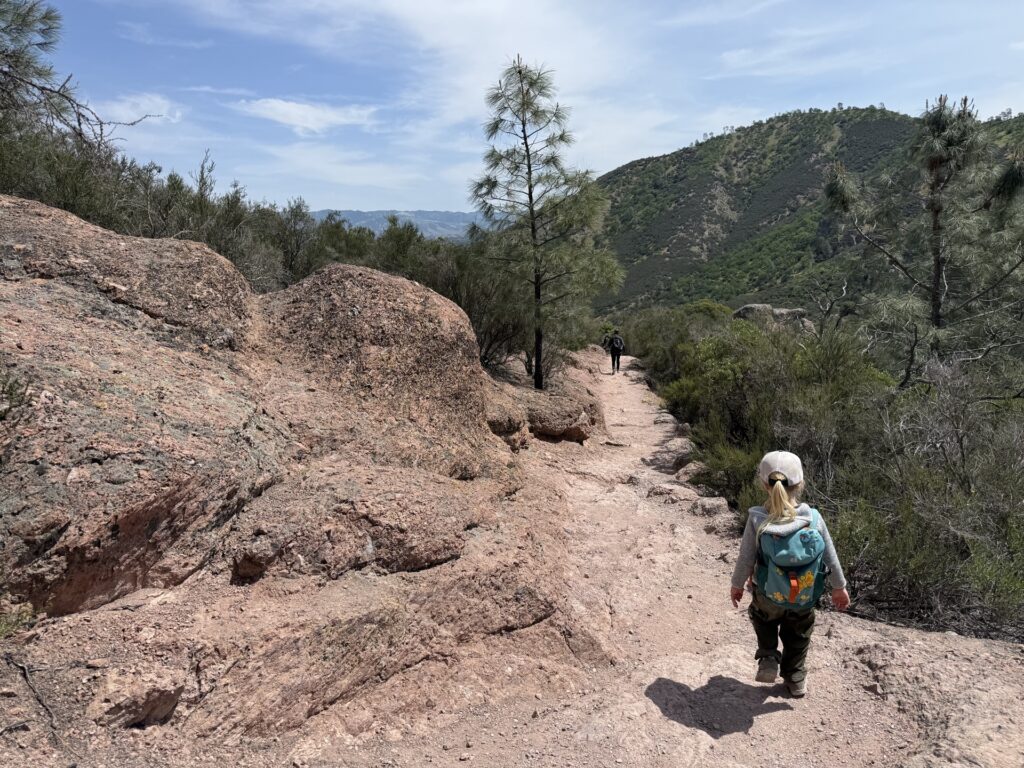
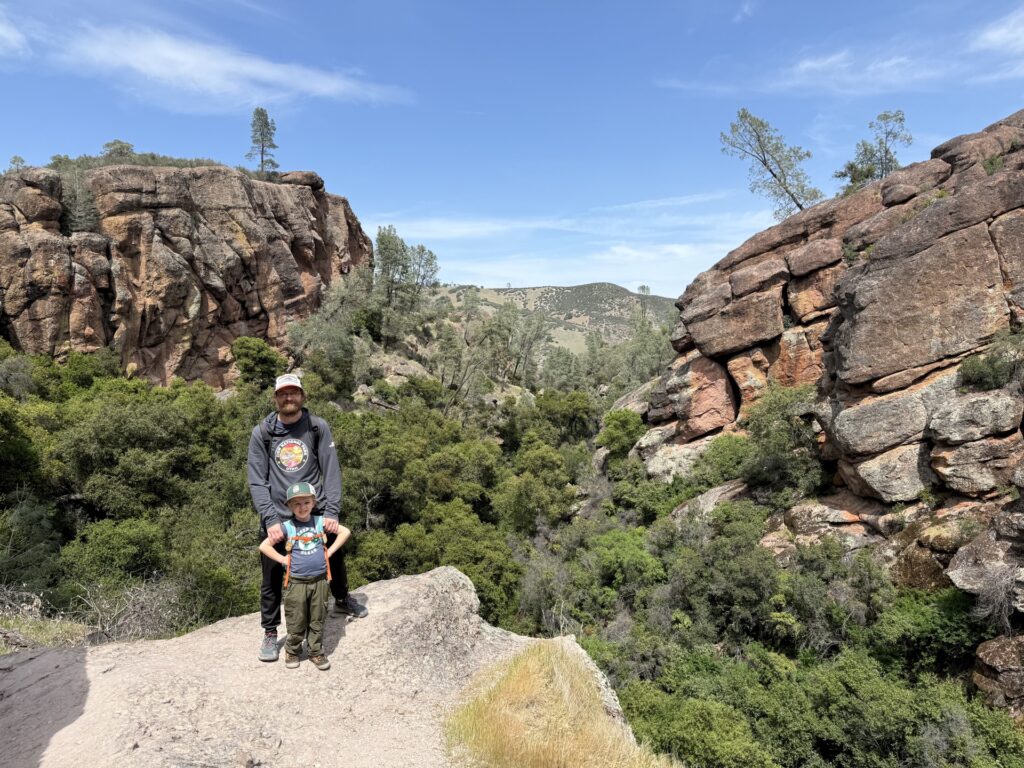
The last leg of High Peaks Trail was the longest, but probably the easiest. After the Steep & Narrow trail meets back up with the detour, the trail follows a series of switch backs down from the high peaks. Then the trail flattens out until it reaches Rim Trail & Moses Springs Trail. This total segment is about 1.5 miles.
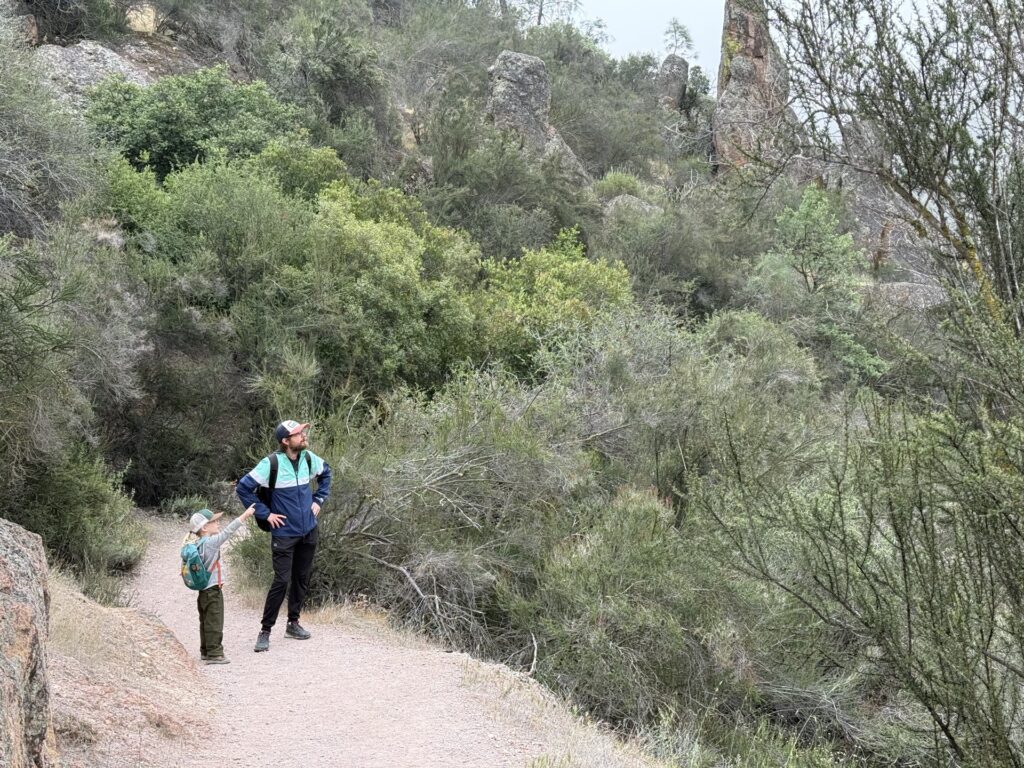
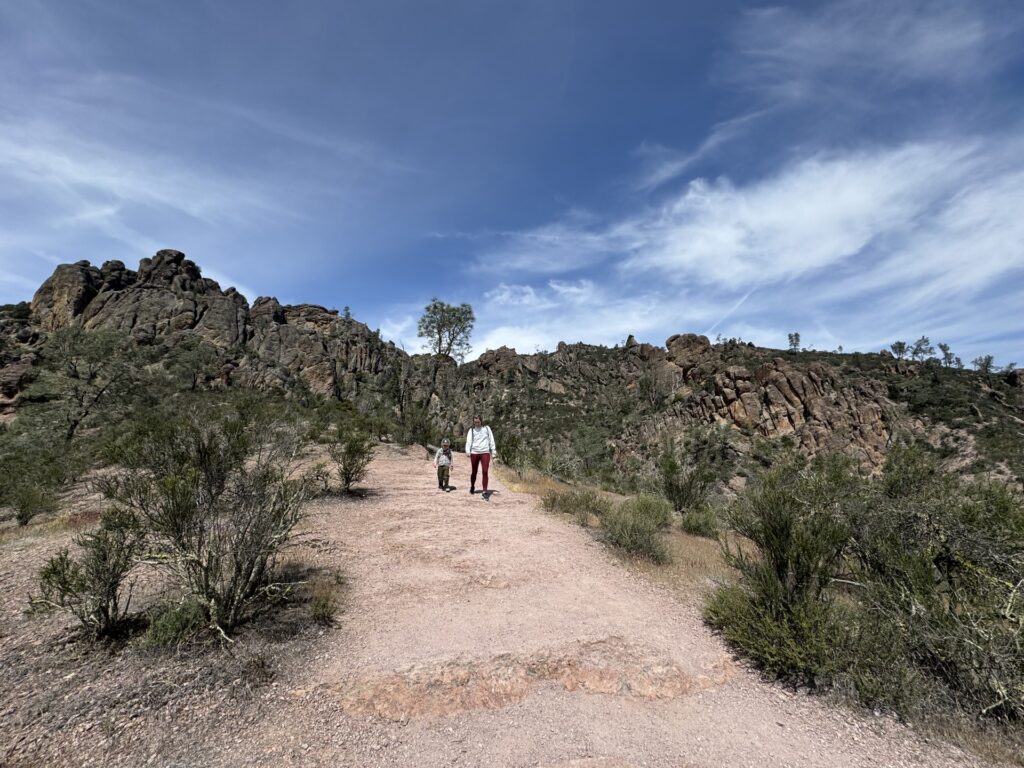
As luck would have it, as soon as we left the high peaks with the most epic and unique views, the sky cleared!
As the terrain got easier and we got more tired, we resorted to a lot more chatting. And by a lot, I mean I asked my kid to talk to me about bees and they did not stop talking for 30 minutes straight. Only about 40% of what they said was true, but they liked being (beeing?) an expert, so I let it go.
This stretch of trail was technically easy but it was also full sun. In the summer, this stretch would be brutal.
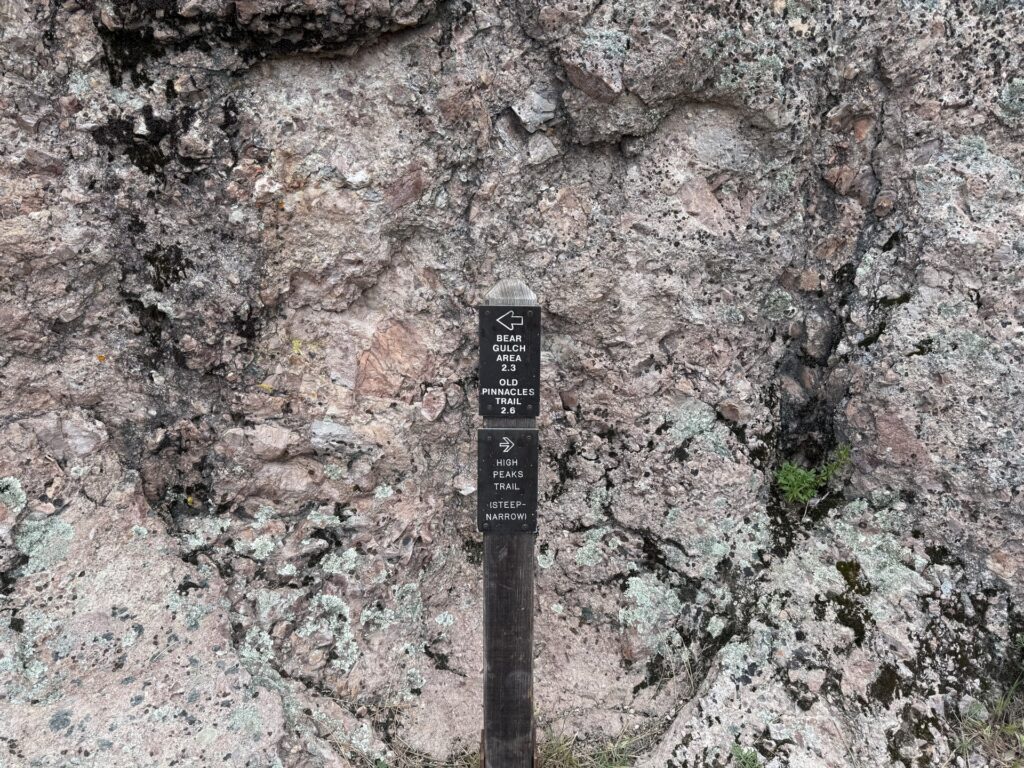
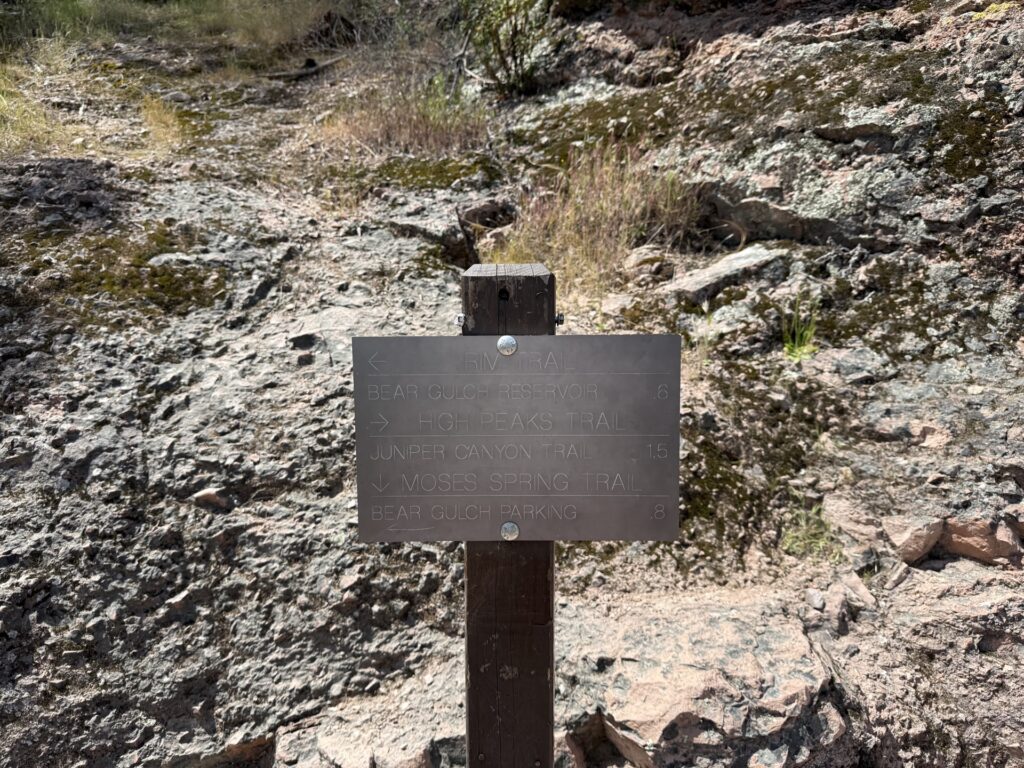
Eventually we hit a fork in the trail. We turned onto Rim Trail toward Bear Gulch Reservoir. This is out of the way, but we wanted to do the caves. If you want to go straight back to the starting point, you’ll follow the sign toward Moses Spring Trail and Bear Gulch Parking.
Rim Trail to Bear Gulch Reservoir & Caves
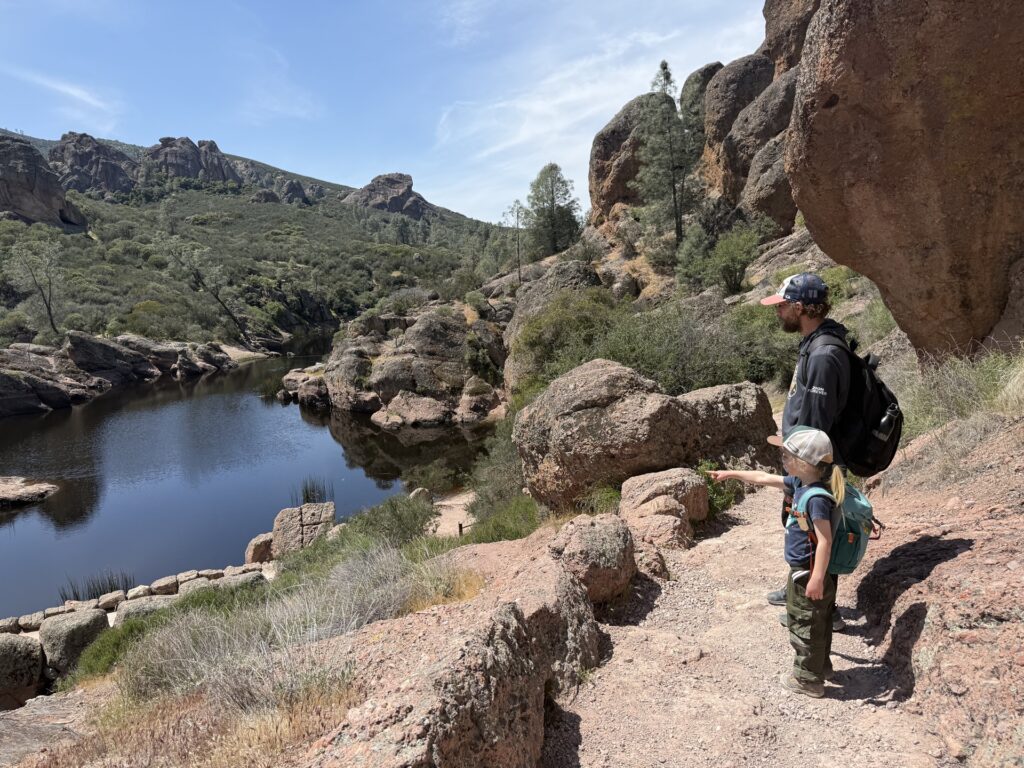
Next, we followed the Rim Trail down to the Bear Gulch Reservoir. This was a pretty easy, mostly down hill stretch for about .4 miles.

This trail let straight to the water, which was pretty enough. On it’s own, the reservoir isn’t that impressive, but we didn’t come here for the water. We came for the caves.
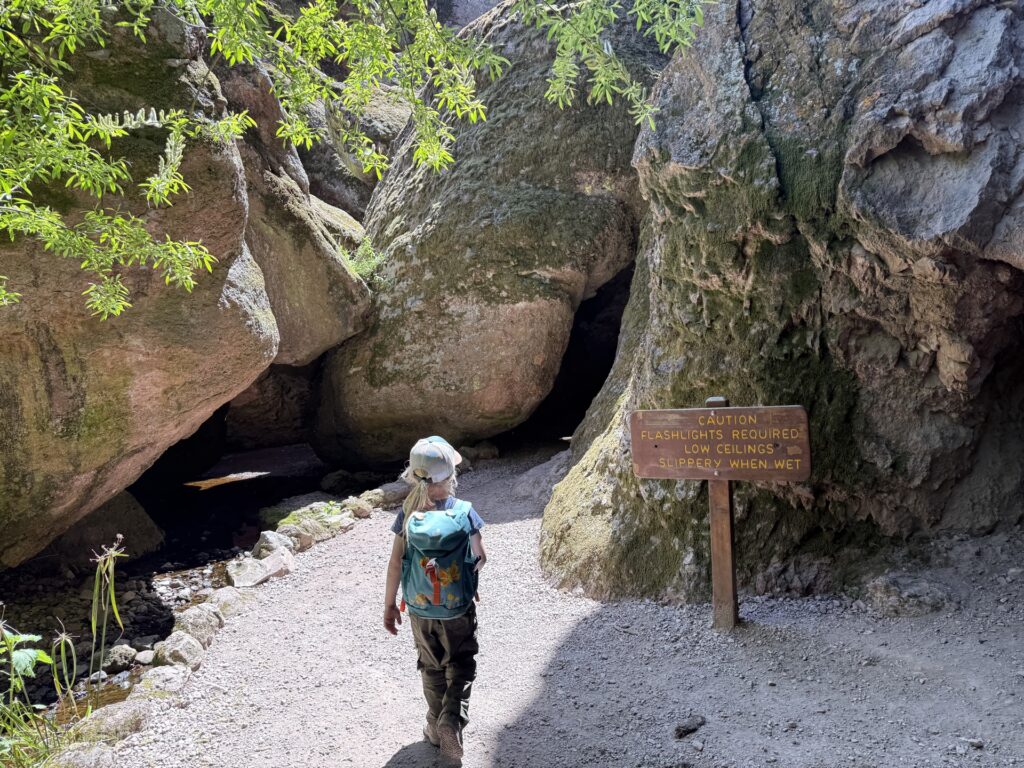
Just past the water is the entrance to the caves. We followed a narrow set of stairs down into the caves.
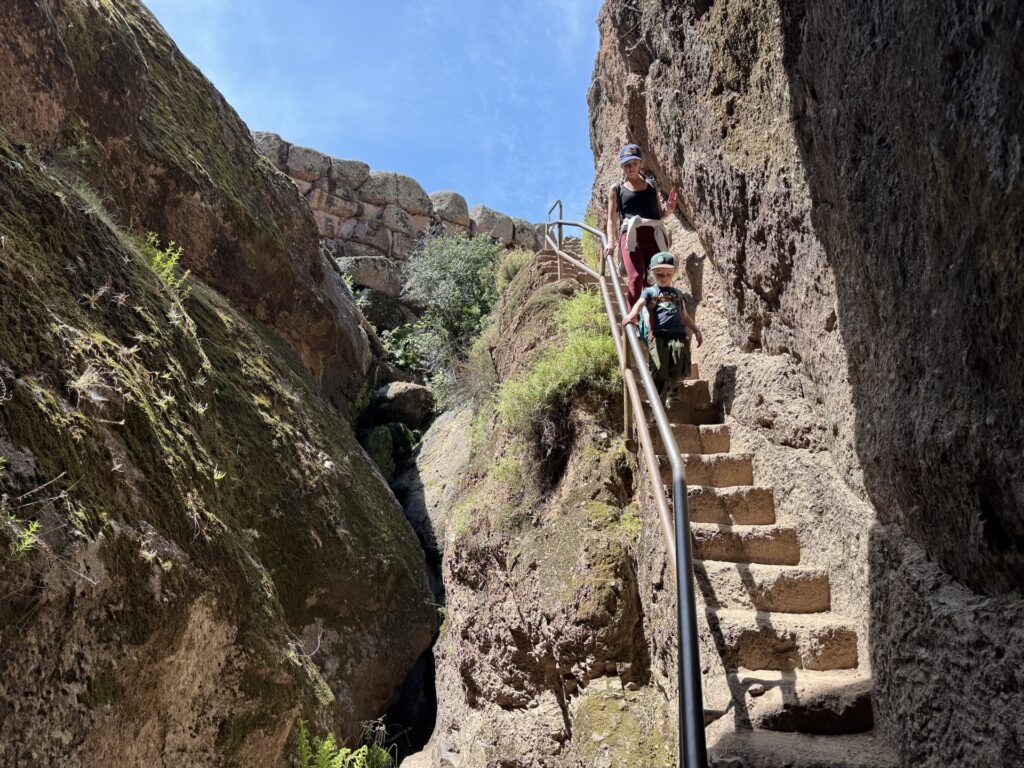
If you’re worried about these caves, don’t be. At least not in this section. I was a bit disappointed honestly. It felt more like we were walking thought a maze of boulders than actually inside a cave. We brought a flash flight, but you could see sunlight from most everywhere in this portion of the caves.
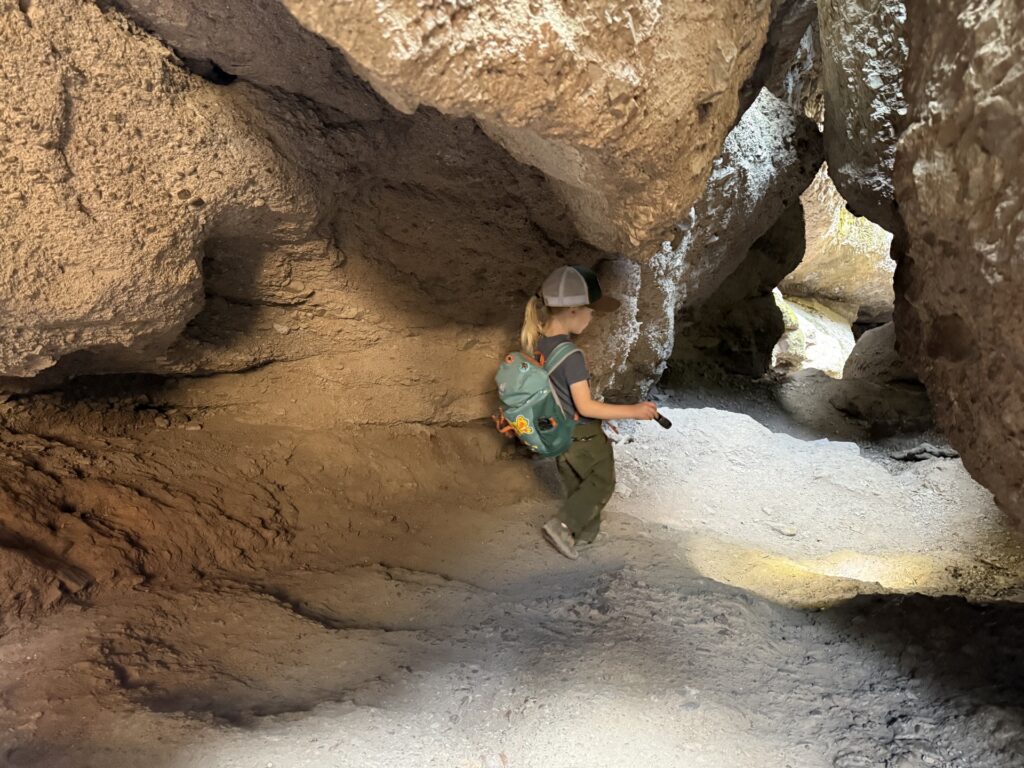
This section is also pretty short. The path isn’t super clear, but it’s a very small area so it doesn’t take long to bop and weave from start to finish. We spent about 10 minutes exploring and then continued on.
Beach Gulch Caves Trail
This is where we got a bit messed up. We apparently exited the first section of the caves and joined up with Moses Springs Trail. However, we could hear people down below and knew there had to be more caves we were missing.
We ended up taking Moses Spring Trail for an extra half a mile before it connected with Bear Gulch Cave Trail. We then took this trail back toward the caves, which led us to a much more impressive section of trail that cut through actual caves.
This section started off tricky. The entrance to the cave was a short walk over a rocky stream.
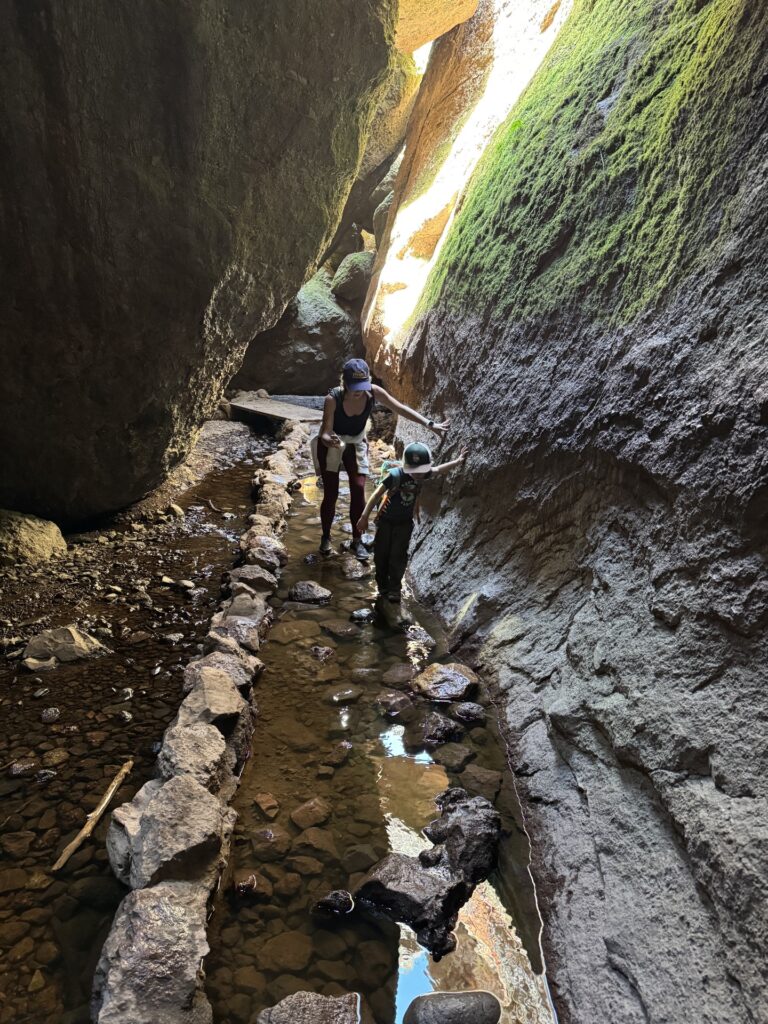
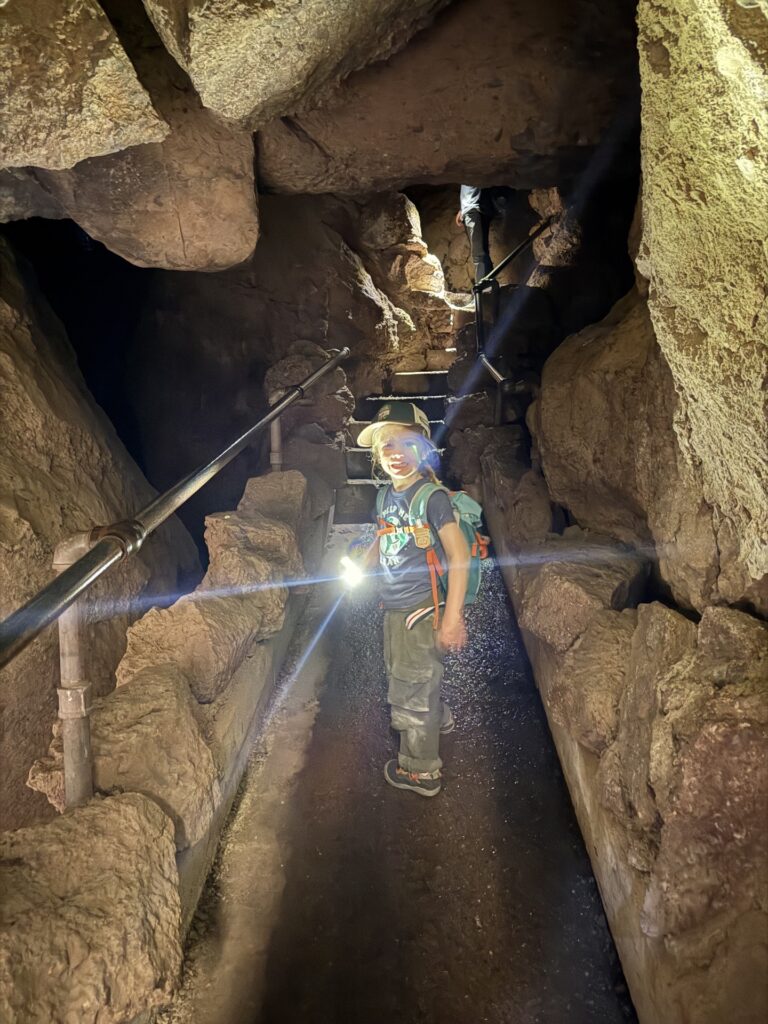
After that, we followed the trail up and through the cave. It was very dark in some sections, but our small handheld flashlight did the trick. We climbed a few stairs and followed a clearly marked trail through the caves. I didn’t find this to be particularly narrow or claustrophobic.
This portion of caves was definitely more cave-like than the other section, but it was also pretty small. We were in and out in less than 10 minutes.
From the exist of the caves on Bear Gulch Caves Trail, there is a turn that leads back toward the smaller bright caves near the reservoir that we’d already explored. Alternatively, you can join back up with Moses Spring Trail and follow that back to the Bear Gulch Parking area. We did the later.
Overall, we expected the caves to be a little cooler than they were. Our kid still had fun though. I’d just caution you not to hype this up too much. I think that was our mistake.
Moses Spring Trail
Our final leg back to the car was down Moses Spring Trail. This was a mostly down hill stretch of trail, less than half a mile, that wound through more forested terrain than previous parts of this hike.
This trail leads back down to the road. Then, we followed the pathway through the picnic area and on to Bear Gulch Nature Center.
This section was fine, but we were exhausted at this point. There were numbered trail markers every 30 feet or so, and Zoe loved counting them down to the end of the trail.
We did it!
Closing Thoughts
In total, our hike was just shy of 6 miles (5.84 according to our Apple watch) and took us 5 hours and 40 minutes. To recap, our route was Condor Gulch Trail > High Peaks Trail > (with the Steep & Narrow Section) > Rim Trail > Moses Spring Trail > Bear Gulch Cave Trail > Moses Spring Trail (again).
This was a really rewarding and fun hike to do with a child. We really liked the thrill of the Steep & Narrow section, but it would be a great hike even if you chose the detour. The incline was manageable, the views (from what we could see) where incredible and unique, and the caves were a fun way to finish out a hike. It was also really cool to see as many condors as we did — we didn’t expect that. (It was also cool to not see any rattlesnakes.)
Pinnacles might not be the most impressive National Park, but it’s definitely one worth seeing. This specific route is a great way to fill a single day and see the high peaks.
Tips for Hiking at Pinnacles with Kids
- Visit the Bear Gulch Nature Center. It’s small, but it has several interactive exhibits, plus a cozy corner with crafts and toys for kids to play with. You can also pick up a Junior Ranger Book here and spend some time in the kids area working on the activities to earn your badge.
- Check the hours. This is a small National Park and the nature center and visitor center have limited hours. During our visit, the Bear Gulch Nature Center was only open on our arrival day and closed the next two days. If it’s closed, ask the Rangers at the entrance if they have books and badges.
- Be alert for wild life (specifically rattlesnakes.) Encounters with rattlesnakes are rare, but their bite is venomous and considered a medical emergency. We dressed our child in long pants as a precaution, but that is not always possible with the heat.
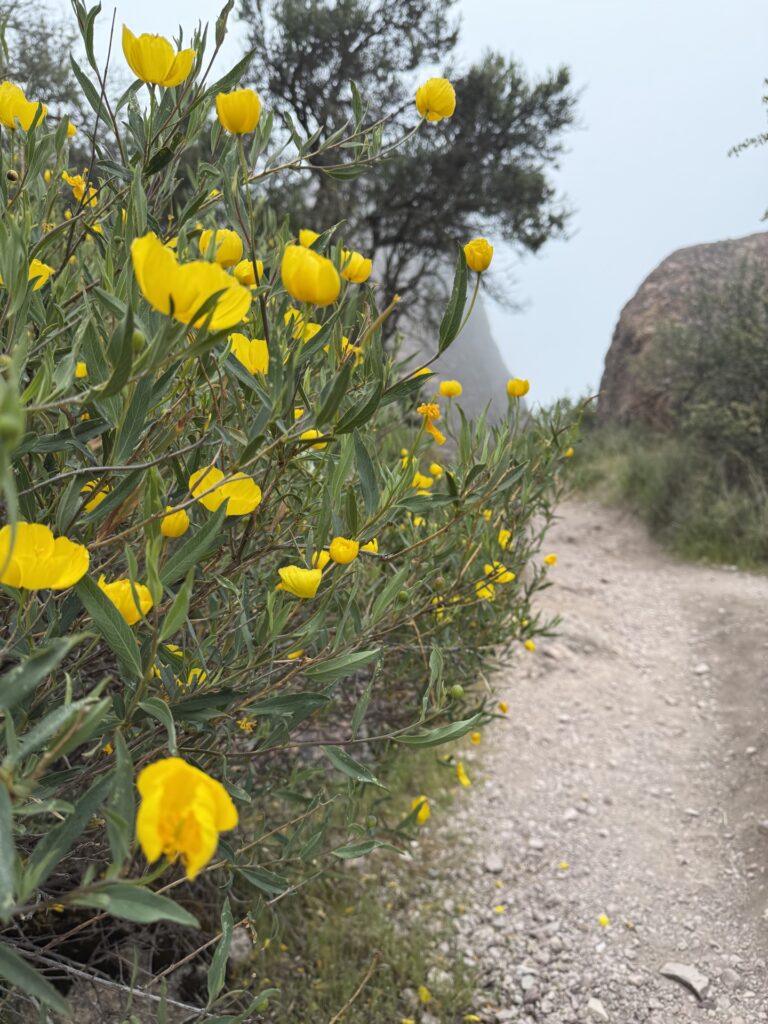
- Watch out for poison oak. There’s a ton of it around multiple sections of the trail. If you don’t know what it looks like, be sure to look up photos in advance.
- Bring lots of water. There is no water available on the trails in Pinnacles National Park. The NPS recommends bringing 1 liter of water per person per hour of hiking. This is particularly important in the warmer months.
- Bring snacks. If you ask our child if they like hiking, half the time they say no. However, if you ask them if they would hike for snacks, the answer is always yes. We let them pick out any snacks they want for the trails and let them eat them at set points throughout the hike. Fruit-by-the-Foot is the ultimate motivator.
- Visit the West Pinnacles Visitor Contact Station. Half of this building is the National Park store, where you can buy souvenirs and merch. The other half is the camp store, where you can buy snacks and drinks (and unofficial gear). They don’t have Junior Ranger stuff here. I’d highly recommend getting a It’s-It ice cream sandwich — a San Francisco classic — as a reward for your hike.
Dreaming of other National Parks?
Check out some of the other National Parks we’ve covered on Emjoyable Explores.

Leave a Reply