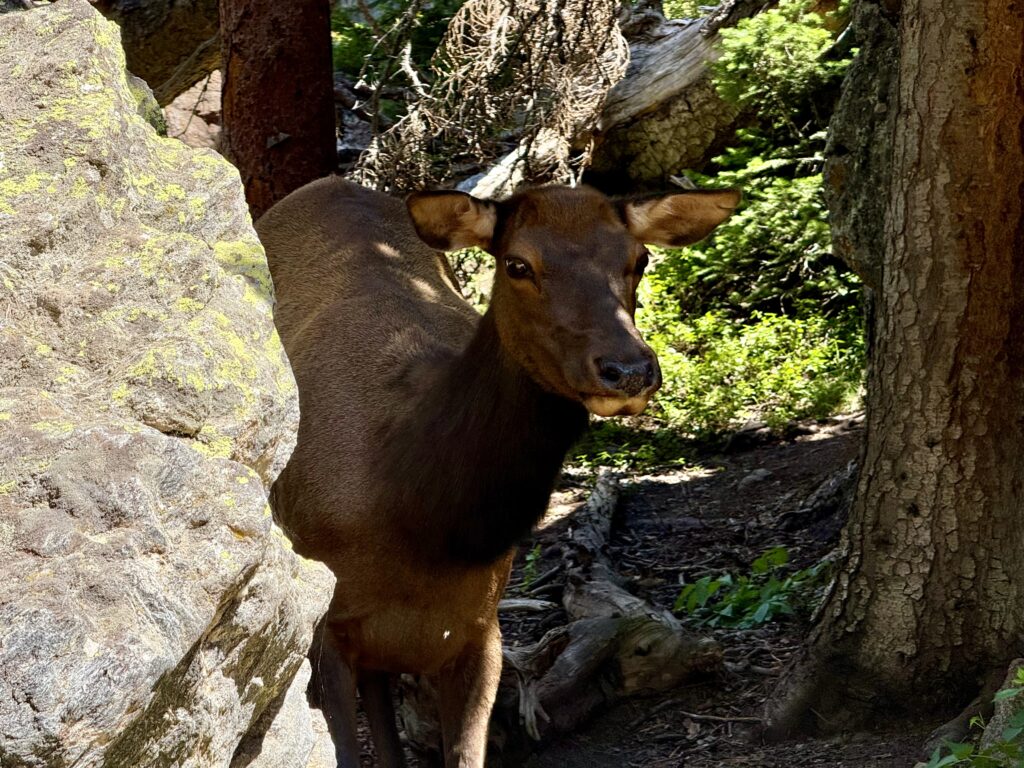
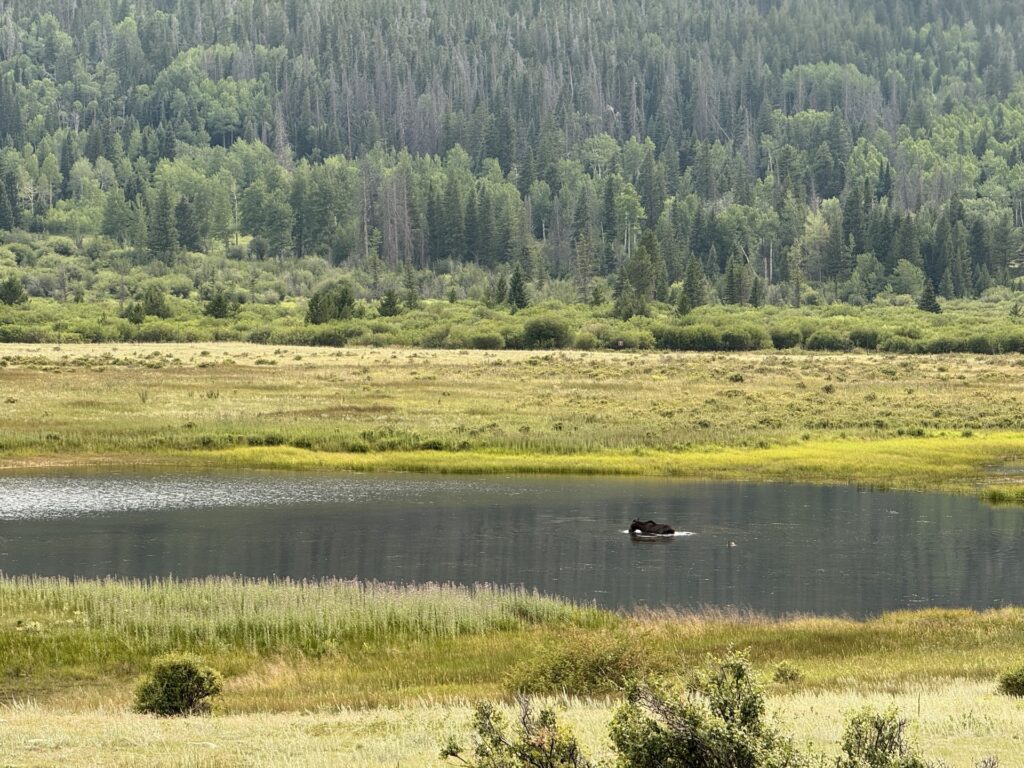
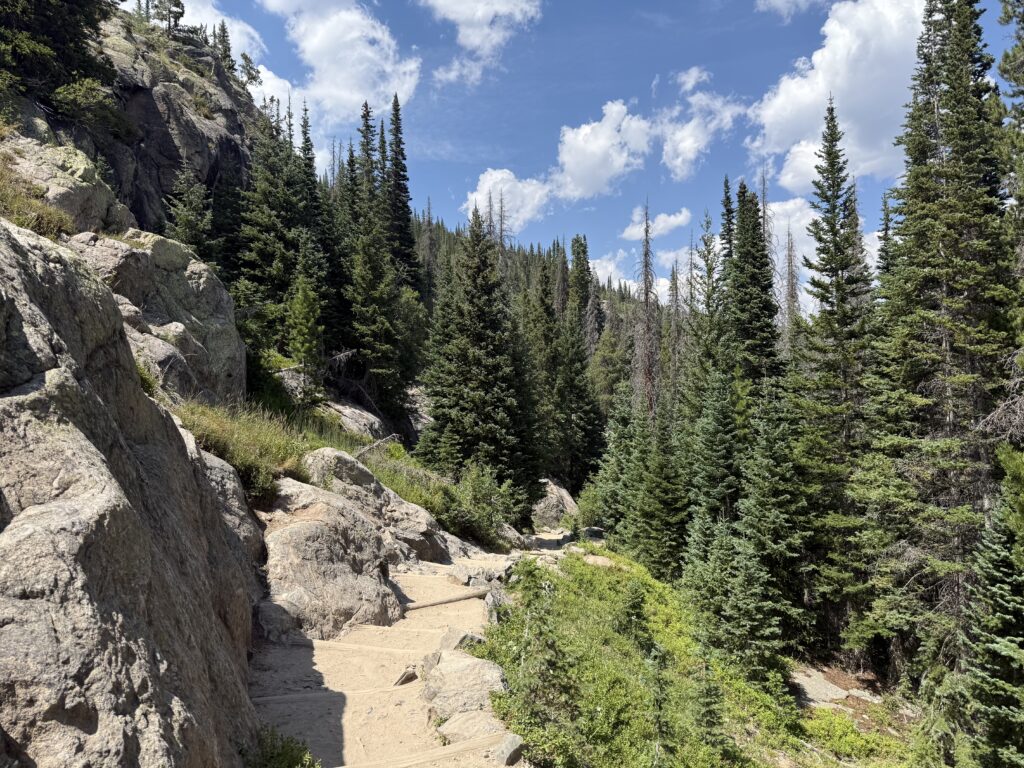
Colorado’s Rocky Mountain National Park is a playground for hikers, outdoor enthusiasts and anyone who just feels alive in the mountains. You can explore alpine lakes, watch moose and elk grazing in a meadow, and climb a waterfall — all with sweeping views of varying landscapes — in a day’s work. It’s a place where epic adventure awaits explorers of all abilities.
You can see a ton of this gorgeous park in three days and this post will show you how. We’re going to cover how to fill 3 days at Rocky Mountain National Park with the best hikes and views this park has to offer.
This particular itinerary is very hiking-forward, but still family friendly. It’s written for the summer season, but can be adapted for spring and fall trips as well. (This itinerary is NOT recommended for winter travels.) Follow along to learn how to spend 3 perfect days at Rocky Mountain National Park.
Let’s dive right in!
Know Before You Go
Planning a National Parks trip these days is no easy task. (Our sister site, Mouse Hacking, is a Disney planning site, and we often joke that planning National Parks is just as hard and often as expensive.)
Here are a few things to keep in mind when planning a trip to Rocky Mountain National Park.
- Book ahead. We mention timed entry permits for the park in the next section, but it’s not just that. Hotels and campsites also book up incredibly quickly and well in advance. This is definitely not a show-up-and-wing-it kind of destination.
- Expect crowds at the gate. This is true at many National Parks and Rocky Mountain is no different. With only two entrances, the car queue to enter the park gets very long. Budget time and patience for this.
- Parking can be tough. Spots at the popular trailheads fill up very quickly. Be sure to do some research on what to expect at each trailhead and have a plan A, B and C. There is a Park & Ride on Bear Lake Road, but that won’t take you everywhere and even that can fill up.
- Respect the altitude. Estes Park is at 7,500 feet, and hiking trails and driving routes go up to 10-12,000 feet or more. The reduced oxygens levels at this elevation can greatly impact you physically, especially if you’re not acclimated. Be sure to drink lots of water and be prepared for things to feel harder than you expect.
- Check for real-time conditions and closures. Trails and roads in and around the park may be closed seasonally, for construction projects, or other reasons. Be sure to check the National Parks website for current conditions when you book your trip and before you hit the trails each morning.
Rocky Mountain National Park Basics
- When to go: May – October
- Closest Airport: Denver International Airport (DEN)
- Where to stay: Estes Park or Grand Lake (This itinerary is based on a Estes Park stay.)
- Entry Fee: $15-$35 daily, $70 Annual Pass (RMNP Only), $80 America the Beautiful Pass (All National Parks & more) + $2 timed reservation fee (daily as needed)
- Permits: Timed entry permits are required to enter the park and Bear Lake Road for select dates and times. There are no trails that require specific permits beyond that.
- Transportation: Car required. Limited Park & Ride service available on Bear Lake Road.
- Food inside the park: Alpine Visitor Center has a cafe & snack bar. Small trail snacks are available at select ranger stations.
- Safety concerns: lightening, wildlife, exposure (steep cliffs)
Timed Entry Permits at Rocky Mountain National Park
There are a few things about Rocky Mountain National Park that you’ll need to know (and plan) well before your trip begins. The single most important thing is the timed entry permits.
Tip! Always check the NPS website for timed entry details, dates, and time requirements.
During the peak season (mid-May through Mid-October), you will need a timed entry permit to enter the park during certain hours.
To access most of the park during these months, you will need a general timed reservation to enter the park between 9 AM and 2 PM. If you enter before 9 AM or after 2 PM, you can enter most of the park without a reservation.
Entry to Bear Lake Road (and all the trailheads along it) requires a separate permit. You will need a specific Bear Lake Road timed reservation to access this road between 5 AM and 6 PM. (The Bear Lake Road permit also includes general park access.)
Note: Bear Lake is a popular sunrise destination, which is why timed reservations are required so early.

Permits are released in batches (Recreation.gov) on the first of the month at 8 AM (MDT) for the following month. For example, on June 1 at 8 AM, reservations will be available for all of July. On July 1 at 8 AM, reservations will be available for all of August. Etc, etc. Each timed entry permit costs $2.
Tip! Be sure to log in right at 8 AM MDT to have the best selection of available dates and times. Some reservations do sell out quickly.
Arrival Day
- Fly to Denver & drive to Estes Park
- Check into hotel
- Evening riverwalk stroll and dinner
Rocky Mountain National is located in north-central Colorado (USA), just northwest of Denver. If you’re flying, the closest major airport is Denver (DEN.) From there, you’ll need to rent a car and drive to the park. It’s about 90 minutes, depending on traffic.
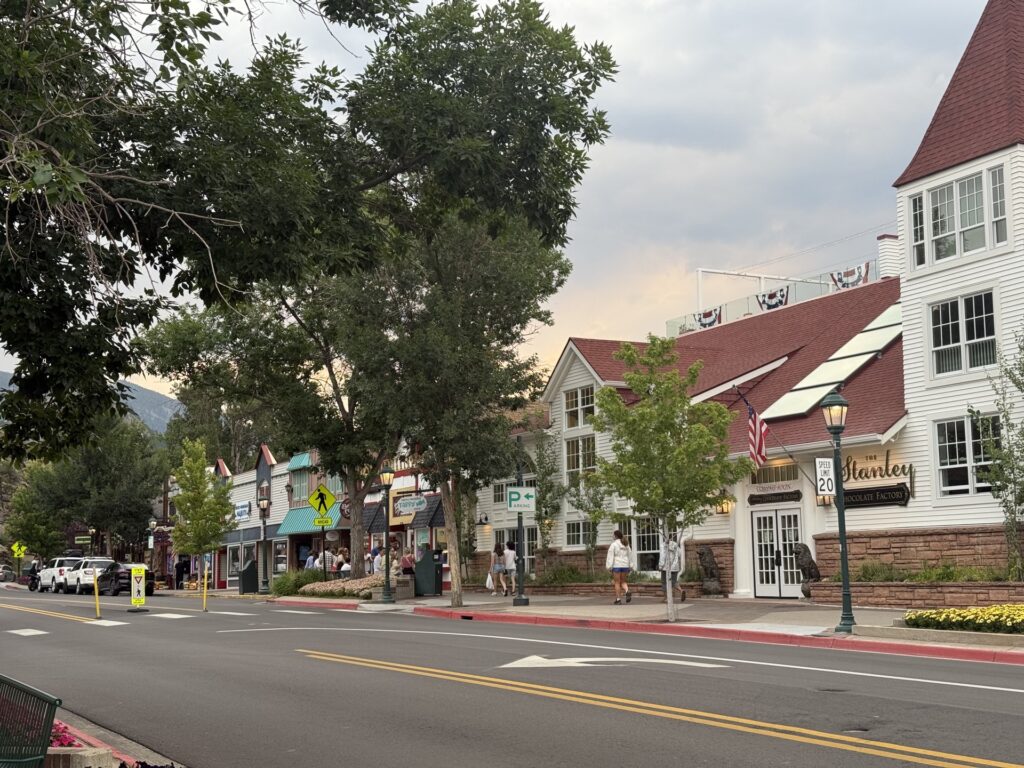
If you’re flying, the best place to stay is in Estes Park. This is the home base of Rocky Mountain National Park, and it’s on the Denver side of the park so it’s much closer than Grand Lake. Estes Park is a really cute town with lots of shops and restaurants.
How much time you’ll have on your arrival day will of course depend on where you’re coming from. Whatever time you have, after you check into your hotel, head toward the downtown area (Elkhorn Ave from roughly Tregent Park to Bond Park.)
Personal Recommendation: We stayed at Silver Moon Inn and it was perfect. It had a rustic and cozy vibe, which felt very on-brand, while also being incredibly comfortable. The location was perfect, plus they have complimentary s’mores and popcorn nightly. 10/10 recommend.
Walk down Elkhorn Ave, taking note of any restaurants along the way. You might also want to keep your eyes out for taffy and ice cream shops — there are many — you want to try later.
At any point along the way or on your return walk, you might want to pop over the river walk. It’s a lovely walkway just south of the main street that follows along the Fall River. Keep your eyes open for humming birds!
Wrap up your arrival day with dinner (and maybe dessert) in town. We enjoyed our meal at Elevations, but it was quite pricy for what it was. The local beer menu was great though. Penelope’s Old Time Burgers is also a must-do, I’d suggest saving it for later in the trip after a day of hiking.
And then rest up — we ride at dawn.
Day 1: Light Hiking, Viewpoints & Visitor Center
- Deer Mountain Hike
- Trail Ridge Road
- Alpine Visitor Center
- Hidden Valley / Junior Ranger HQ
- Sheep Lakes
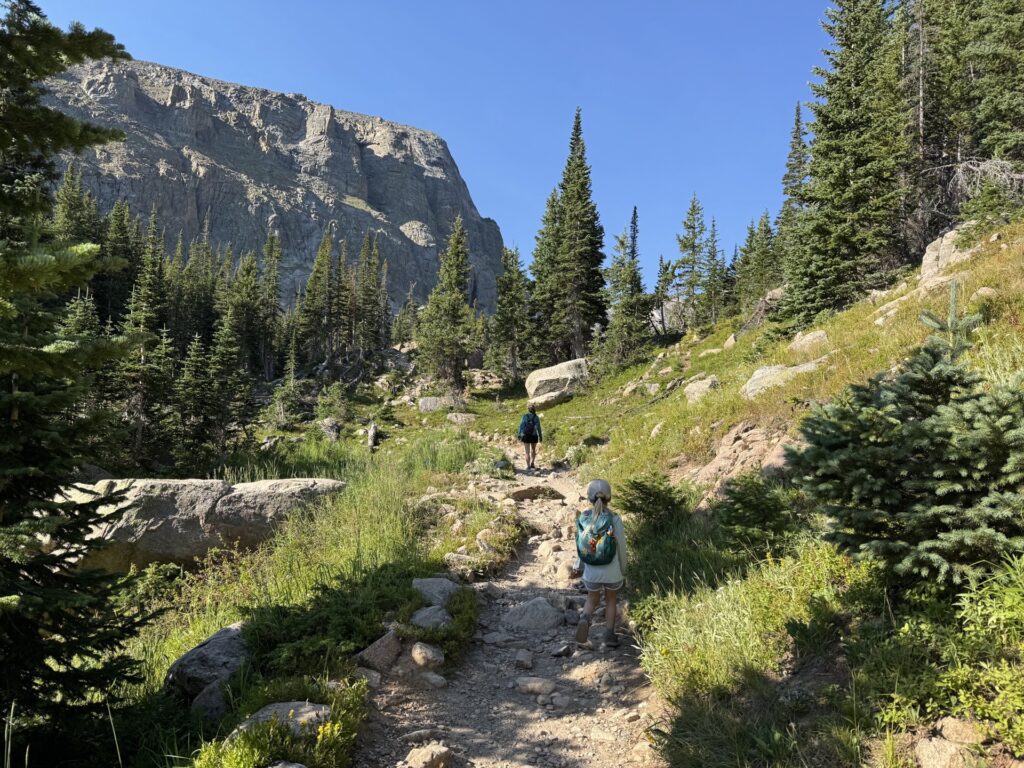
Deer Mountain
Start your day early and strong with a hike up Deer Mountain. You’ll want to start this one early — ideally by 8 AM — for easier parking and to beat the crowds and heat on the mountain.
Note: If you arrive before 9 AM, you do not need a timed entry permit.
Enter through the Beaver Meadows Entrance Station. From there, it’s a short (5-10 minute) drive to the Deer Mountain Trailhead. There is limited street parking near the trailhead.
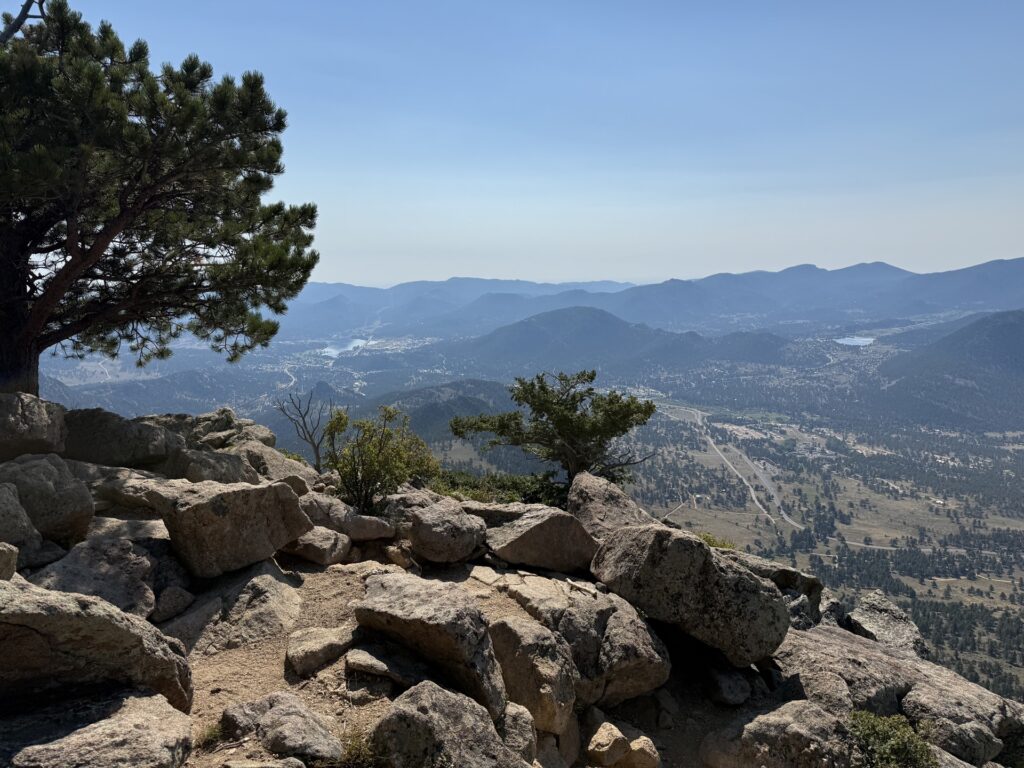
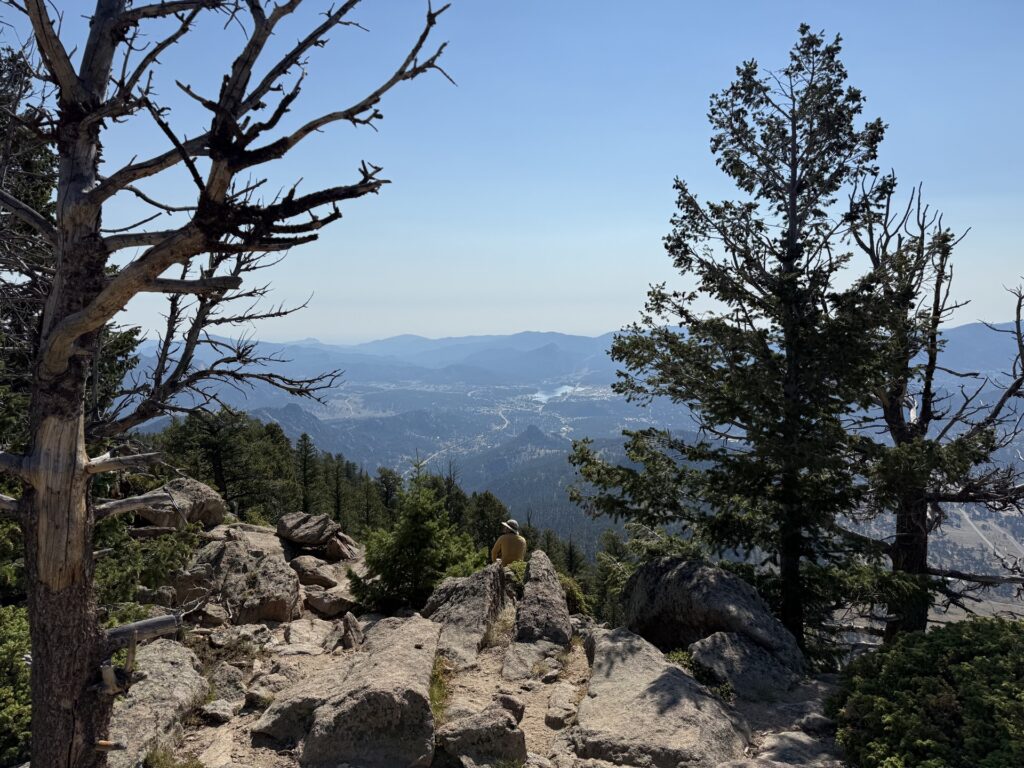
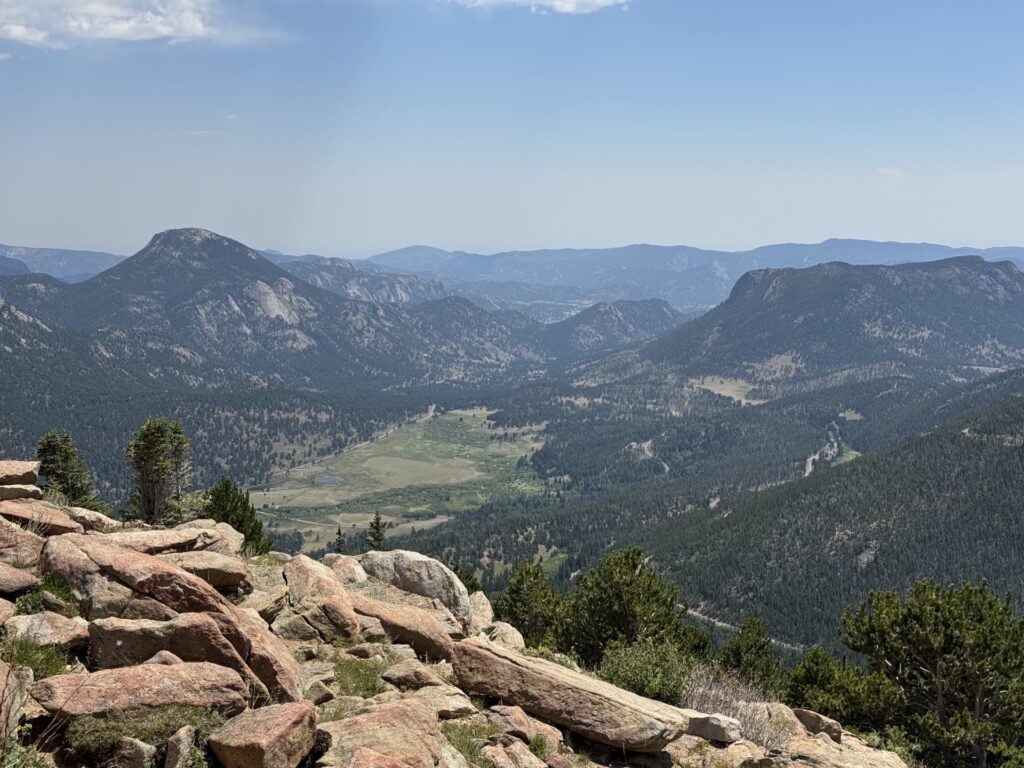
This out-and-back hike is moderately difficult, with 1,410 feet of elevation gain over 3.1 miles. The elevation is distributed pretty evenly, so no one section is particularly steep or technical. At the summit, you’re rewarded with sweeping views of Longs Peak, Moraine Park, Upper Beaver Meadows, and Estes Park.
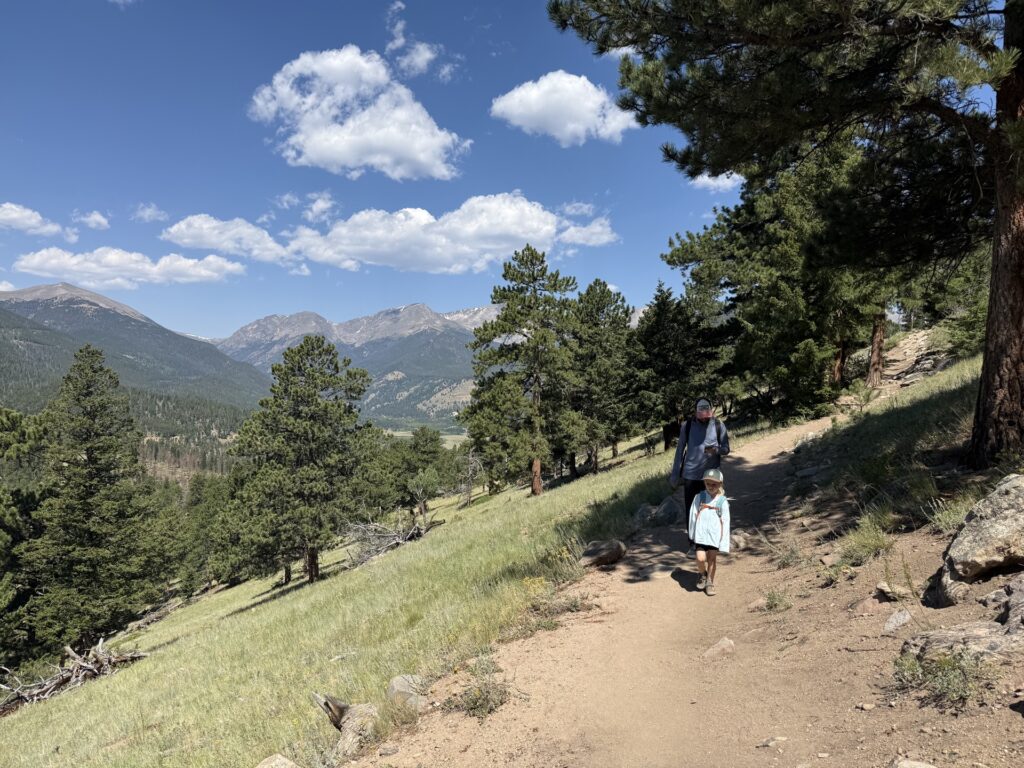
It takes about 4 hours to hike the full 6.2 miles to the summit and back.
Trail Ridge Road
After Deer Mountain, head west on Trail Ridge Road. It’s a 35 minute drive from the trailhead to your ultimate destination, the Alpine Visitor Center. Take your time on the drive though — it is the activity.
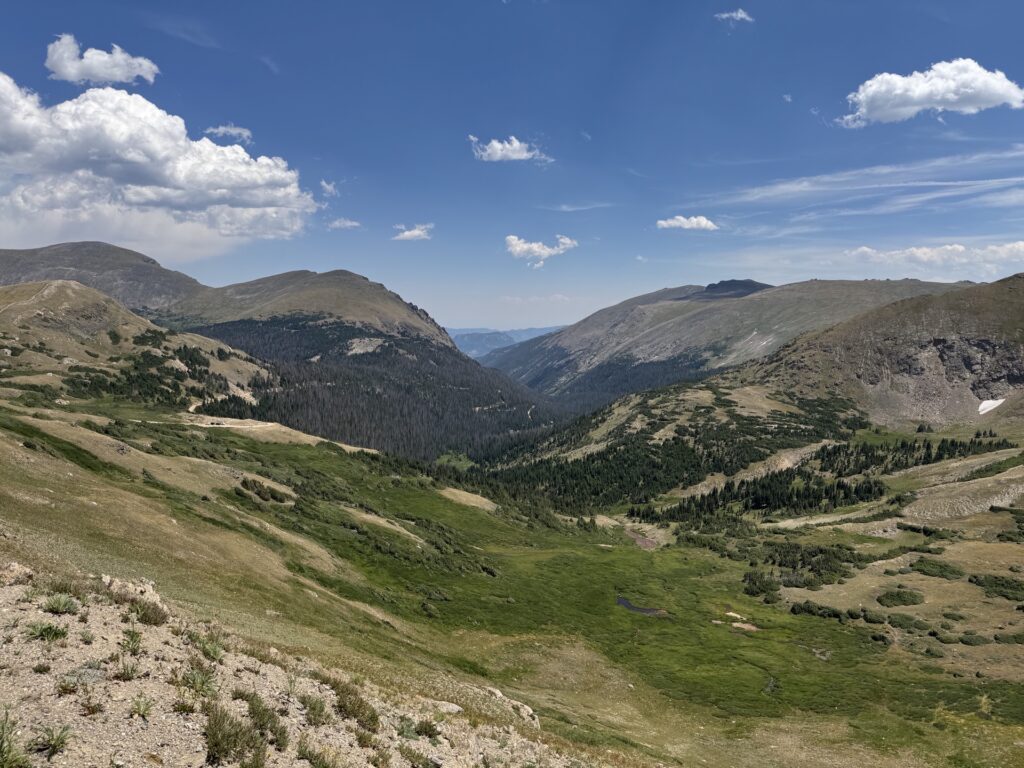
Trail Ridge Road cuts through the heart of the park and offers easy access to some of the best views in the park. Non-hikers visiting Rocky Mountain National Park could easily spend a full day on this road, bopping between lookout points. This particularly itinerary is fairly packed with other hikes and views, so you might not have the time or appetite to stop at every lookout. (That’s okay!)
If you only make one stop though, let it be Rainbow Curve. It’s a little early in the drive, but the view is incredible. If you packed a lunch, you might want to eat it here. (Though if you prefer a table or need to buy lunch, wait until the visitor center.)
Tip! There are bathrooms available at Rainbow Curve. This might be important to note as there are not bathrooms at the Deer Mountain Trailhead.
Alpine Visitor Center
The Alpine Visitor Center is a real highlight of Rocky Mountain National Park. Here you’ll find a ranger station, large store and cafe, as well as incredible views, wildlife spotting, and a short-but-steep hike to a peak at 12,000 feet.
The NPS-run visitor center is closest to the road. It has a great little museum exhibit, where you can learn about the wildlife and landscape of the region.
Tip! If you’re visiting with kids, be sure to swing by the ranger station and pick up a Junior Ranger book. They can complete activities to earn a Junior Ranger badge — for free!
Next door is the shop and cafe. It’s huge and stocked with clothing, treats, books and toys for National Park enthusiasts of all ages. The restaurant offers hot and cold meals, a full coffee bar, packaged snacks, and more.
The hike is just beyond the gift shop. It’s maybe less of a hike and more of a steep flight of stars. And at elevation, those stairs feel even steeper! The view from the top is great, but don’t sweat if you can’t do it. It’s honestly not much better than the view from the visitor center.
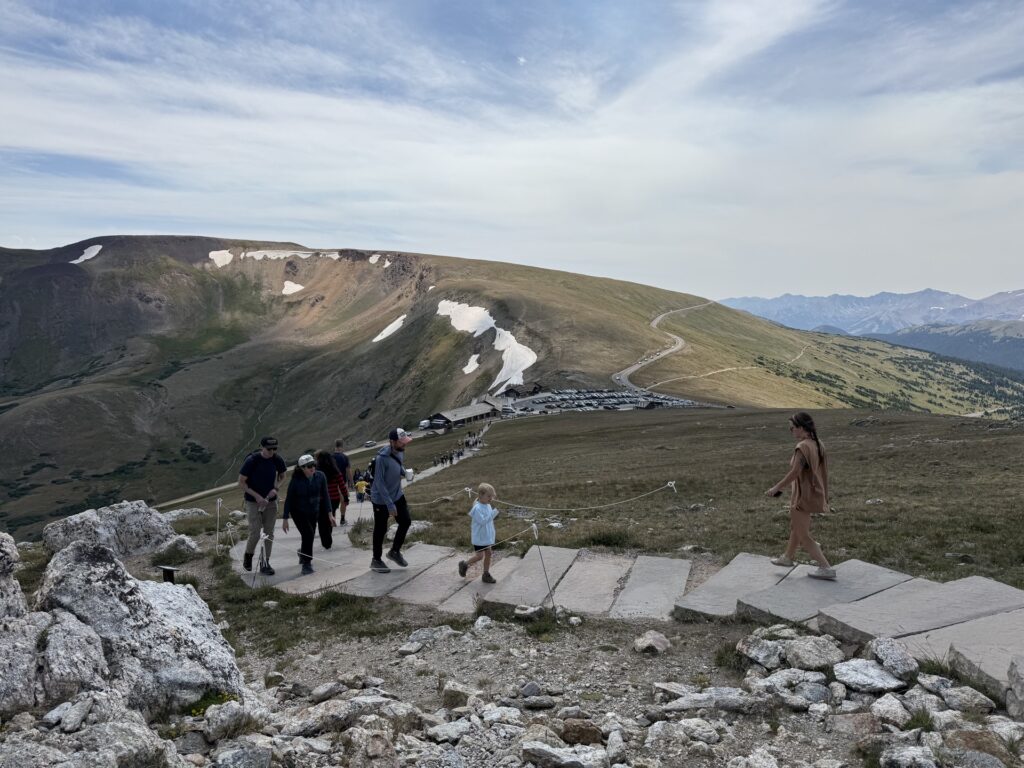
This visitor center is on most everyone’s itinerary, and it gets very crowded. There’s a large parking lot, but it often reaches capacity. If you’re arriving midday, expect to take a few laps before you find a spot.
Note! The Alpine Visitor Center sits in the Alpine at just under 12,000 ft of elevation. The wind is strong and the UV index is high. Be sure to dress accordingly and remember your sunscreen. We all wore sun hoodies with UV protection for this trip, which worked out great. (We particularly loved this one for kids!)
Hidden Valley / Junior Ranger HQ
After the visitor center, head back down Trail Ridge Road toward Estes Park. On your way back, you’ll pass Rainbow Curve, then Many Parks Curve, and shortly after that is the turn off for Hidden Valley Road. (You can follow Google Maps to here.)
It’s called Junior Ranger HQ, but don’t get too excited. There’s a small shop, which does primarily sell Junior Ranger and kid-centric merchandise. You can also pick up a Junior Ranger book here (which you can also get at any visitor center.) But other than that, it’s not a must-do for Junior Rangers.
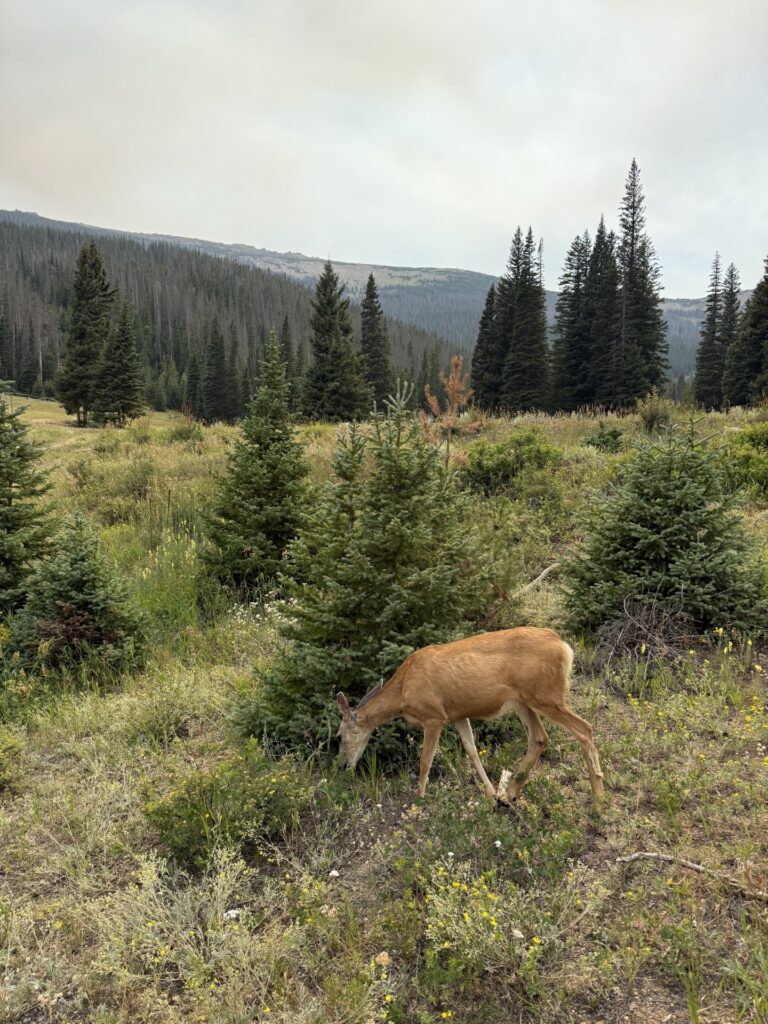
It’s worth stopping here though, to hike the short Hidden Valley nature trail. The easy, accessible trail is mostly flat and less than a half mile. It’s great for animal spotting (Elk are often seen here), and there are informative signposts along the way.
Got more time? If you are finished early and have the appetite for another short hike, you could tack on the Alluvial Fan. It’s a short (<1 mile) hike with pretty little waterfalls and rapids.
Sheep Lakes
After you leave Hidden Valley, head toward the Fall River Entrance. Before you leave the park, make a quick stop at Sheep Lakes. These two small lakes are an oasis for many local residents. Specifically, moose and big horn sheep are known to visit these lakes on summer afternoons.
You can’t guarantee an animal sighting of course, but it’s worth going a little bit out of your way for to see if there’s anything to see.
Note! If animal(s) are in the area, they tend to draw a crowd. Often times, the small parking can fill up when something exciting is happening. Exercise caution and be sure to follow all parking and driving regulations. (We unfortunately had to settle for a drive-by from the parking lot.)
Evening in Estes Park
After your full day in Rocky Mountain National Park, it’s time to relax — and eat! Head back to the main street and riverwalk area for dinner, drinks, and/or ice cream. Then, get some sleep because tomorrow is a big day of epic hiking.
Tip! Check the Estes Park events calendar for any special events during your visit. For example, Performance Park often hosts free outdoor concerts in the summer.
Day 2: Day Hike to Sky Pond
- Sky Pond via Glacier Gorge Trail
On your second day, it’s time to tackle one of the more challenging trails at Rocky Mountain National Park: Sky Pond. This difficult, at times technical trail, clocks in at about 9 miles with about 1,750 ft of elevation gain. The effort does not go unrewarded.
Reminder! This trailhead is on Bear Lake Road, which requires a timed entry permit from 5 AM – 6 PM from mid-May through Mid-October.
Note: You can read more about this trail, including the map, on AllTrails here.

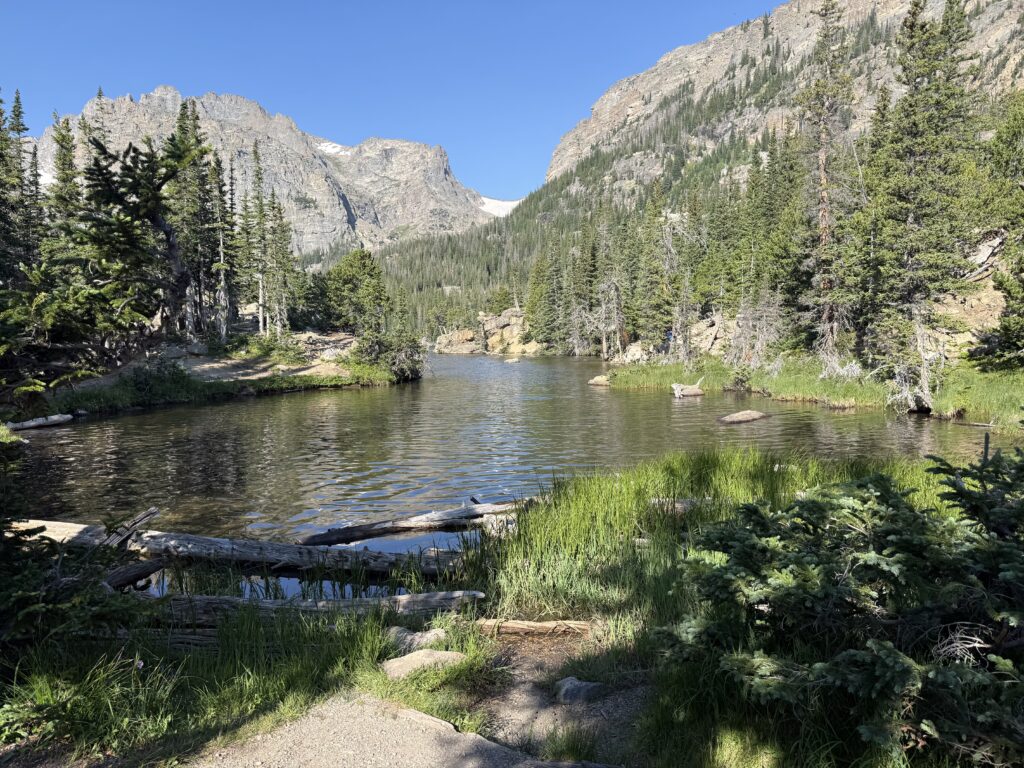
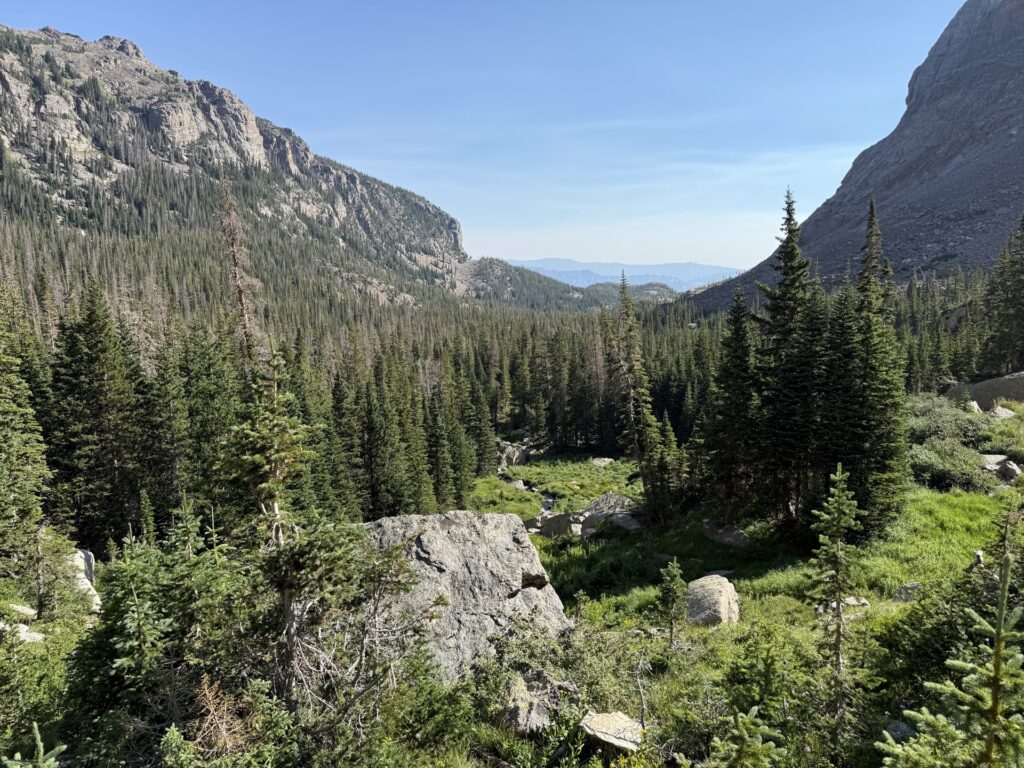
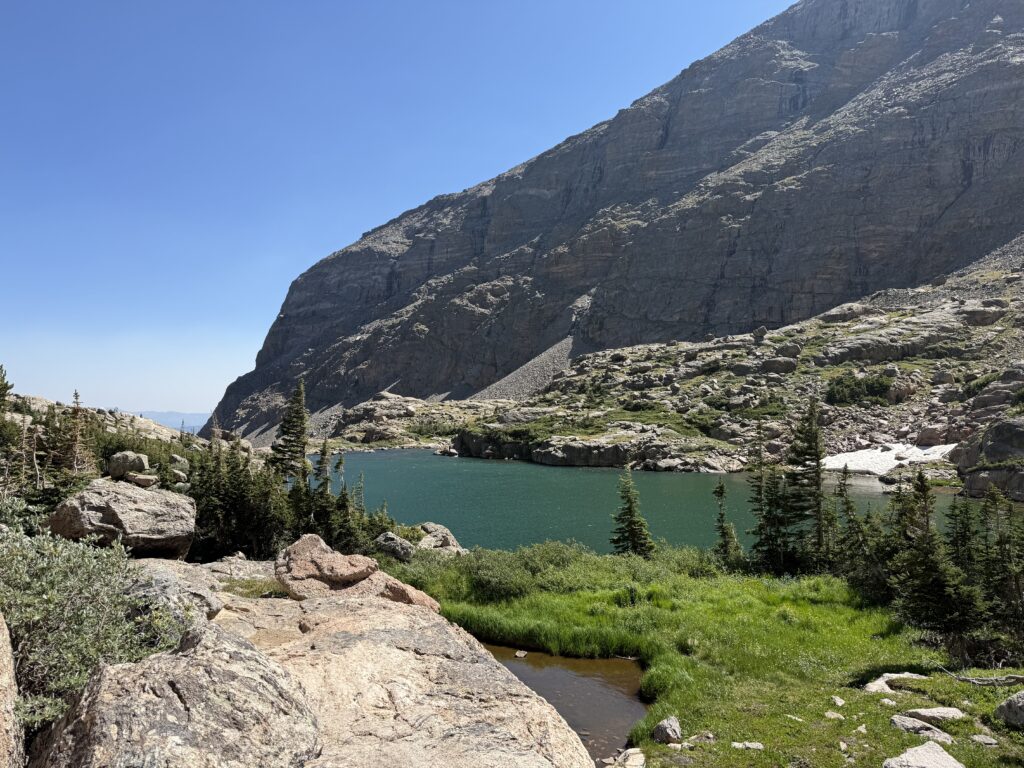
The ultimate destination of this trail is Sky Pond, an alpine lake at almost 11K feet of elevation. The lake itself is lovely, but as the saying goes, it’s about the journey.
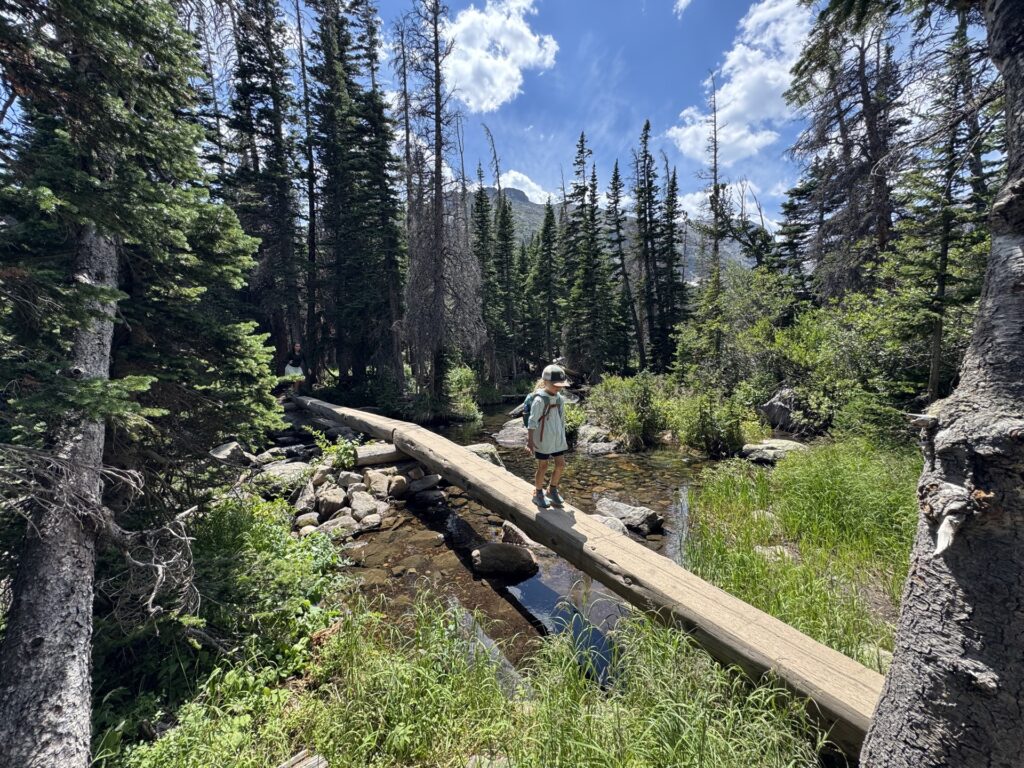
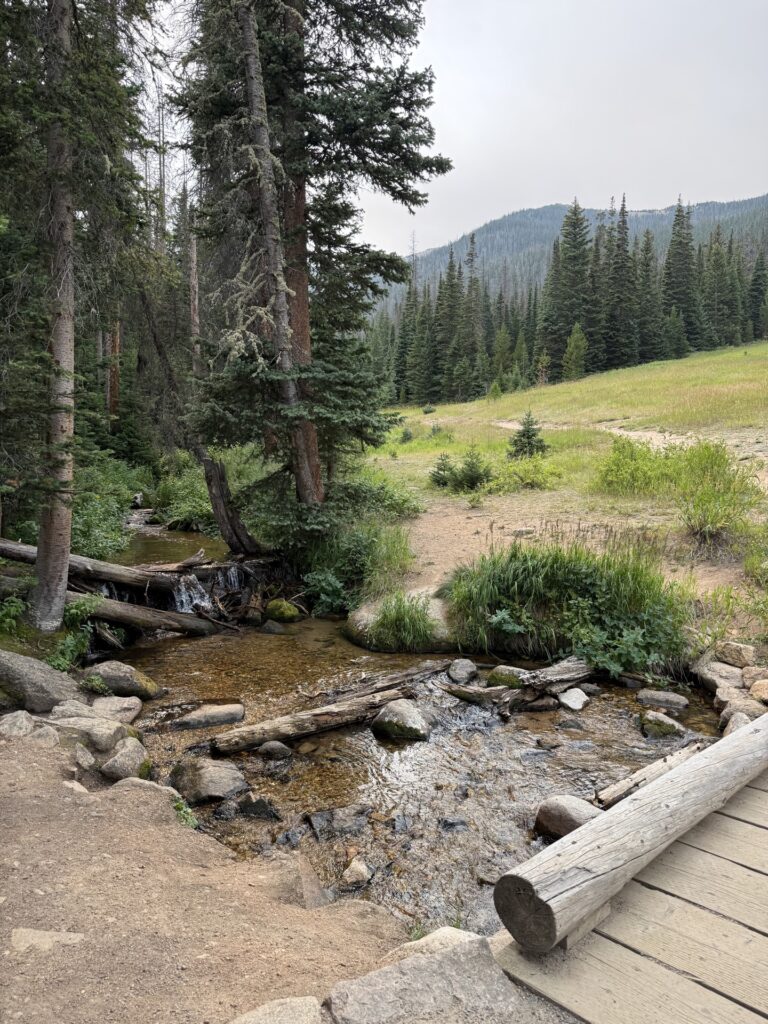
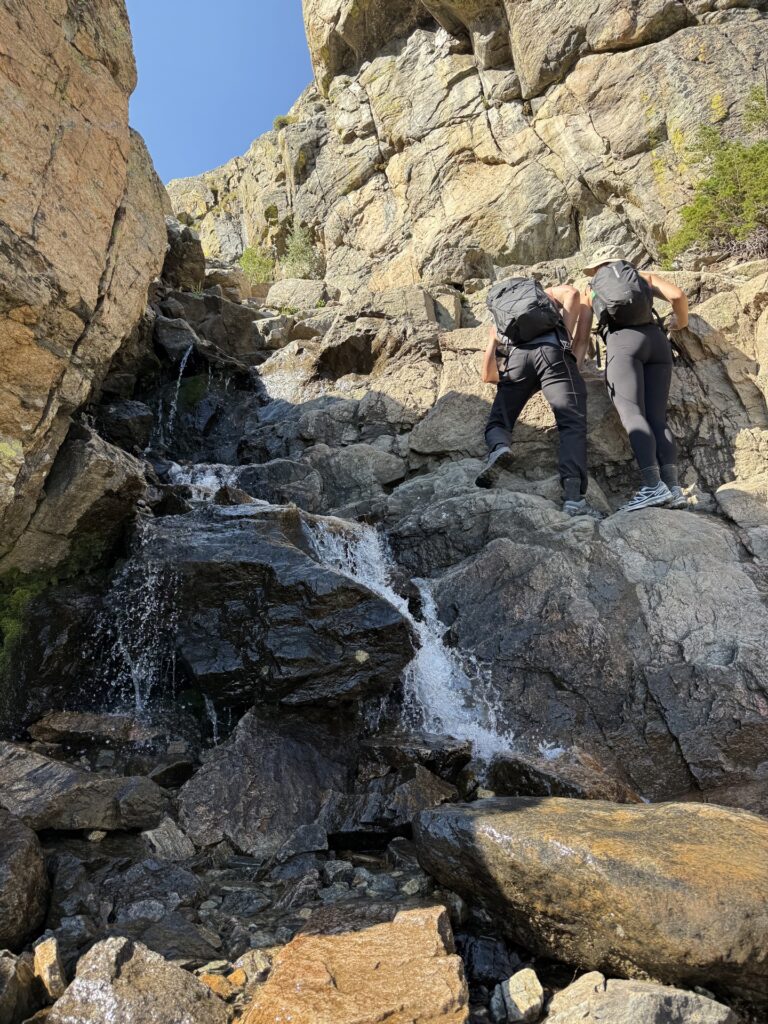
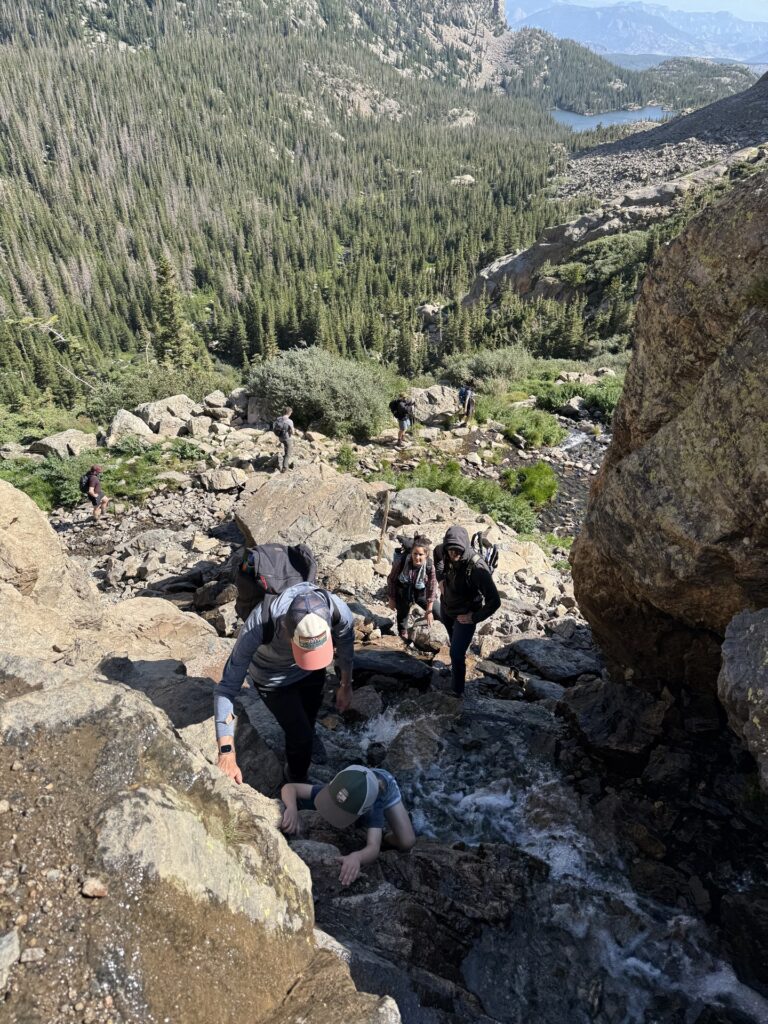
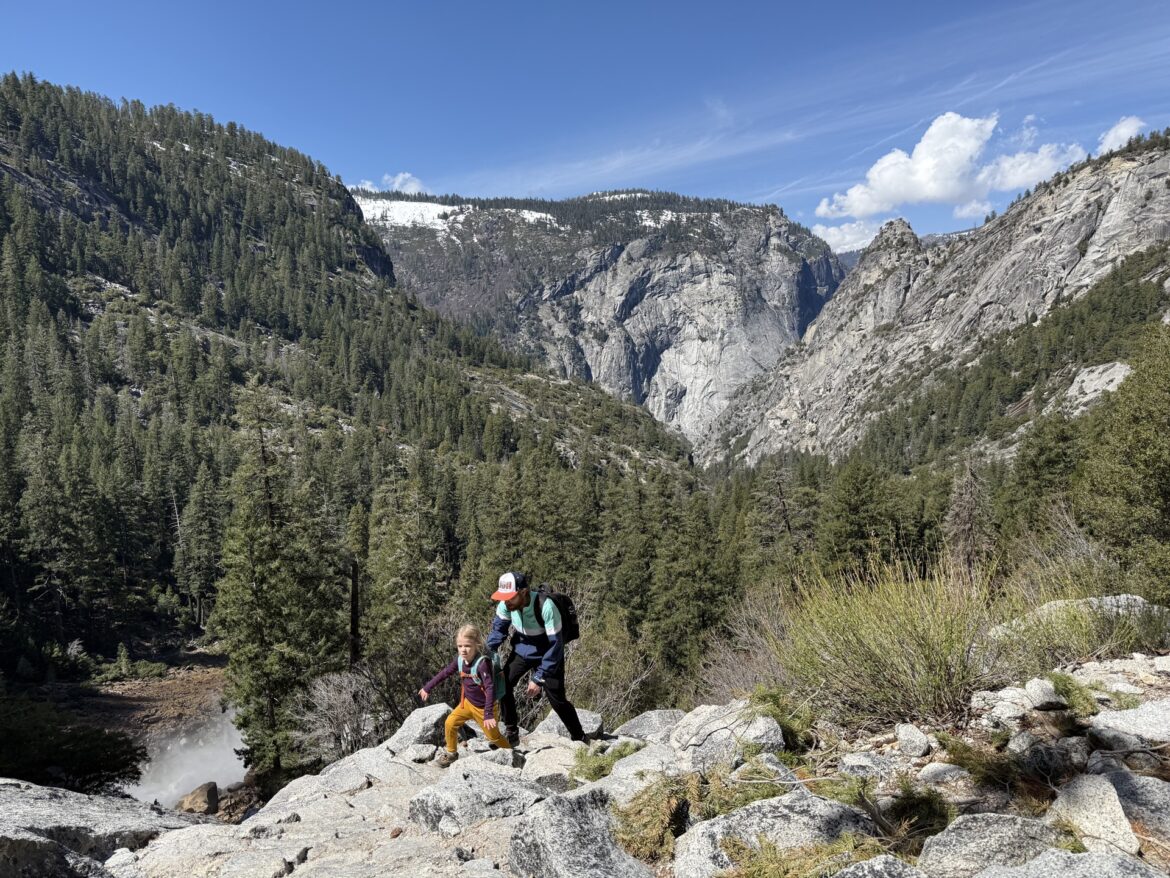
As your make your way to the alpine lake, you’ll pass Alberta Falls, wander through conifer forests, cross wooden bridges over babbling streams and most famously — climb up a waterfall.
The waterfall portion of this trail is the most challenging. It is a relatively short stretch, but a near-vertical climb. It requires sure footing, fairly large steps, and a willingness to get a little wet.
Personal experience: This trail is not an easy trail for kids, but it is possible. Our child was just shy of 5 years old when we hiked this trail. They are a pretty strong hiker and have shown an affinity for climbing, which helped. It took us 7 hours, round trip, from the Bear Lake Trailhead.
After the waterfall, you’ll be at Lake of Glass. This lake is gorgeous, but it can be very windy and cold here. It can be a little tricky to find and follow the trail, as it goes up and around the boulders and rocks. Keep going though, keeping the lake to your left, and you’ll get to Sky Pond shortly after. Sky Pond should be more pleasant, but might still be cold and windy, even in the summer.
For this hike, you’ll again want to start early — to be the crowds and heat, and to find parking. As far as parking goes, you have three tiered options: Glacier Gorge Trailhead (best location, very few spots), Bear Lake Trailhead (little longer hike, large lot, but fills up by about 7 AM during peak season), or the Park & Ride (a much larger lot with shuttle service to the trailhead.)
Depending on where exactly you start your hike and your ability, this hike can take 6 to 8 hours. Be sure to bring a lunch, plenty of snacks, and lots of water, especially during the summer months. Reminder, you’re hiking at a high elevation and scaling upwards, so you’ll need more water than you might be used to.
This is a difficult and long trail, so take your time and enjoy the experience. When you’re done, head back to Estes Park and relax for the rest of the afternoon. And when it’s finally dinner time, it’s the perfect day to go to Penelope’s Old Time Burgers — you earned it!
Day 3: Lake-hopping
- Bear Lake
- Nymph Lake, Dream Lake & Emerald Lake
- Lake Haiyaha
Spend your final full day at Rocky Mountain National Park hopping from lake to lake and taking in the iconic Rocky Mountain National Park views and vibes.
All of these hikes start from the Bear Lake Trailhead. There is a parking lot at Bear Lake, but it fills up quickly (often by 7 AM during peak season.) If you don’t make it into this lot, continue on to the Park & Ride and take the shuttle to the Bear Lake Trailhead.
Reminder! This trailhead is on Bear Lake Road, which requires a timed entry permit from 5 AM – 6 PM from mid-May through Mid-October.
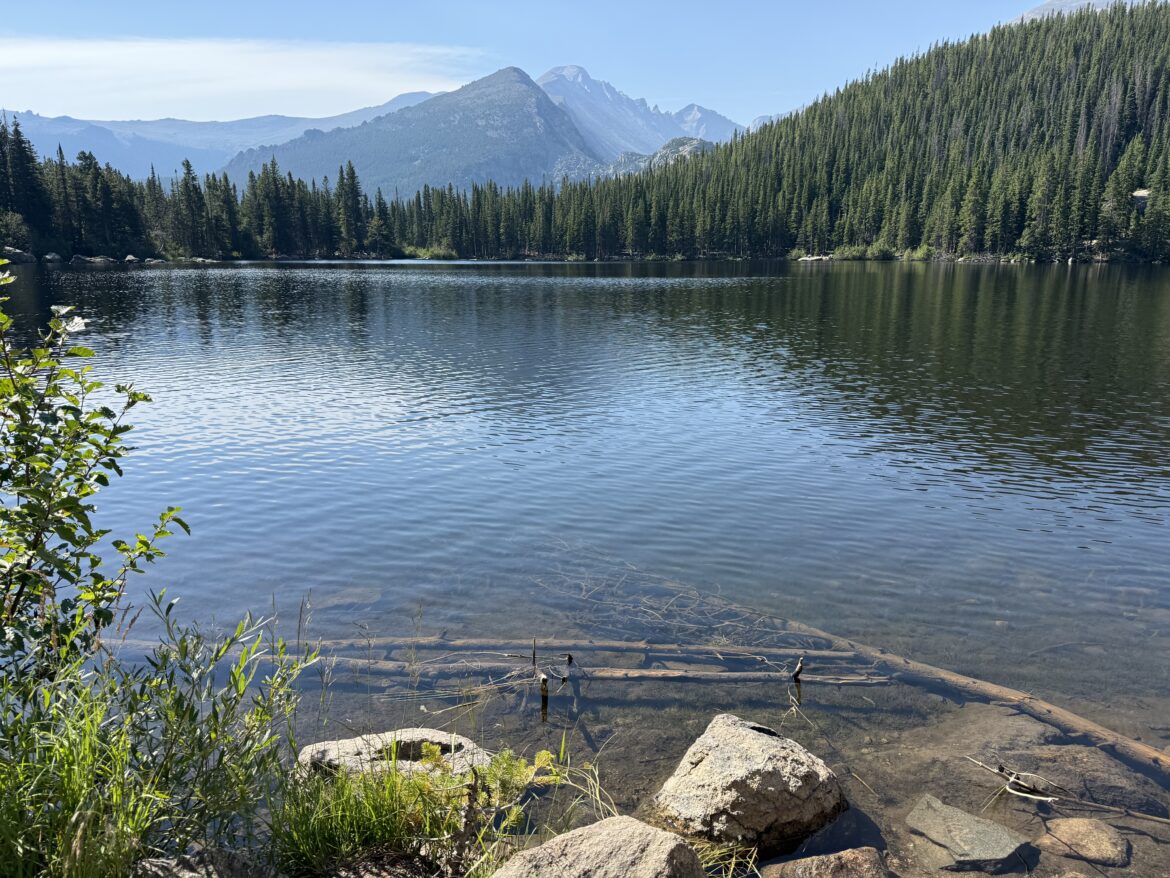
Bear Lake
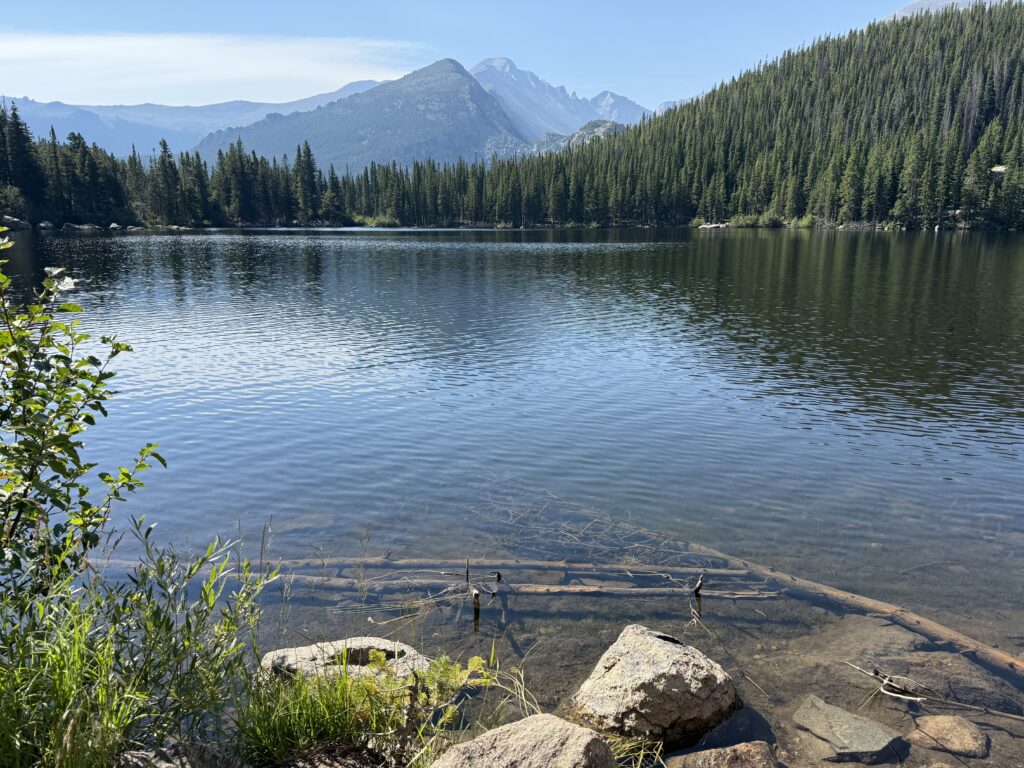
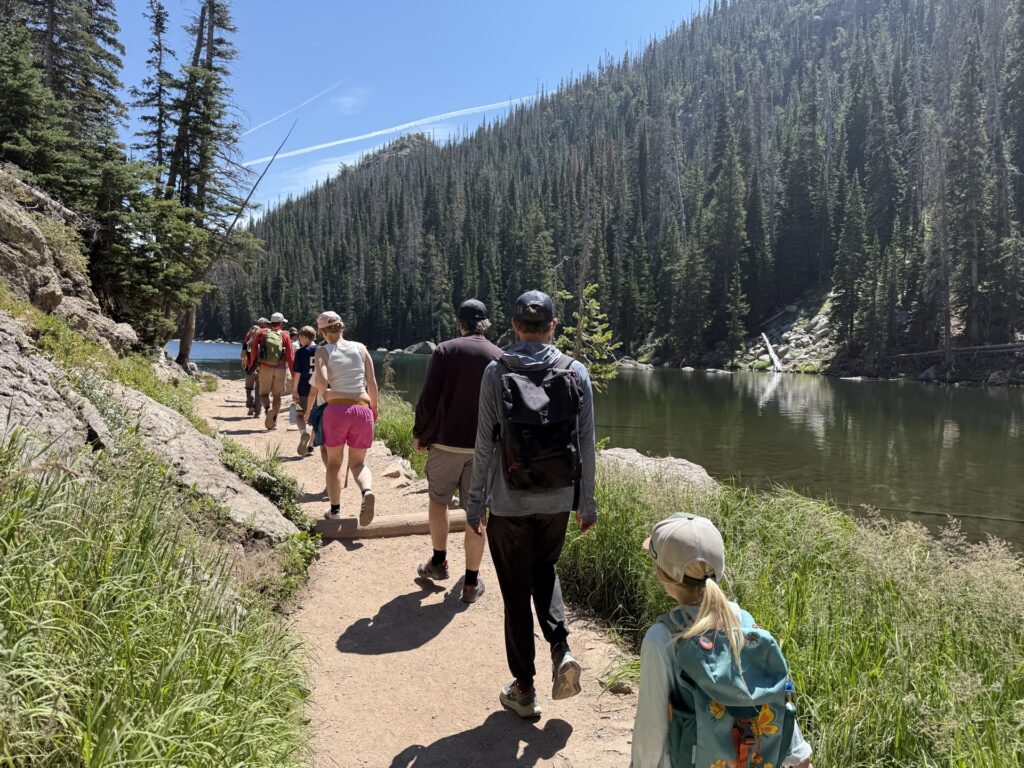
Start your day with an easy stroll around Bear Lake. This lake is just steps away from the parking lot. There’s a short (0.6 miles) loop trail around the lake that is perfect for little kids and families. Though short in distance, this trail delivers big beauty. It’s easy to understand why this is one of the most visited placed in the park.
Tip! If you have a Junior Ranger, this hike has a lot of great spots to complete the different activities in your booklet.
Nymph Lake, Dream Lake & Emerald Lake
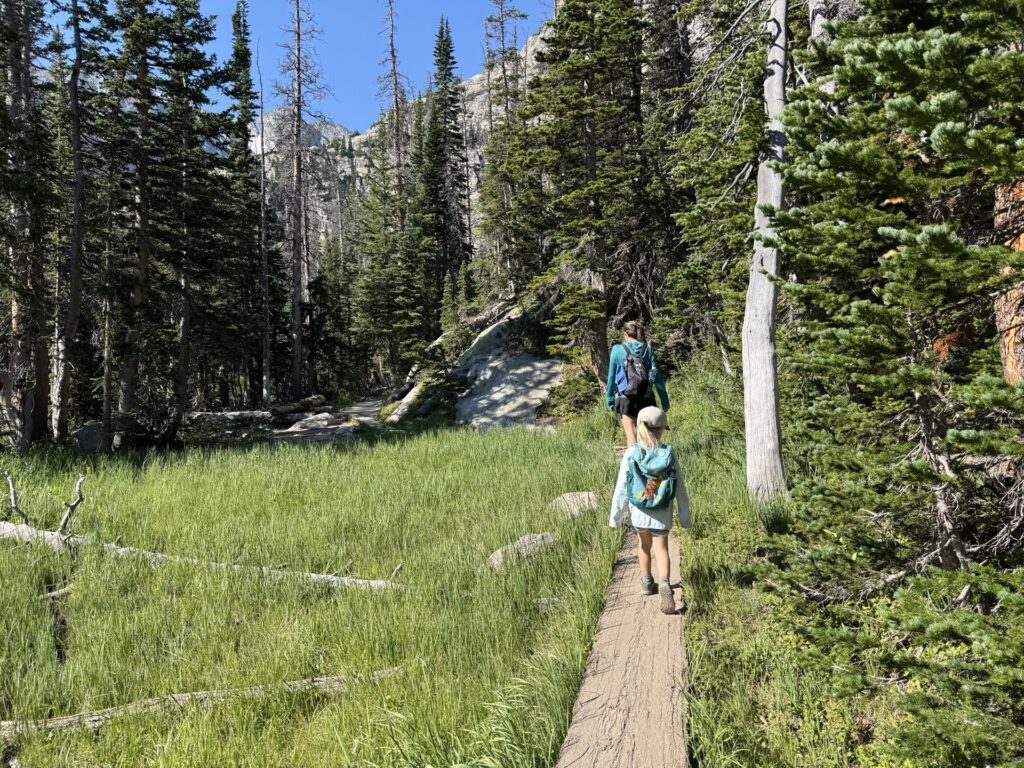
Next, you’ll head away from Bear Lake and toward the first trio of lakes. These three are all along a single trail, each a little higher than the last. It’s an uphill hike there, but not overly steep. There are some steps and hills, but no intense switchbacks.
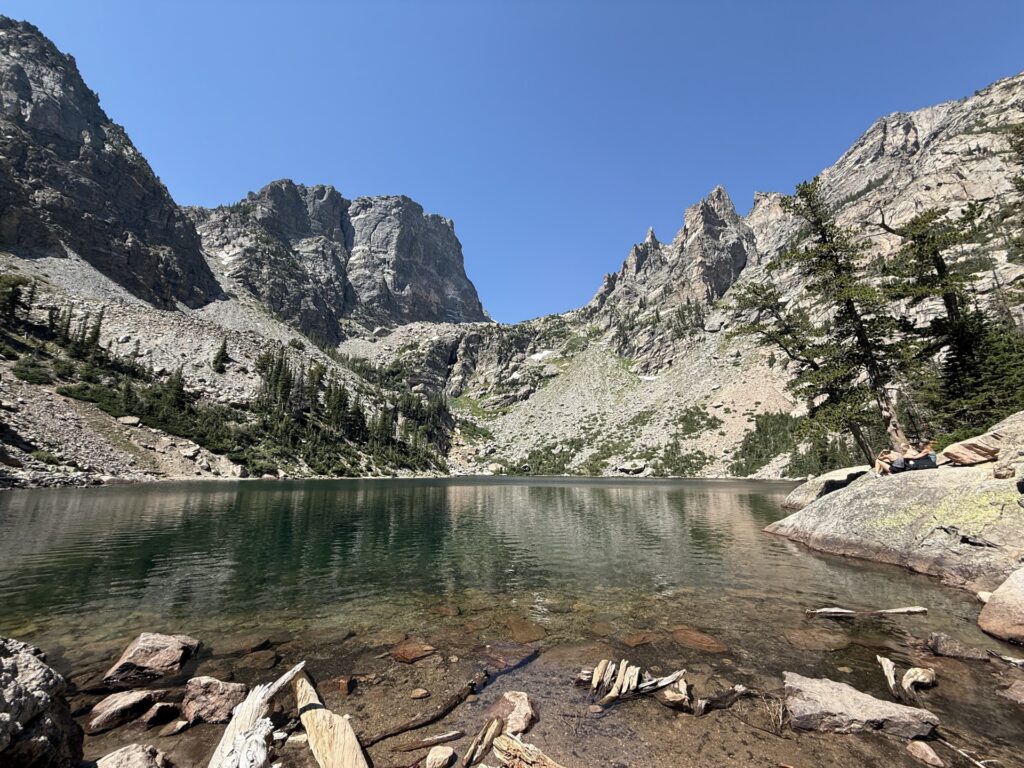
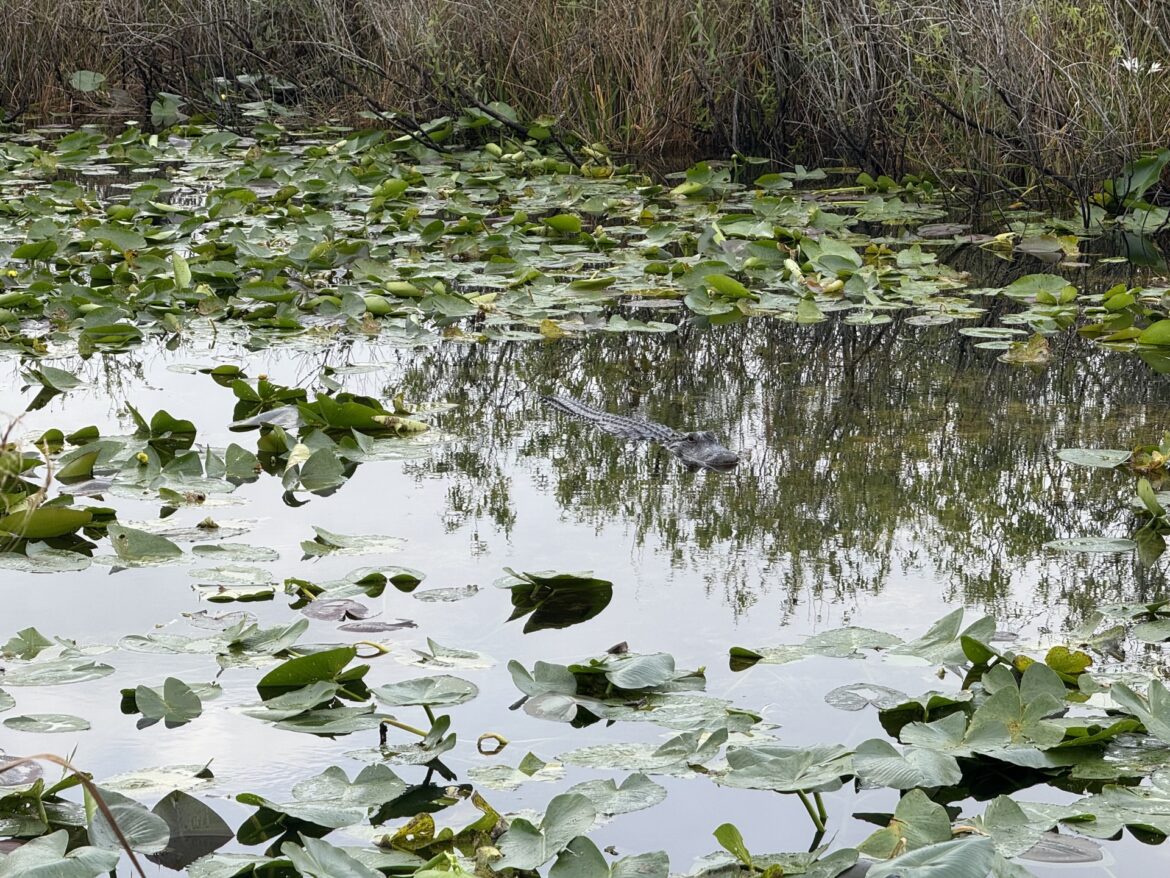
You’ll reach Nymph Lake first, which is known for its lily pads in the summer. Next is Dream lake, which is an absolute stunner. Then the trail itself hugs the lake in one of the most beautiful sections of this entire hike — thanks in large part to the many boardwalks. Lastly, you’ll reach Emerald Lake, which is the largest of the three.
The stretch from Bear Lake to Emerald Lake is about 1.6 miles one way and 775 feet of elevation.
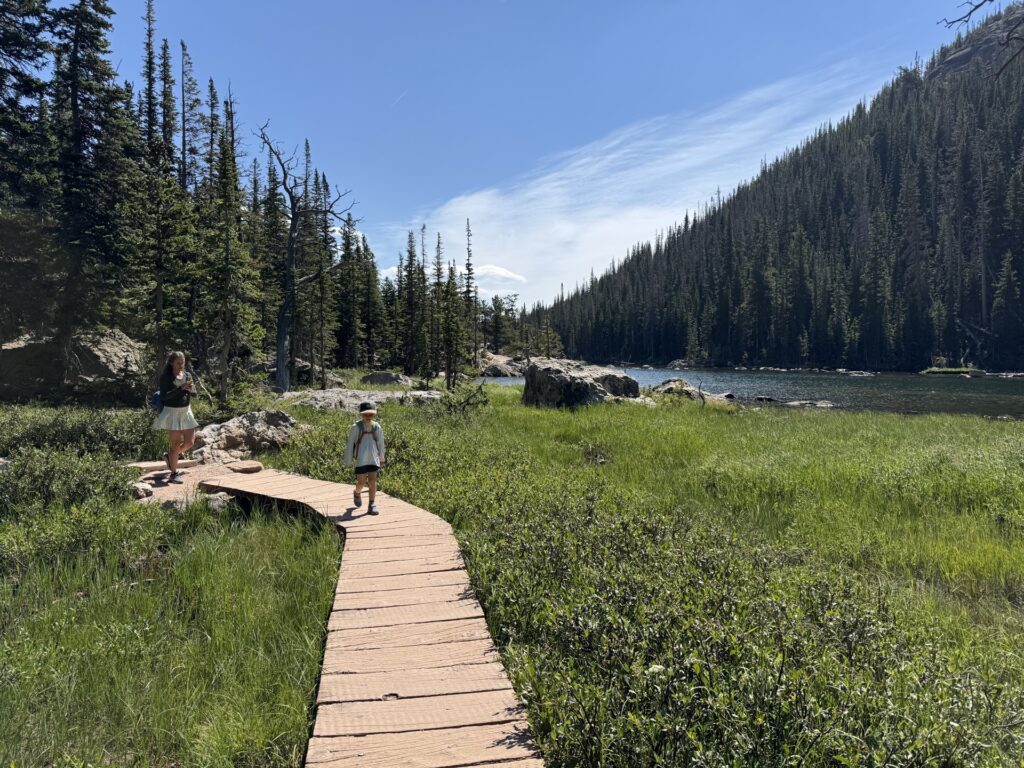
Tip! As the final destination on this trail, Emerald Lake gets very crowded. If you’re looking for a place to relax, Dream Lake may be more peaceful. There’s also a small waterfall between Emerald and Dream Lakes that makes a perfect picnic spot.
This trail is another very popular trail in a very popular National Park. (That’s another reason you might want to start this one early.) Expect crowds on the trail from mid-morning to late afternoon .
After you reach Emerald Lake, you’ll turn around and hike back the way you came. After passing Dream Lake, you’ll veer off and head to Lake Haiyaha.
Lake Haiyaha
From Dream Lake to Lake Haiyaha, it’s about 1 mile and 300 ft of elevation, most of which you’ll climb in the first half mile. It’s a hard start, but stick with it because Lake Haiyaha is (I think) the most stunning of all the lakes in Rocky Mountain National Park.
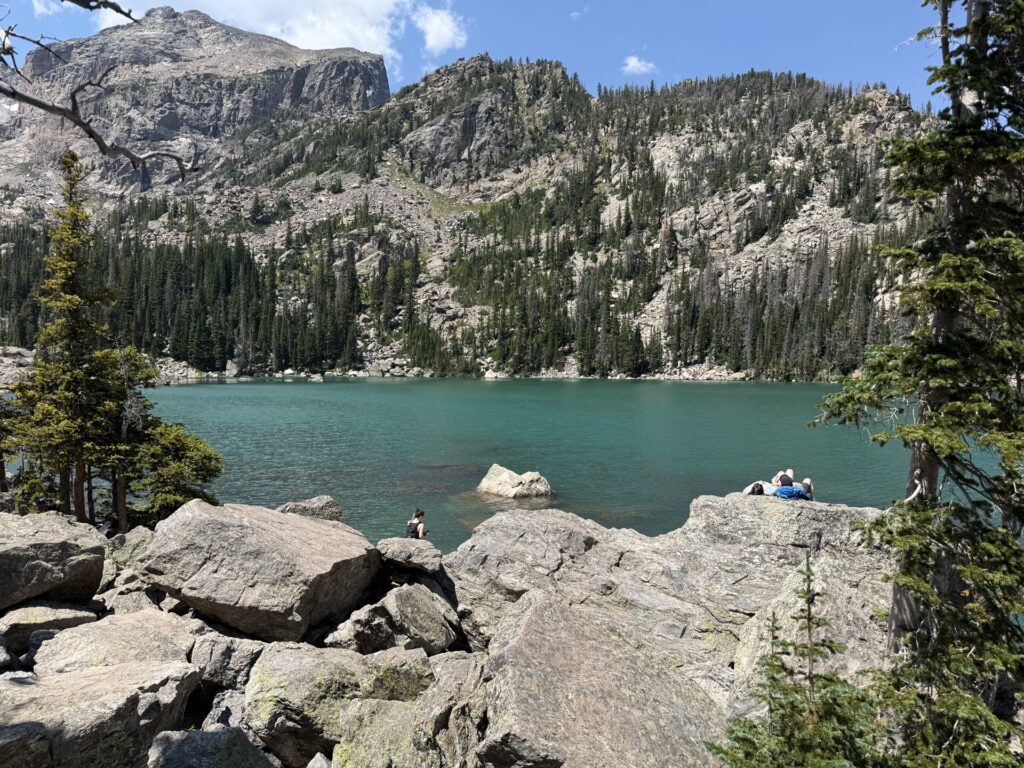
This trail really has it all. Sweeping cliff-side views, scenic stream crossings, some light scrambling, and of course, a turquoise blue lake at the end. There are a few exposed sections, so keep smaller hikers close by. Overall, this is a lovely trail with so many incredible views.
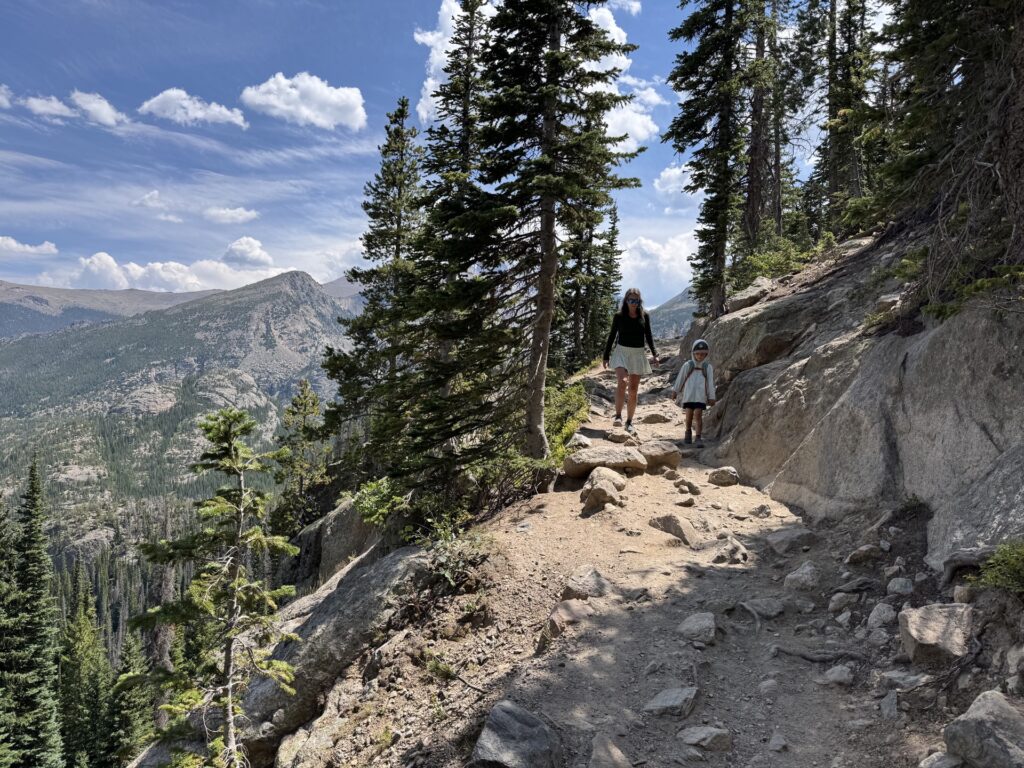
One of the trickier sections of this trail is the approach to the lake itself. The well-marked trail eventually hits a boulder field for the final few hundred feet. You’ll have to do some scrambling up, over and through the rocks to make it to the lake. Once you get to the lake, you’ll have to do a bit more to find your favorite sitting spot. It’s worth it though.
After a relaxing visit to Lake Haiyaha, you’ll turn around and hike all the way back to Bear Lake — about 2 miles. In total, the hike from Bear Lake to Emerald Lake and Lake Haiyaha and back, is about 5 miles.
Evening in Estes Park
After another beautiful day of hiking, retreat back to Estes Park for one final evening. Now is the time to buy that Rocky Mountain National Park tee or the salt water taffy you’ve been eyeing. Take a final stroll on the riverwalk and tap yourself on the back for a great three days of hiking at Rocky Mountain National Park.
Personal Recommendation: If you’re looking for ice cream, Pines & Cones was our favorite. They have a great line up of classic and interesting flavors and super friendly service.
Is 3 days enough time at Rocky Mountain National Park?
Rocky Mountain National Park is a huge park with over 350 miles of hiking trails. Three days is certainly not enough to see and do everything, but it’s definitely enough to hit the highlights.
Honestly, I’d say that three days is pretty generous. In that amount of time, you’ll be able to drive the scenic road, go on several hikes, and view the park from a variety of angles and elevations. I’d say that very few people need more time, and some could even get by with 1 or 2 days.
All things considered though, I think three days is the perfect amount of time for Rocky Mountain National Park.
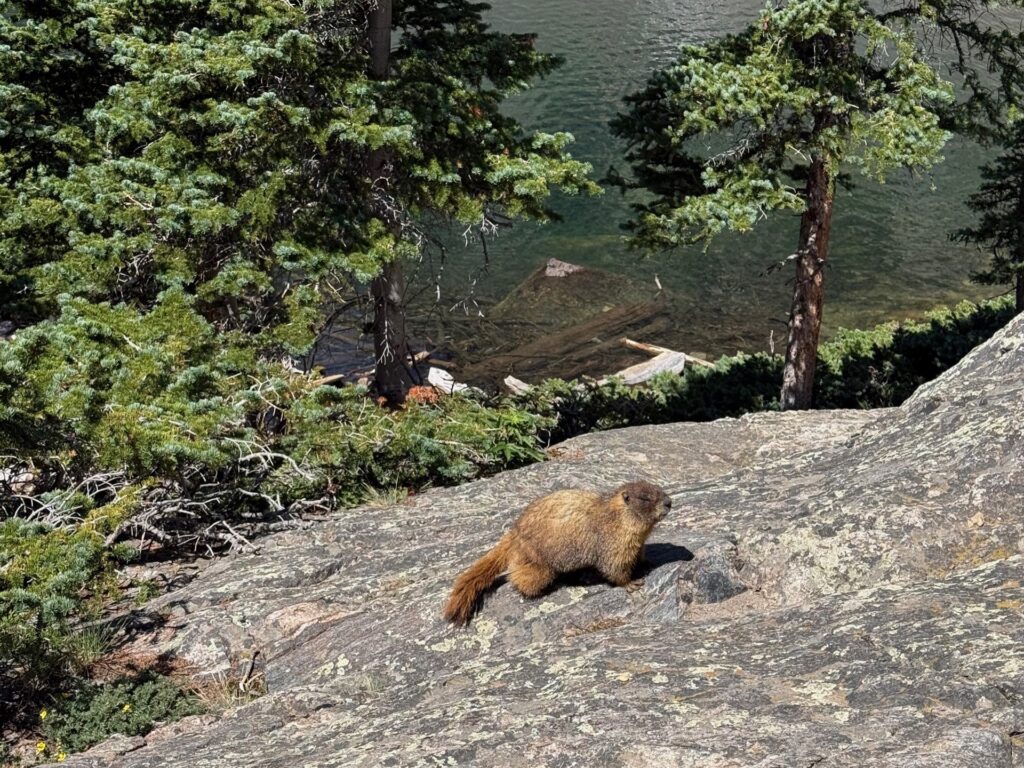
So long, from me and my fearless little marmot friend I met at Emerald lake.
Dreaming of other National Parks?
Check out some of our other National Parks posts.

Leave a Reply