
Canyonlands National Park, located just outside Moab, UT, is known for its deep canyons, dramatic striped sandstone spires, and cinematic views of sprawling desert and distant mountains. It is unique in its accessibility — you can see and experience these views with relative ease and little effort.
Canyonlands National Park is waiting for you.
In this post, we’re going to share how to see the best of Canyonlands National Park in just one day. This detailed, 1-day itinerary — which we personally tested — will guide you through the highlights of this stunning park. We love this itinerary because it perfectly balances short, rewarding hikes, easy overlooks that showcase the park’s impressive natural landscapes, and a challenging, off the beaten path hike.
I won’t harp on it too much in this post, but Canyonlands really surprised me in the best possible way. It is such a beautiful park with amazing, unique views that are easily to get to. If you’re looking for a National Park that hovers under the radar but delivers an above average experience, Canyonlands is a great option. I would even dare to say that I preferred these canyon lands to another grand canyon you’ve probably heard of.
Keep reading for a detailed itinerary for a perfect day at Canyonlands National Park.
About this Itinerary
In this itinerary, we’ll explain how to fill one day at Canyonlands National Park. We know this itinerary works and is amazing because we personally followed it.
This itinerary sticks to the Island in the Sky district, which covers much of the northern half of the park. It features several viewpoints and a handful of short hikes, scattered along a scenic driving route. We also tacked on a challenging one that the end, which we hope you’ll try out.
For the most part, you don’t have to be an avid hiker to enjoy this itinerary, and it’s quite family-friendly. We made this trip as a family with 1 child, who turned 5 exactly 2 days later.
Note: Family friendly does not equal stroller friendly. A few of the trails and viewpoints are wheel accessible, but not all. Children should be able to safely hike on their own or be warn in a carrier. When our child was younger, we loved the Sakura Bloom Onbuhimo carrier for short hikes like these. (Not sponsored, just love it.)
To get the most out of this itinerary, it’s best to start early. That assumes you’ll be staying in Moab or nearby at least the night before. We personally stayed at Under Canvas Moab, which is perfect if you’re a fan of glamping. (We’ve stayed at a few of their locations and have always loved it.)
If you follow this itinerary exactly, you will likely wrap up in the late-afternoon. We personally filled the afternoon with some nearby dinosaur attractions and stayed a second night in Moab. However, this itinerary would potentially leave you enough time to drive on to your next destination (such as Zion National Park or Salt Lake City) if needed.
Canyonlands is a cold desert and the weather here is characterized by its extremes. The summers are hot and the winters are cold. The best time to visit this National Park is the temperate seasons of Spring (April – May) and Fall (September – October). Our visit was in August, so it was still quite hot.
So let’s go ahead and dive right in.
Itinerary At A Glance
- 8:30 – 9 AM: Island in the Sky Visitor Center
- 9:15 – 10 AM: Mesa Arch Trail
- 10:15 – 11:45 AM: Grand Viewpoint Trail
- 12 – 12:30 PM: Picnic Lunch
- 12:30 – 2 PM: White Rim Overlook Trail
- 2:15 – 2:30 PM: Green River View Point
- 2:45 – 4 PM: Aztec Butte Trail
- 4:15 PM: Shafer Trail Viewpoint
- 4:30 PM: Island in the Sky Visitor Center Part II (Optional)
Island in the Sky Visitor Center
Suggested timing: 8:30 – 9 AM
Start here at the Island in the Sky Visitor Center.
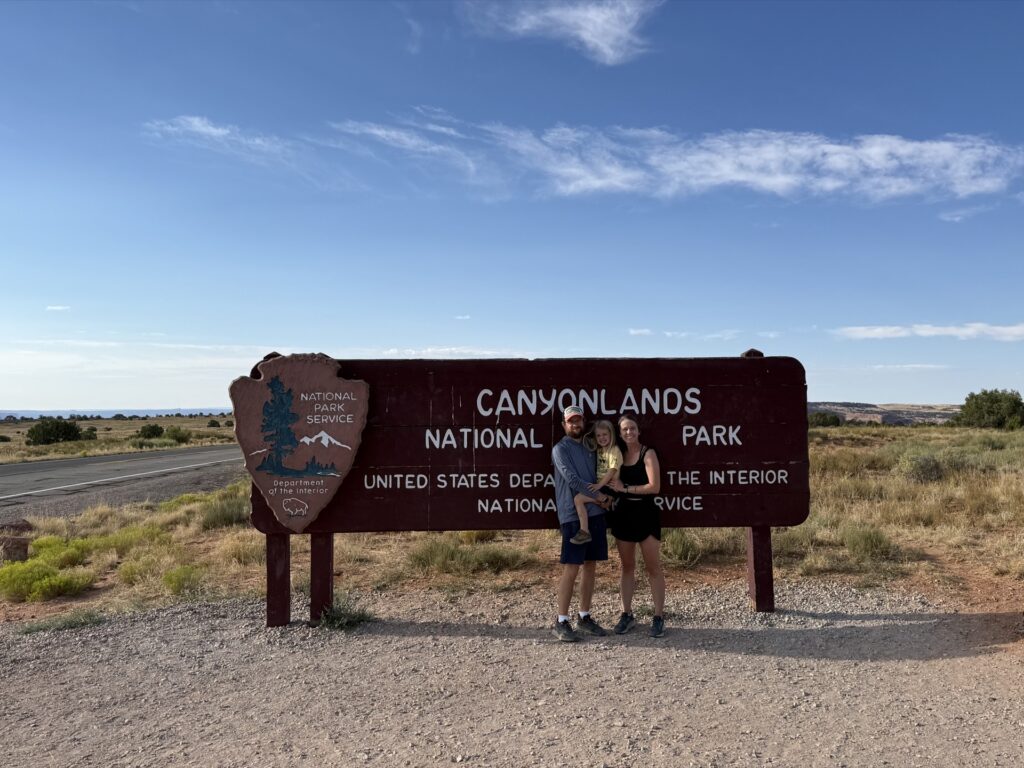
On your way there, you’ll pass the National Park Sign. There’s a pull-off area, and it’s a great place to grab that iconic photo. Or if you’re anything like us, clean up your child who couldn’t even make it to the entrance without getting car sick. (It takes a while for our car-free city kid to get used to the driving required to visit the National Parks.)
This visitor center is fairly small, but does its job.
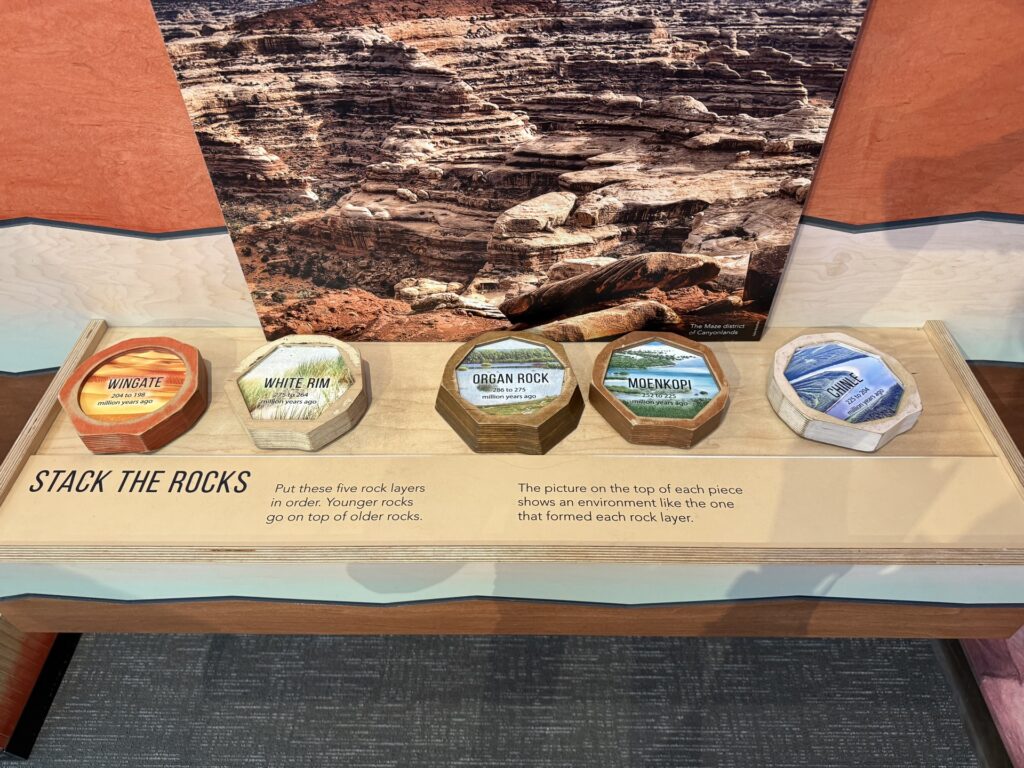
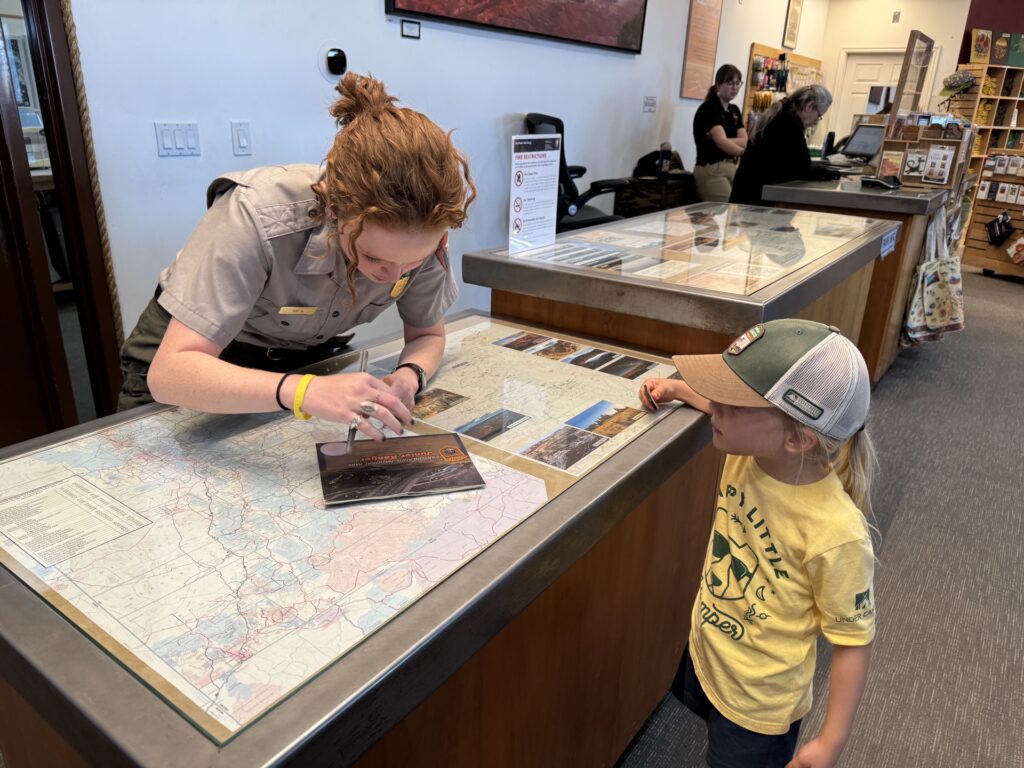
There’s a museum/learning center on one side, which has some interactive exhibits that explain the key elements of the landscape. This is also where you’ll find the Ranger Station. Feel free to chat with the ranger or ask any questions. If you’re visiting with kids, this is also where you’ll pick up a free Junior Ranger Book.
On the other side, there’s a museum shop and bookstore that includes things like books, toys, apparel, stickers, and a handful of outdoor essentials (bug spray, sun block, etc.) Of course, there’s also a stamp station inside so be sure to grab that if you’re collecting them.
The Island in the Sky Visitor Center is a fun place to start your day, but it’s also a practical one. There’s a water filling station here, plus the most luxurious bathrooms you’ll find in the park. It’s probably a good idea to visit both.
Note: The standard hours for the visitor center are 8 AM – 5 PM. However, hours are reduced in the off season. Be sure to check the exact hours and adjust your schedule accordingly.
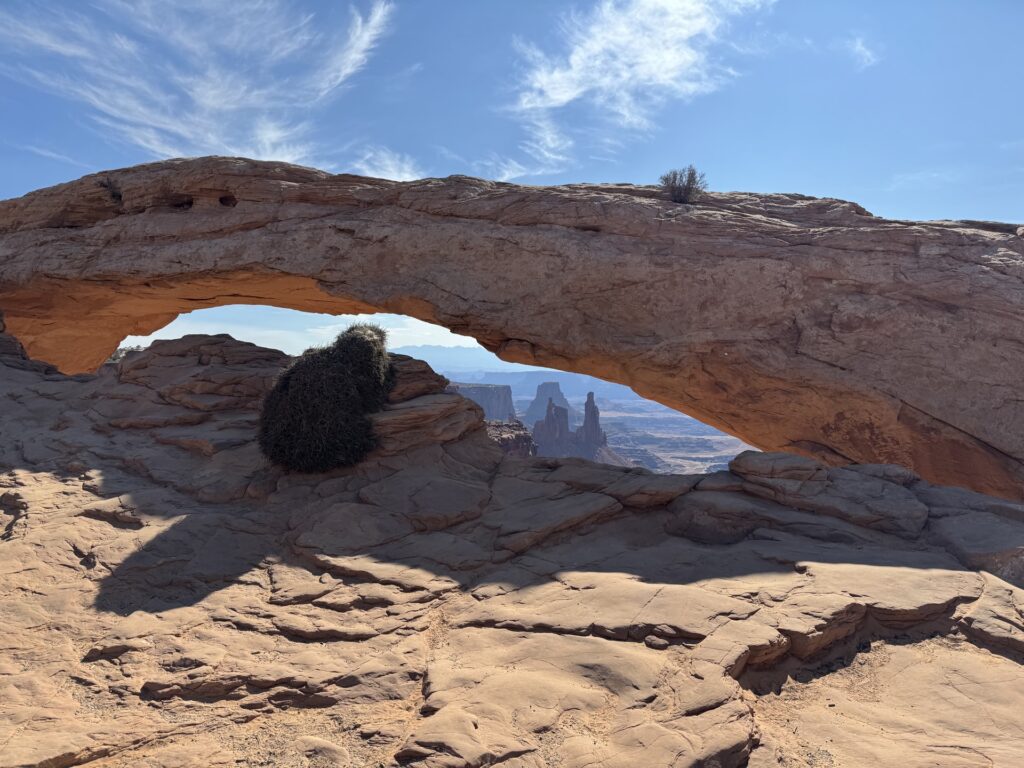
Mesa Arch Trail
Suggested timing: 9:15 – 10 AM | Distance: 0.6 miles
Continue on the main road (Grand View Point Road) for about 10 minutes and you’ll arrive at Mesa Arch Trail. This is a popular trail, particularly in the early morning for sunrise photographers. There is a small parking lot which can fill up, but turnover is often quick.
Mesa Arch Trail is a short, mostly flat loop trail that leads to Mesa Arch. It’s an easy hike with very little elevation change. Note the desert plants along the path — particularly if you have a Junior Ranger — but this hike is mostly about the destination: Mesa Arch.
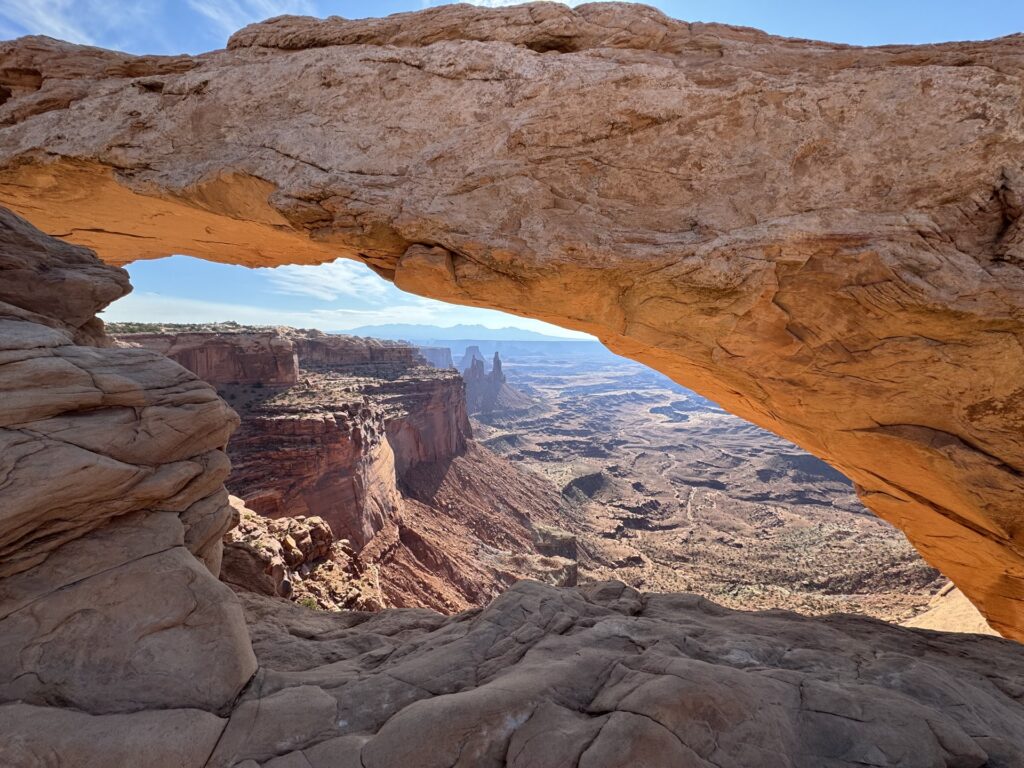
Mesa Arch is a natural rock arch that beautifully frames the La Sal Mountains and sprawling canyons. It’s most beautiful and most crowded at sunrise, but it’s impressive at any time of day.
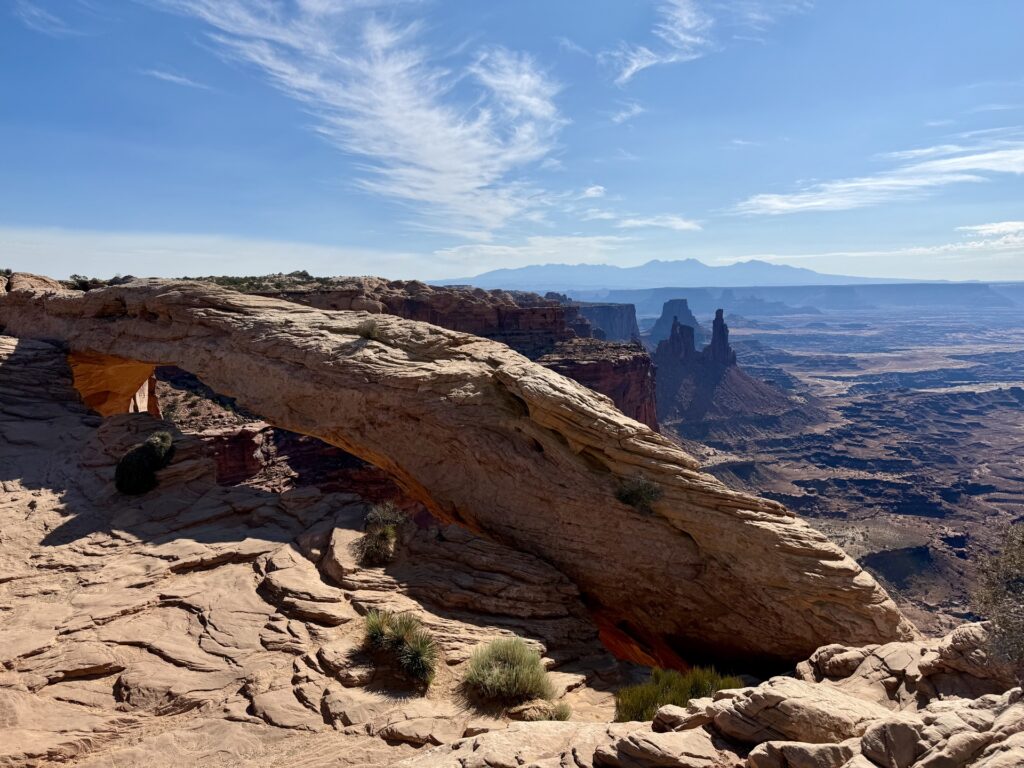
The best photos are often from right beside the arch, but some of the best views are from around it. There are a few different boulders and elevated short paths you can climb to take in the view and the arch from different angles. (Be careful, of course, and stay on the marked pathways.)
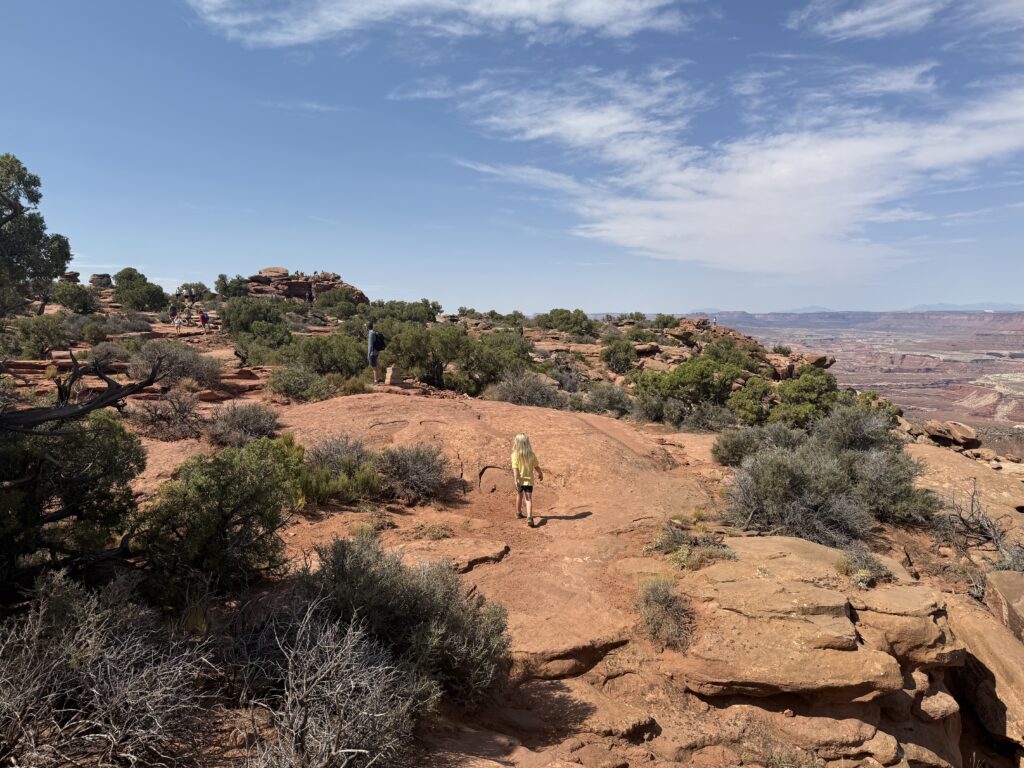
Grand Viewpoint Trail
Suggested timing: 10:15 – 11: 45 AM | Distance: 1.8 miles
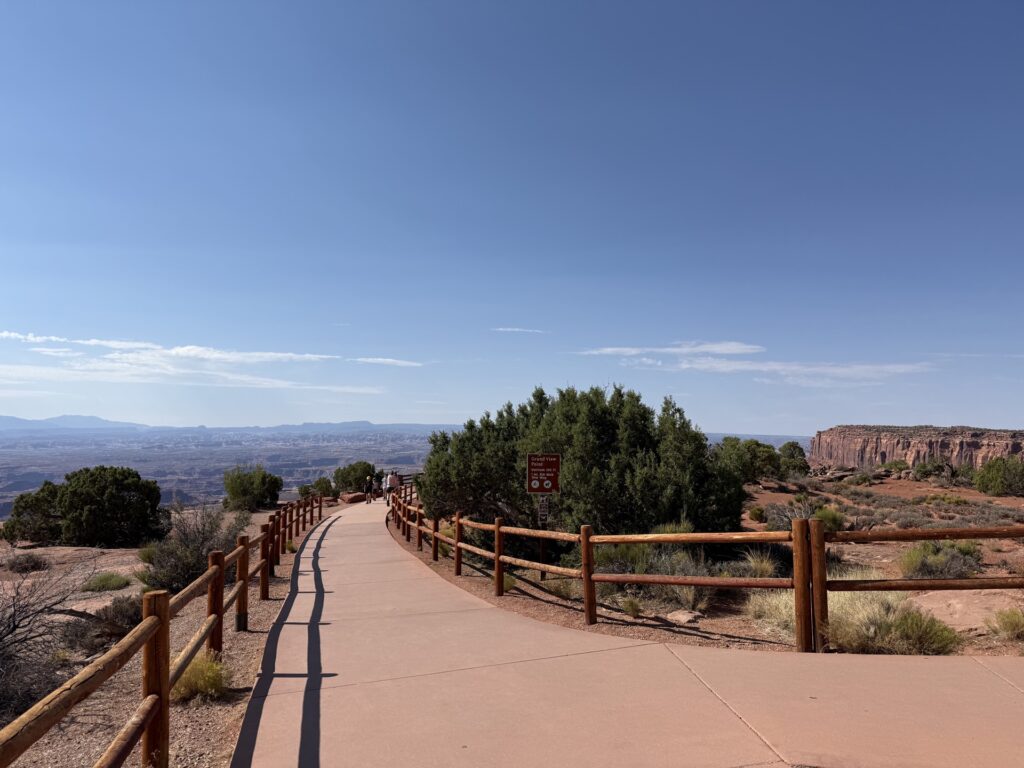
Continue south on Grand View Point Road for about 15 minutes until you reach the Grand Viewpoint Trailhead here. There’s a small parking lot as well as street parking. There’s also another small parking lot at nearby Orange Cliffs Overlook, so you can also try there if it’s really crowded.
Grand View Point Overlook is adjacent to the parking lot. It’s stunning in its own right, so it’s worth stopping here even if you’re not planning to do the whole hike. If you can hike the trail though, you should.
This out-and-back trail is longer than the last one, but the entire hike offers incredible views as it hugs the edge of the canyon the entire way. It’s a bumpy trail with some some rocky steps, but is not overly technical.
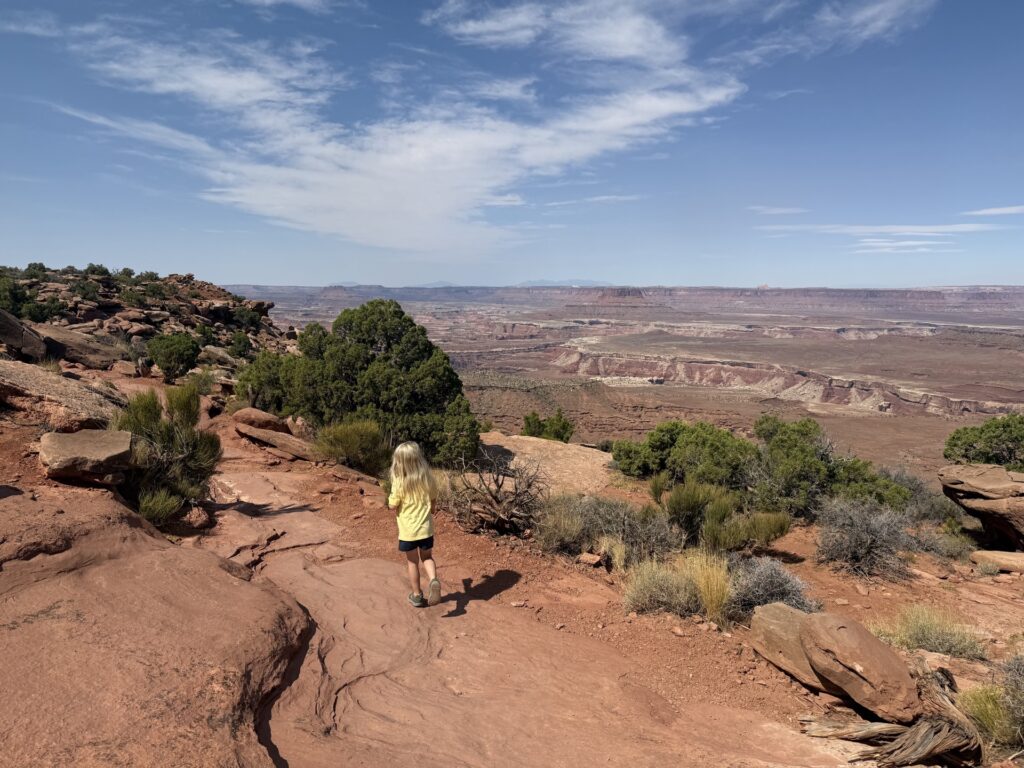
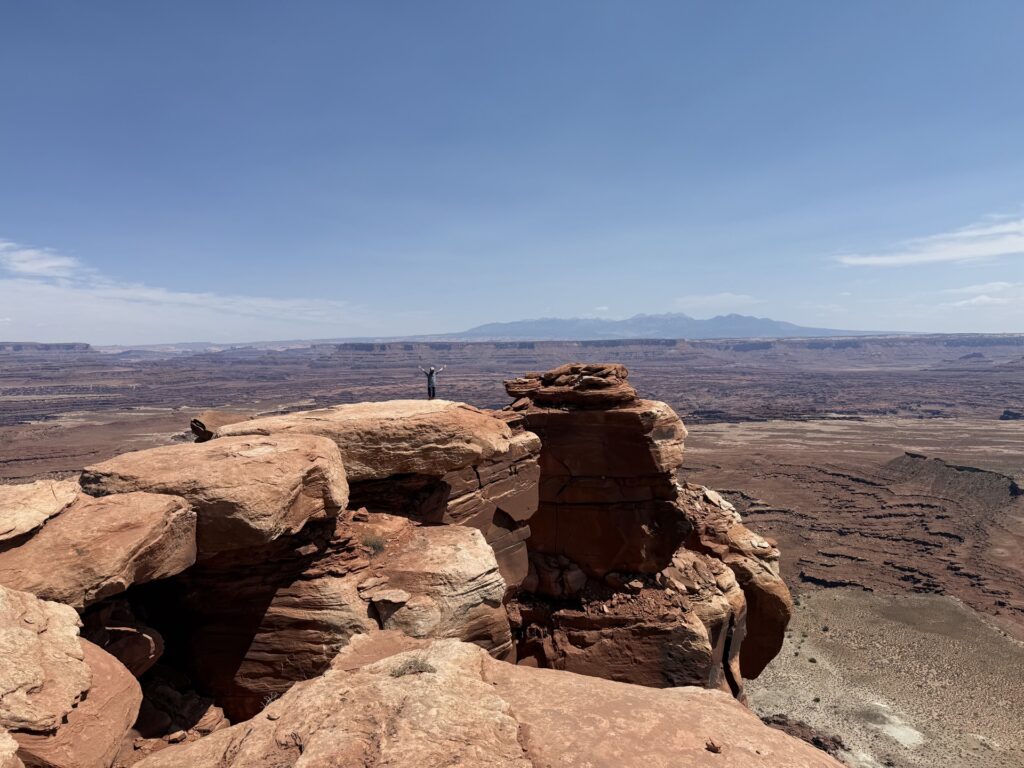
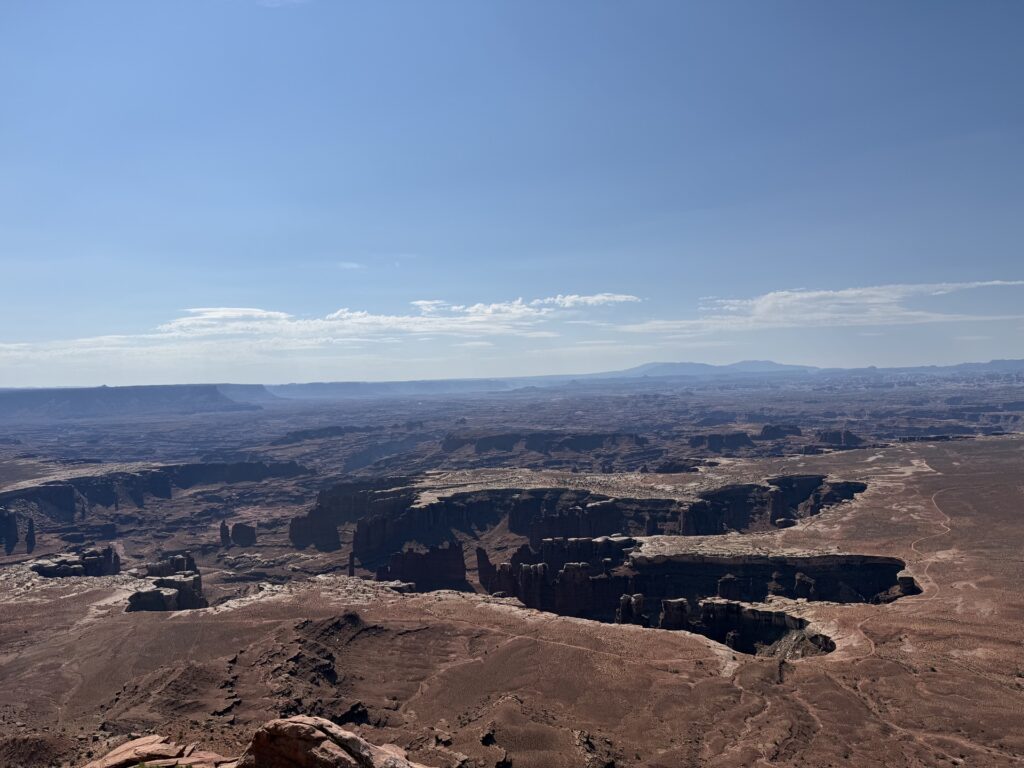
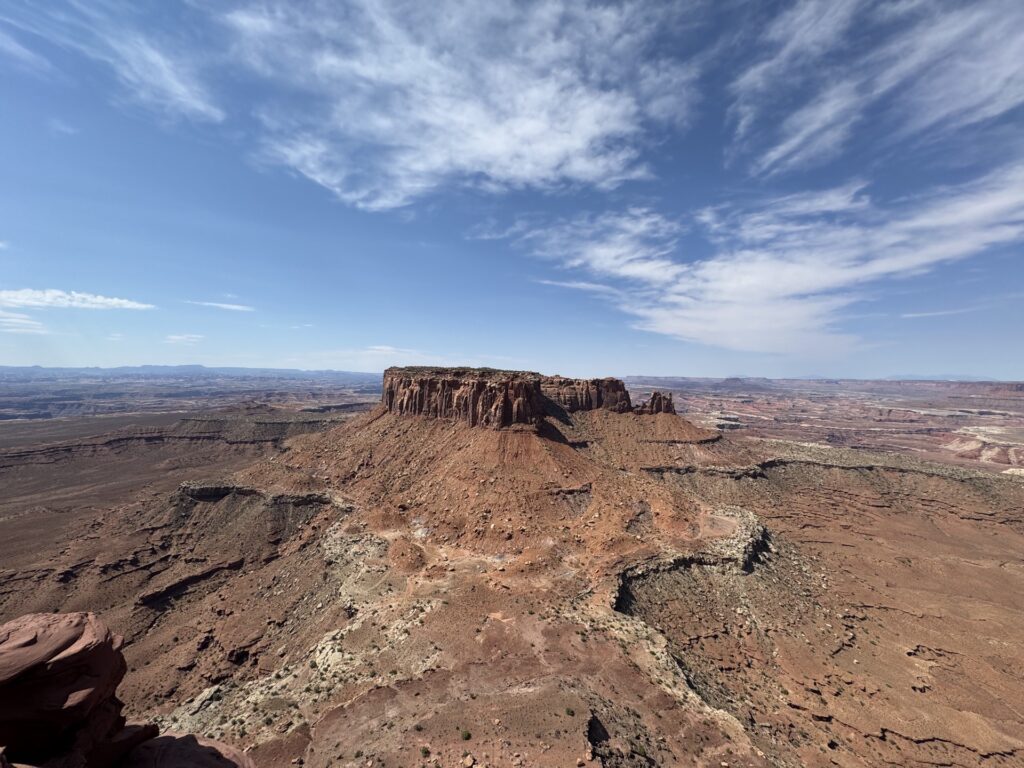
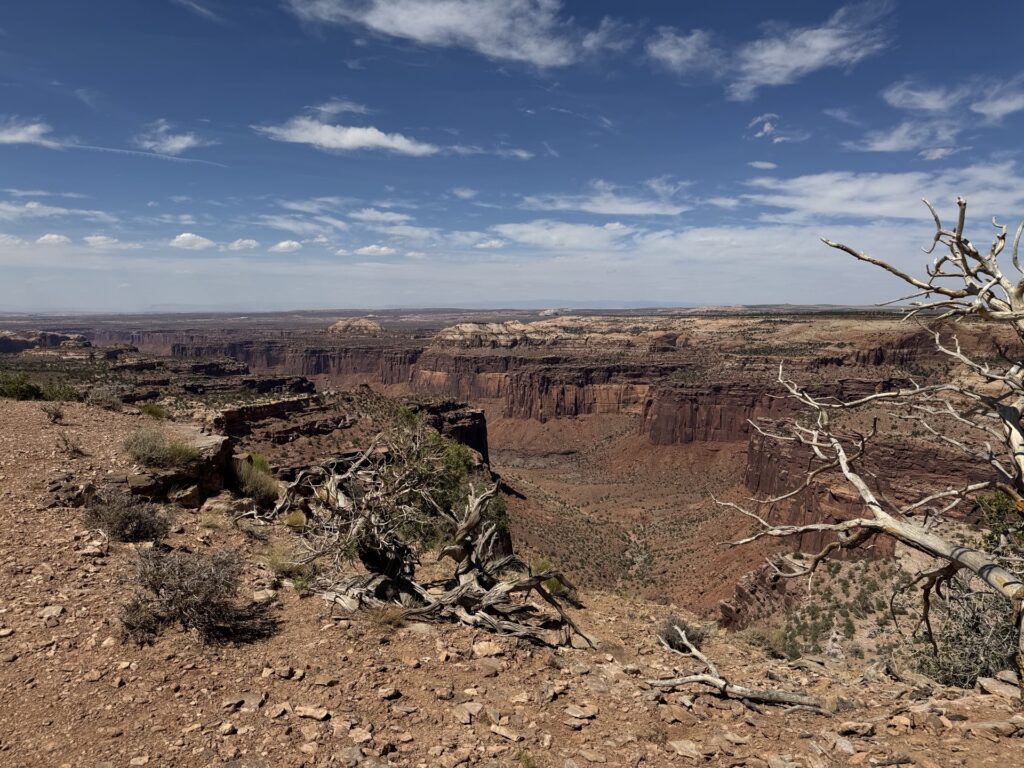
At the end of the trail, the plateau comes to an end and you’re rewarded with sweeping views of Junction Butte, the canyons, and sprawling desert.
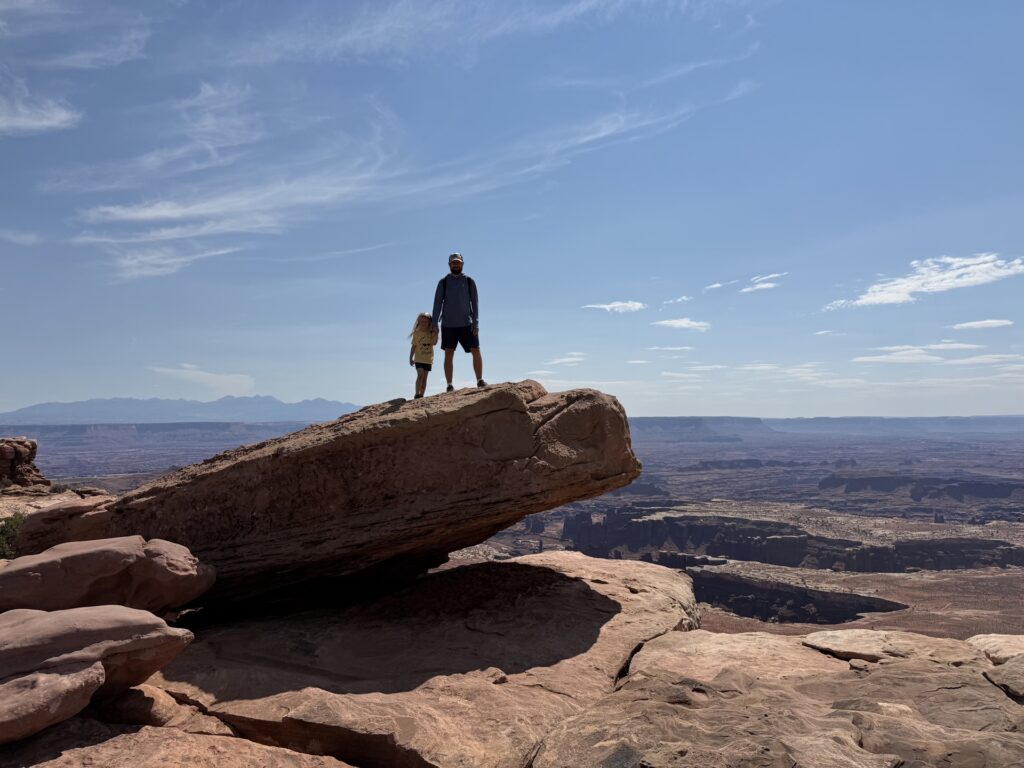
You can enjoy the view from the trail, or you can do some light scrambling to the top of some boulders for a really impressive 360-degree view — and this excellent photo op.
Picnic Lunch
Suggested timing: 12 – 12:30 PM
Grand View Point Road ends at Grand View Point, so you’ll turn around and head back north. White Rim Overlook trailhead is just a few minutes up the road, here. Parking here is very limited, and there is no street parking allowed near the trailhead. Fortunately, it’s not a very popular destination so you should be fine.
There are a handful of picnic benches over here, and it makes for a fine spot to stop for lunch. (The tables are a bit hidden from the street, but they are on the far side of the parking lot, in the direction of traffic.) There is also bathroom nearby. It’s a single stall vault toilet, but it’s about the best you’ll get out here.
There are no food services inside of Canyonlands National Park, so you’ll need to bring your own lunch. Some of our favorite (super original) things to pack are PBJs, Pringles (the container keeps them from crumbling), fruit snacks/leathers, apple sauce pouches, Goldfish, trail mix and CLIF Bars.
Note: The resident birds love all of those things, so be sure to guard your goods and do not feed them.
You can do the picnic and the trail in either order. We personally did the trail first, but were starving by the time we got back. For the sake of this itinerary, I’d suggest flipping that and eating first.
White Rim Overlook Trail
Suggested timing: 12:30 – 2 PM | Distance: 1.6 miles
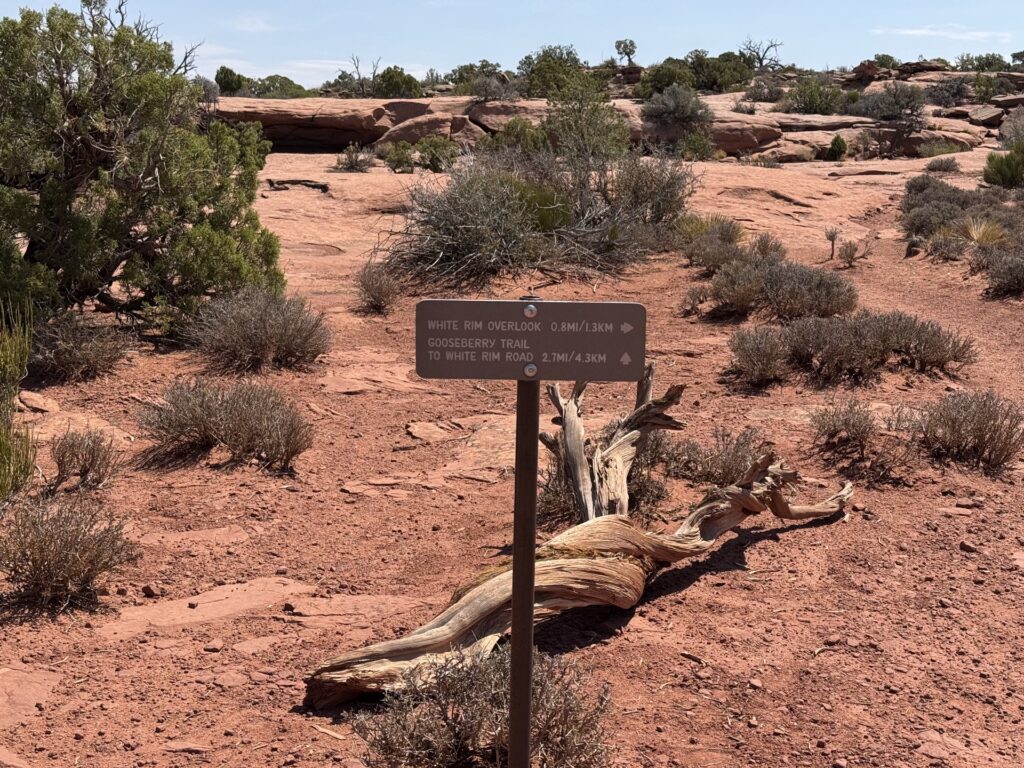
From the picnic area, follow the marked path straight away from the road and you’ll soon hit a fork. This is where White Rim Overlook Trail meets up with Gooseberry Trail. Follow arrows toward White Rim Overlook Trail (not White Rim Road.)
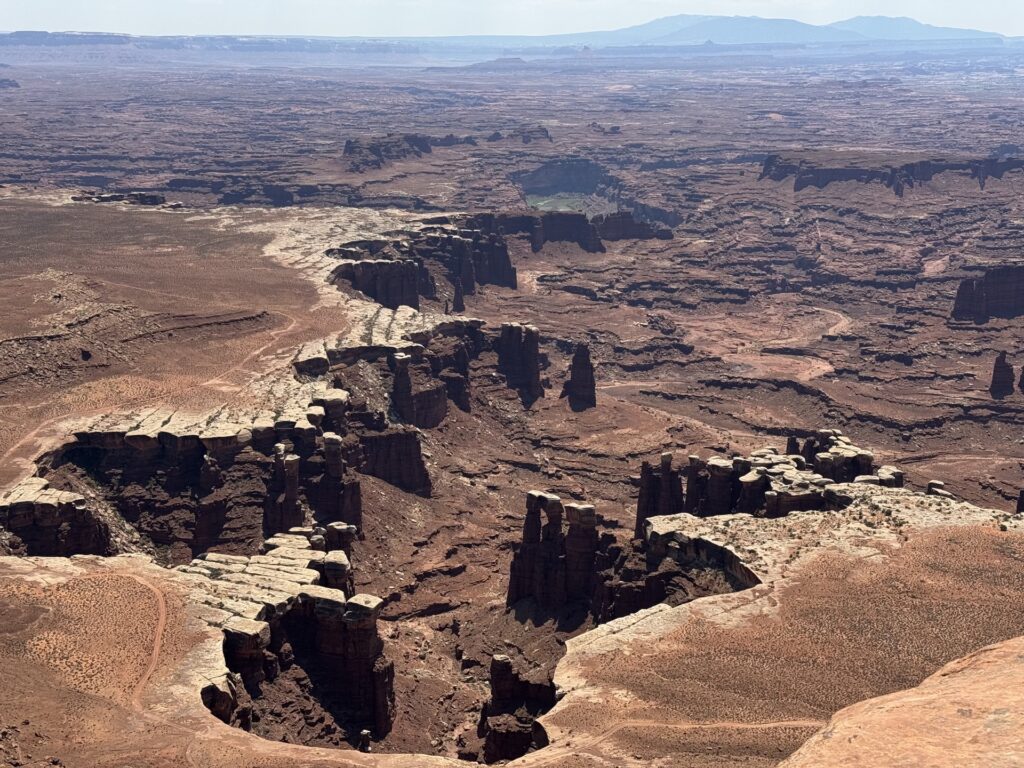
This out-and-back trail ends at White Rim Overlook with a breathtaking view of the canyon below. It’s the same canyon you saw from Grand View Point Trail, but from a different angle. You can also see the Colorado River down there, Monument Basin, the La Sal Mountains, and even Junction Butte from some angles.

This trail is mostly flat, and a bit hard to track at times. Be sure to look for cairns — those stacks of rocks — and stick to those. If it seems like you need to walk over the living soil (“biological soil crust”) to get where you want to go, you’re probably off trail.
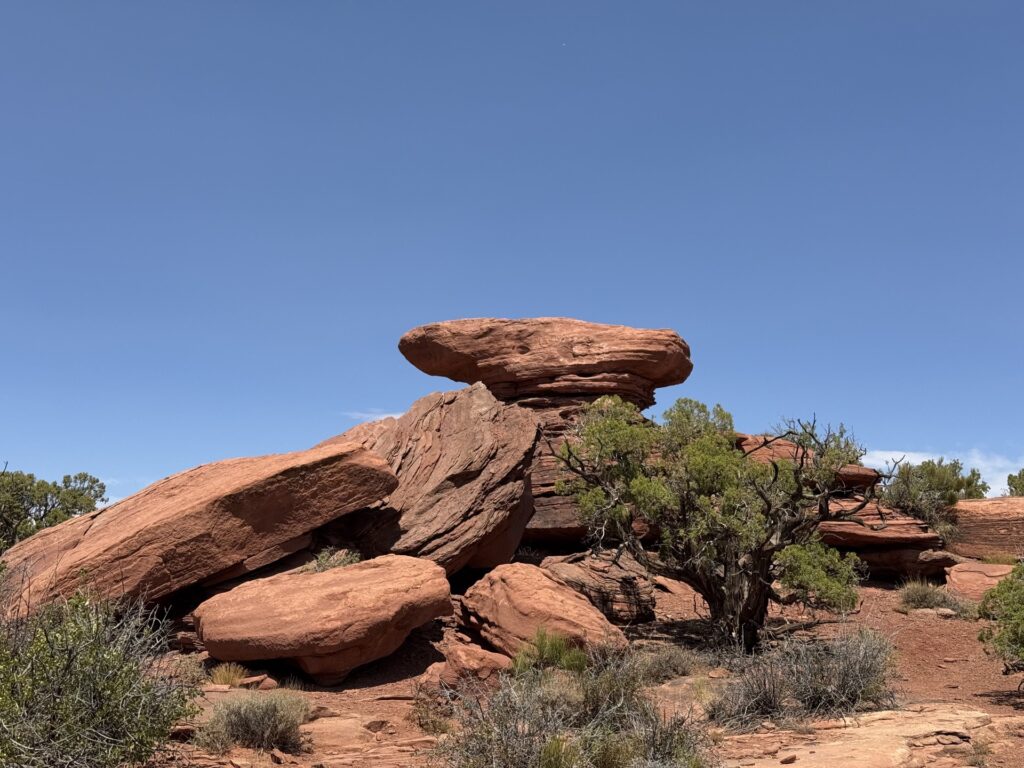
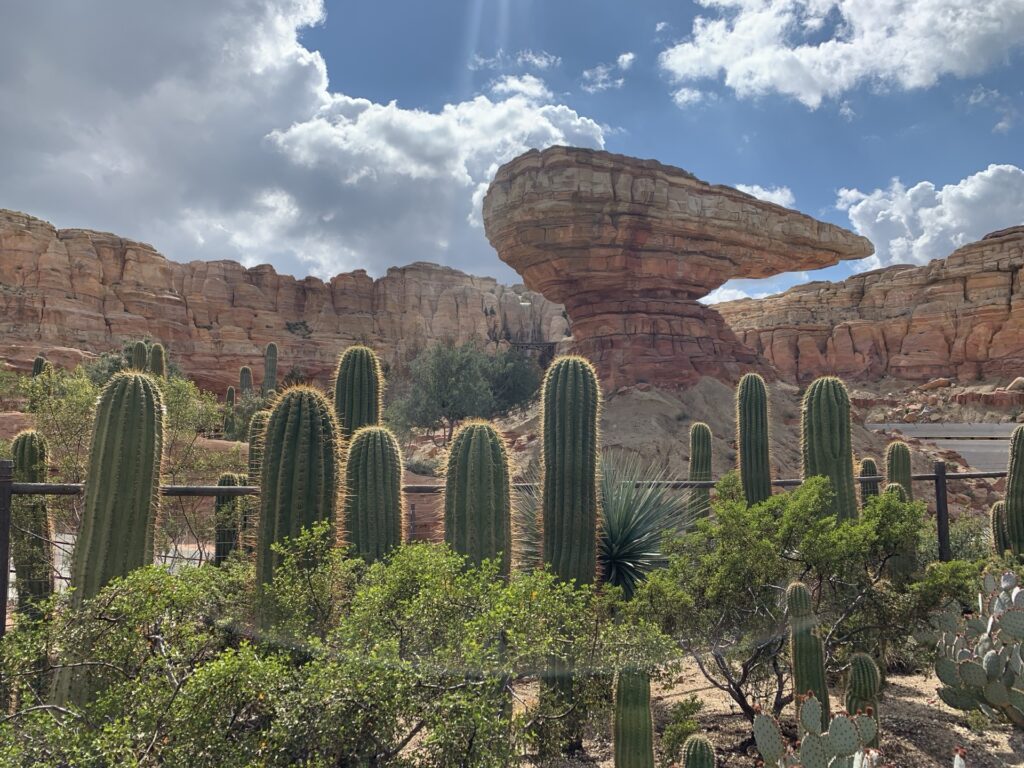
The trail itself isn’t along the canyon, so entertain yourself by admiring the rock formations and foliage. We personally loved this one, which reminded us of Radiator Springs in Cars/Disneyland.
The trail has no shade and this itinerary has you hiking it in the afternoon. Fortunately, there’s a great spot alongside a big rock at the end of the trail that offers a much needed bit of shade to enjoy the incredible view.
Some may say the view is close enough to Grand View Point overlook, so it’s fine to skip. I would argue that because many people skip, that is why you should do it. What we particularly loved about this trail was that we felt like we had it all to ourselves. Not just the trail, but the viewpoint itself. We only passed one other hiker the entire time.
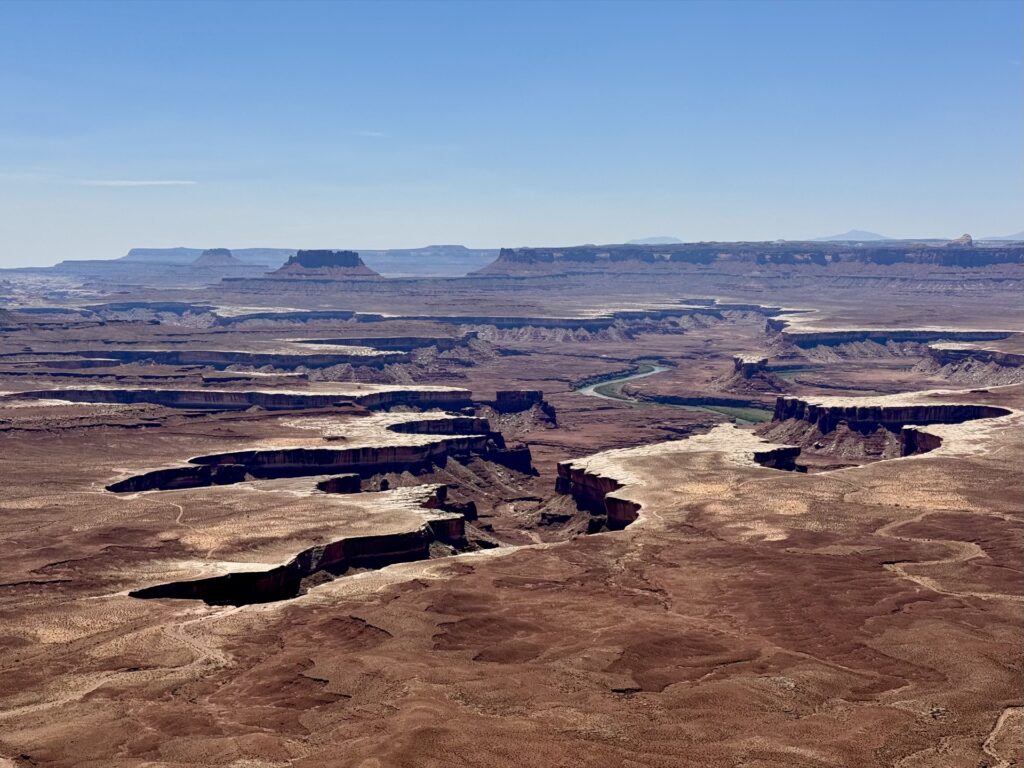
Green River Overlook
Suggested timing: 2:15 – 2:30 PM
Continue up Grand View Point Road back toward Mesa Arch. Just before you get there, hang left at the fork and head toward Green River Overlook here. It’s about a 15 minute drive. There is a small parking lot here that can fill up, but there is a lot of turnover so finding a spot isn’t too tough.
This overlook is a popular one because it offers breathtaking views and is fully whell chair accessible. A short paved sidewalks leads right up to the cliff’s edge (with a protective wall / barrier, don’t worry.)
From this view, you’ll see (what for it) … canyons! But this one is special. I particularly loved this overlook because it has the best view of the river below. It’s wild to imagine how this seemingly tiny river cut this entire canyon.
It’s an epic view with very low effort, so it’s easily a must-do if you’re in Canyonlands. As epic as it is, it is just one main viewing area, so you’ll probably only need about 15-20 minutes here.
Aztec Butte Trail
Suggested timing: 2:45 – 4:00 PM | Distance: 1.4 miles
After leaving Green River Overlook, turn left onto Upheaval Dome Road instead of going back toward Grand View Point Road. This road will take you right to the Aztec Butte trailhead here in about 5 minutes.
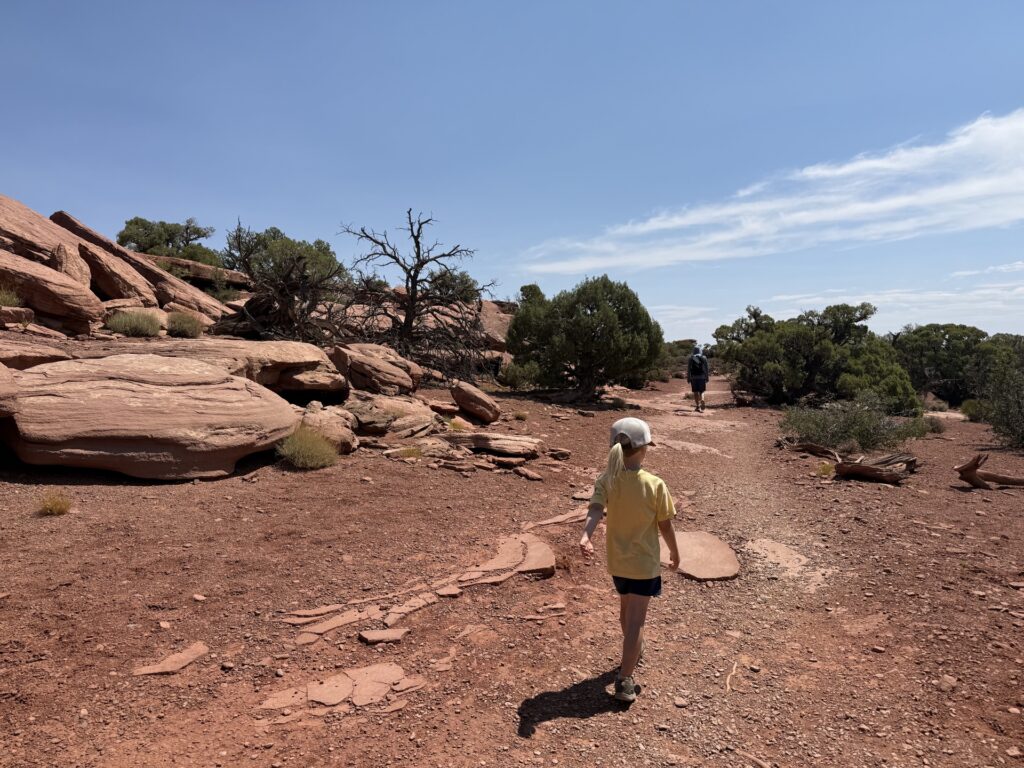
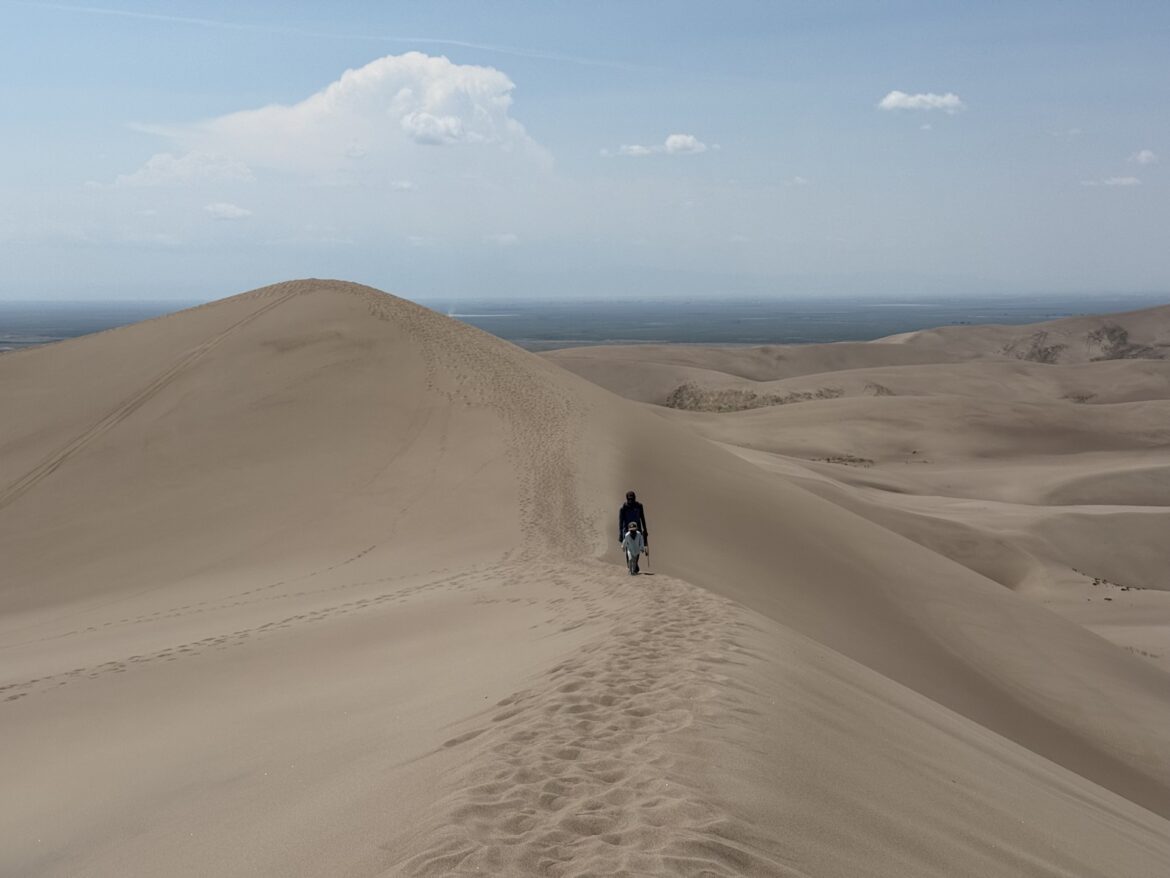
Remember when I mentioned the off-the-beaten-path, challenging trail? Well, this is it. It’s “only” 1.4 miles, but it feels longer because of its difficulty. This hike requires hiking through sand, scrambling up steep inclines, and some advanced trail-finding skills. It’s also in full sun.
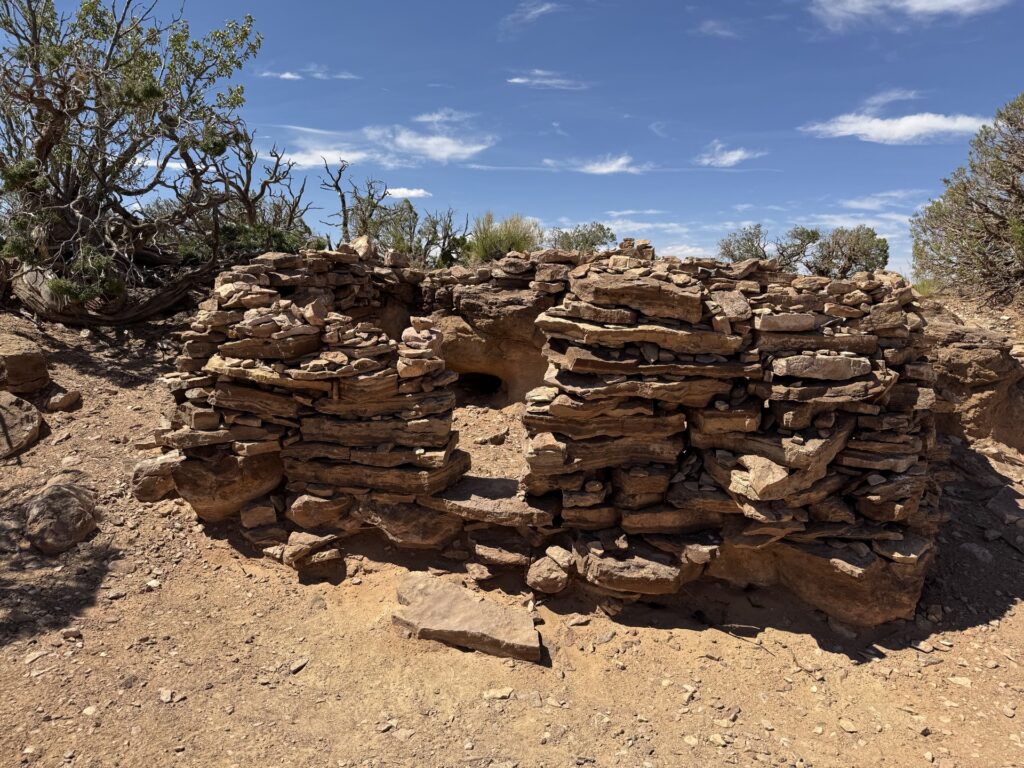
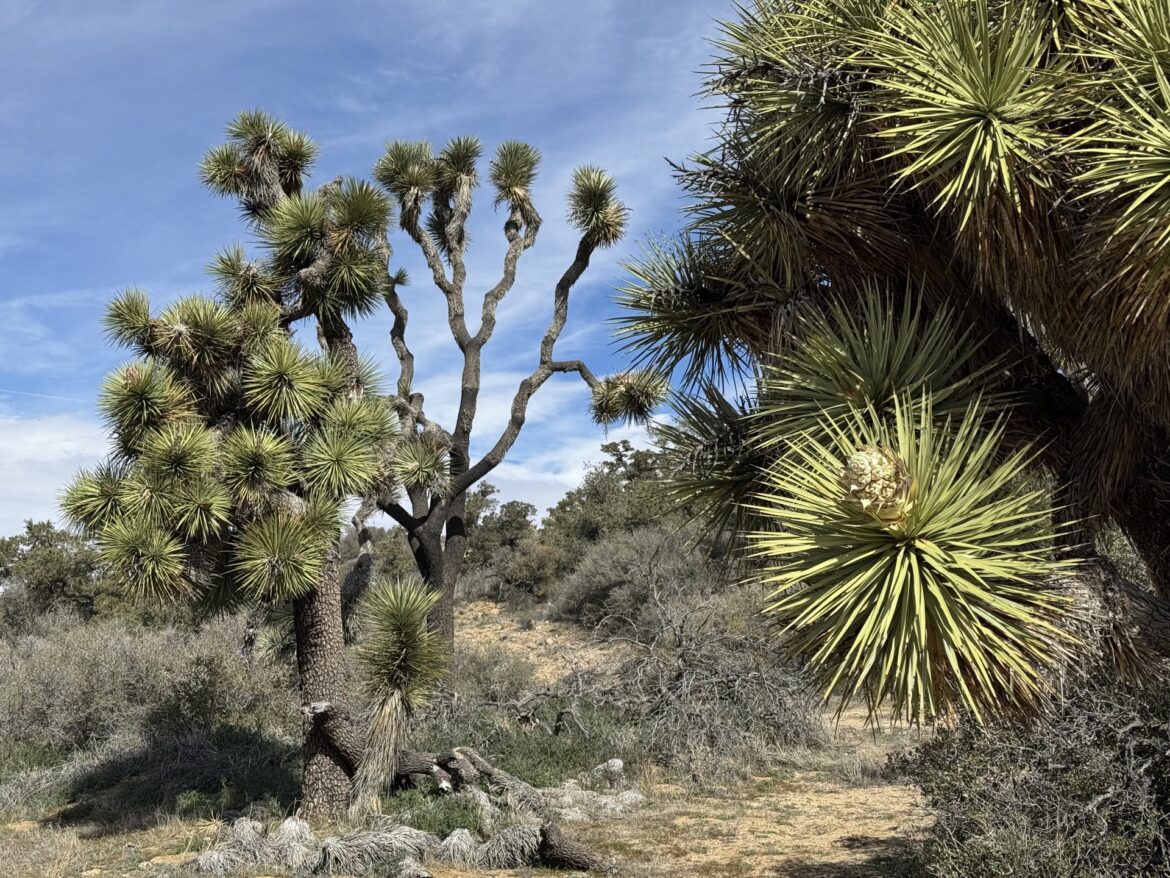
If you’re looking for something unique, challenging, and cultural to add to your itinerary, though, this is definitely it. Indigenous people made this same hike hundreds of years ago. It’s a special opportunity to put yourself in their shoes (except theirs were made out of yuca, keep in mind) and then see some of the actual structures and dwellings that they created all those years ago. This is not a popular trail, so there’s a good chance you’ll have it all to yourself.
I wouldn’t necessarily call this hike kid-friendly, but it is kid-possible for a child with strong fitness and safety awareness. There are exposed portions of this trail with steep drop-offs, so do be extremely cautious and aware. The good news? It’s an out and back trail, so if it gets too tough, you can always just turn around.
We personally made this hike with our nearly 5-year-old. For context, we have done a fair amount of hiking and our child tends to enjoy climbing on things, so we are always practicing and discussing how to do these things safely.
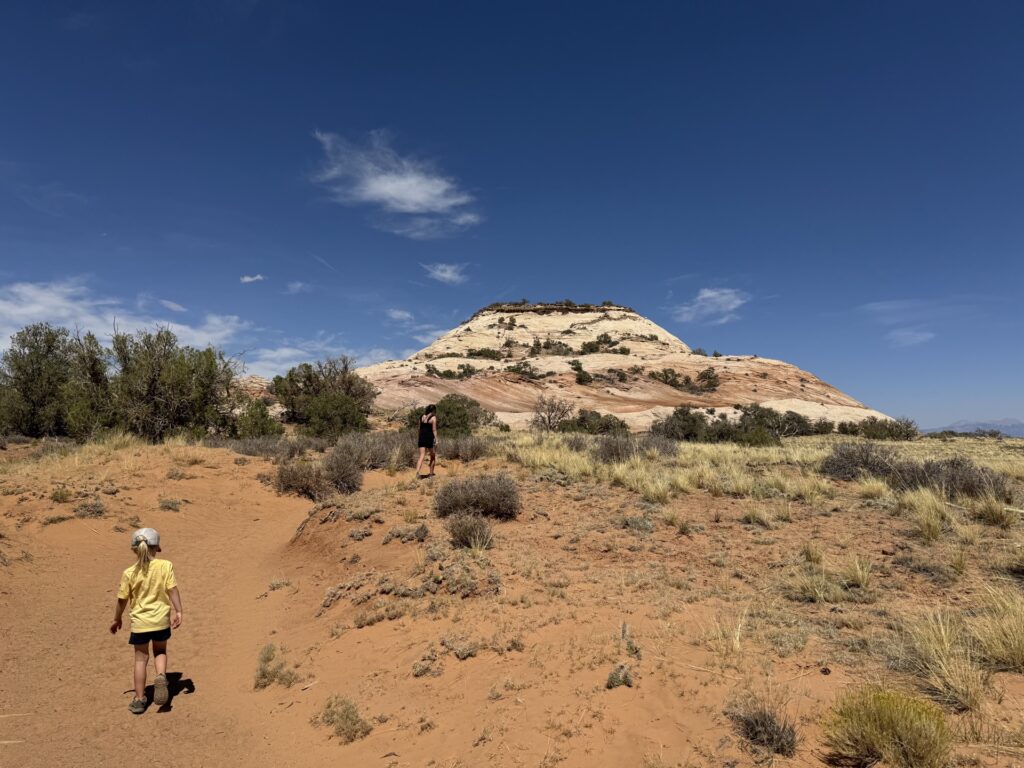
The trail starts out through sand and is well marked from the trailhead until the start of the butte (the hill itself.) Finding the trail and climbing the hill is the hardest part of this hike.
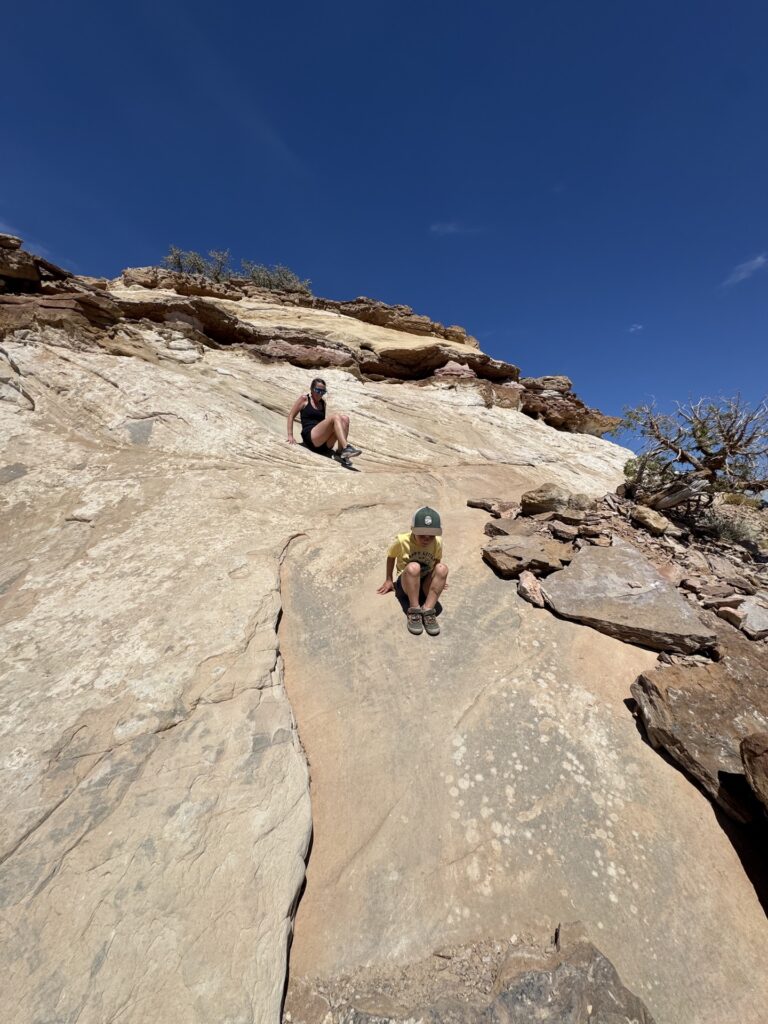
On the rocky hill climb portion, the trail is marked by cairns — these are the little piles of rocks. You will want to climb a straight line directly between each cairn. Be sure to spot the next one before you start going. They zig and zag up the rock face, basically guiding you on the easiest, safest route up.
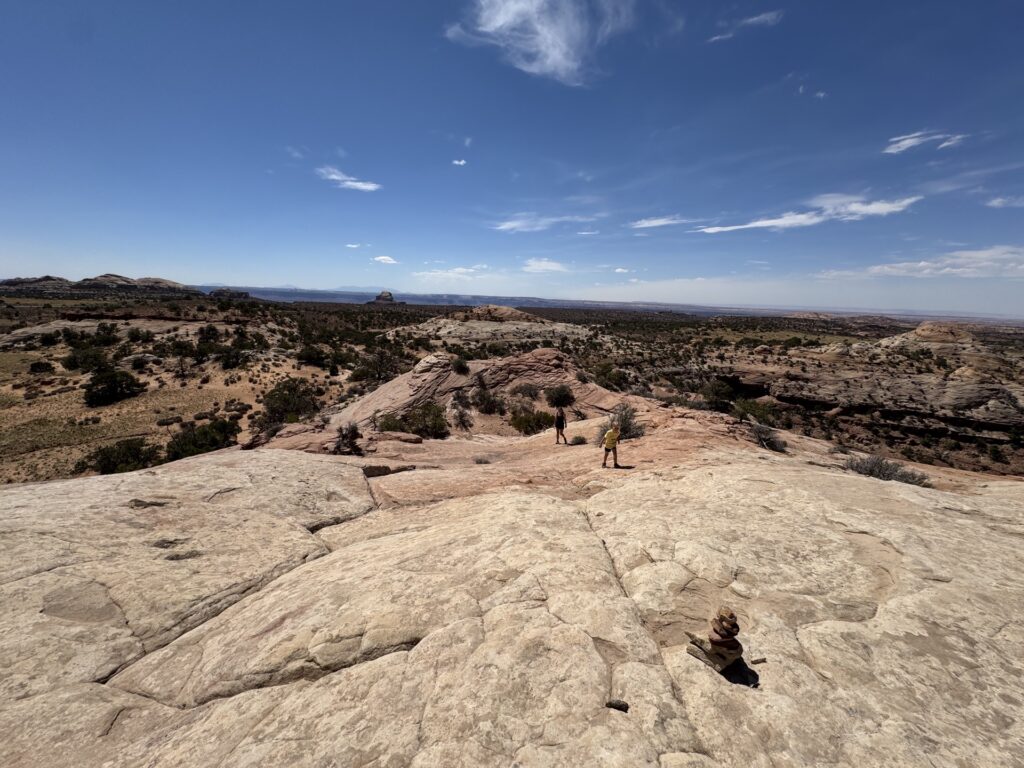
When you get to the top, you’ll be rewarded with 360-degree views over the canyons and desert. Look out for a handful of stone structures up here, too. These are original structures (so obviously don’t climb on them or touch them), built over 200 years ago from the people who lived in this region.
If you ask me, this one is all about the climb. The accomplishment of getting up and back down the steep butte was worth more to me than the view itself. Overall, it’s a great hike to finish on.
Shafer Trail Viewpoint
Suggested timing: 4:15 PM
Leave Aztec Butte trailhead back the way you came and then back to Grand View Point Road. Turn left to head north in the direction of the visitor center. Just before you get there, pull off at a small parking area for Shafer Trail Viewpoint here.
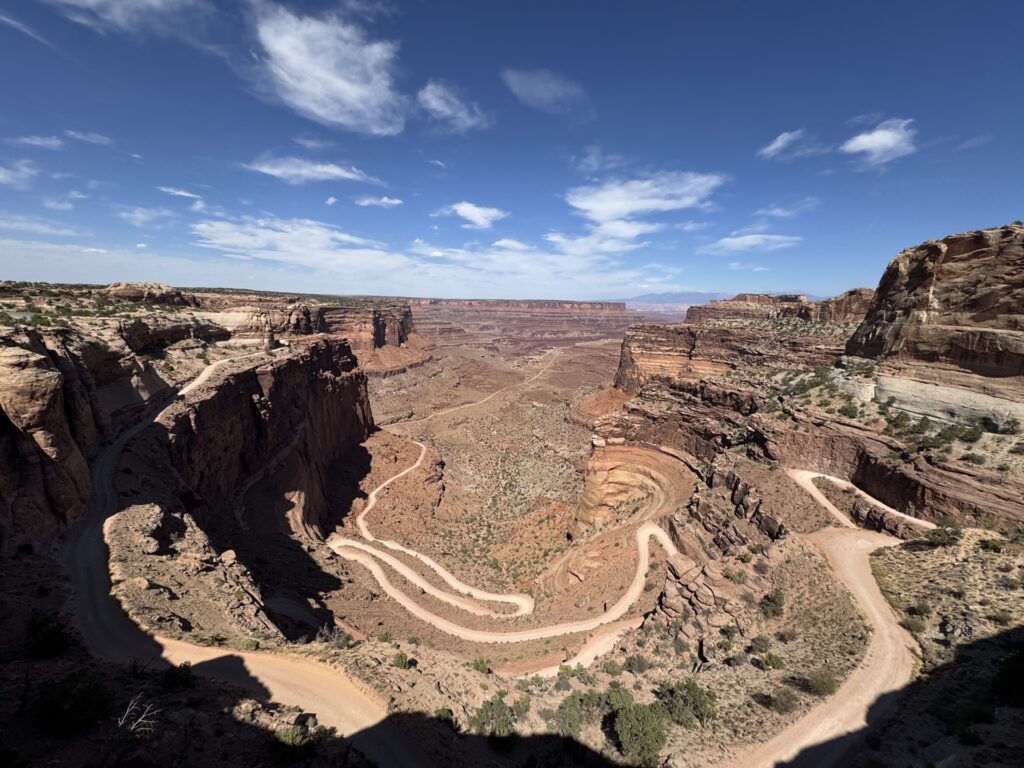
We tacked this one on at the last second, but it only took a minute and was absolutely breathtaking. It was so cool to see the roads and trails winding down the steep rock face and the expanse of the canyons below.
This one is definitely worth a quick stop.
Optional: Visitor Center Part II
Suggested timing: 4:30 PM
Note: The standard hours for the visitor center are 8 AM – 5 PM, so this timeline should work during peak season. During the off-season, the visitor center is usually only open from 9 AM – 4 PM. Be sure to check the hours and adjust your schedule accordingly.
After a long a beautiful day, you may choose to head right on out of the park. However, you may want to make one last spot of the visitor center. If you loved the park more than you expected (like we did!), you might feel inspired to pick up some merch.
A stop of the visitor center though is most important if you have a Junior Ranger. Now is the time to earn that badge.
Kids who completed the required number of pages in their book throughout the day can stop by the Ranger Station. The ranger will skim their book, ask a few questions, and recite an oath with your child before awarding them their badge. (The Junior Ranger Program is honestly the best and if anyone ever comes for it I will come for them.)
Tip! In the gift shop, they sell a few different guides to the area. One of them is about nearby dinosaur attractions. I’d highly recommend picking one, as many of these attractions are tough to find and navigate to on your own, even with Google Maps.
And with that, our time at Canyonlands National Park has come to an end!
Tips for Visiting Canyonlands National Park
- Bring a tripod. I always love having a tripod for hikes, but particularly ones when other people might not be around to snap a photo for you. This itinerary has a couple of those. It’s also perfect for that iconic welcome sign photo, where again, there’s often no one around. I have and love this one, but a cheaper and more compact option like this will do you fine.
- Pick up a Junior Ranger book. These are such a great way to keep kids engaged at a National Park. They make learning fun and the badge reward at the end is great motivation. We love to find a spot on each trail to sit down and complete a page or two.
- Stay on the trail. This is important at every national park, but it’s particularly important at Canyonlands because of its living soil. What looks like rocks and dirt off trail is actually biological soil crust, and it’s actually alive. Walking off trail destroys this delicate ecosystem.
- Pack a lunch & snacks. There are no food services available inside Canyonlands National Park. Be sure to pack lunches and abundant snacks. Equally important — be sure to carry out all of your trash, and do not leave any trash or food behind.
- Stay hydrated. Canyonlands is right in the middle of a desert. However much water you think you need, bring a little more. The park service recommends drinking one gallon per day, per person. During the high season, you can fill water bottles at the Island in the Sky Visitor Center, or bring your own. And on that note…
- Wear sunblock. This was a lesson I learned the hard way. It wasn’t super hot during our visit, so it slipped my mind. Not only is always sunny here, but it’s sneakily at elevation — on average about 5,000 — so you burn quicker. I got completely burnt and had to make an emergency run for aloe. Don’t be like me.
- Be careful. I’m a mom so I am legally required to say this. This national park has its fair share of stomach turning drop-offs and ledges. Stay alert and keep little ones close.
- Tack on dinosaur fossils. This itinerary leaves you just enough time to see some dinosaur fossils and tracks. We’d recommend Mill Canyon, which is about a 35-minute drive from the park. There is a bone trail where you can see fossils inside the rocks, as well as a tracksite where you can see footprints.
Interested in other National Parks?
Check out some of the other National Parks we’ve covered on Emjoyable Explores.

Leave a Reply